Home Theater Install
I finally had space for a decent media room, but I quickly realized that throwing up a flat screen on an empty wall would make the TV look incredibly small. I hadn't liked projectors up until this point; they looked terrible with any light on in the room, they were bulky, noisy and heavy, and they required power and video (among other cables) to be run up through the ceiling. I finally gave in, though, and here's a quick look at some of my favorite products from companies I've used to put together a small in-home media room.
Planning
The room I wanted to use was about 20 feet by 20 feet, and putting a sofa anywhere in the room aside from the back wall didn't make much sense. Looking at a flat panel television on a wall that's 20 feet wide by around 12 feet high from a distance of about 18 feet would be less than ideal, even if it was 65-inches. After evaluating different options (I so, so slightly considered making a media wall with a 65-inch in the middle and two vertically-orientated flat panels on both sides), I finally decided that a projection screen and projector was going to give me the best experience in a room of that size.
Now, what size projection screen should I get? I wanted to be incredibly sensitive to the fact that a projector, even an amazing projector, still isn't as good as a LCD panel, so I didn't want to push it. The bigger the screen, the more light from the projector, the less sharp the picture (assuming you don't change your viewing distance) — and other things can affect the quality of the picture as well.
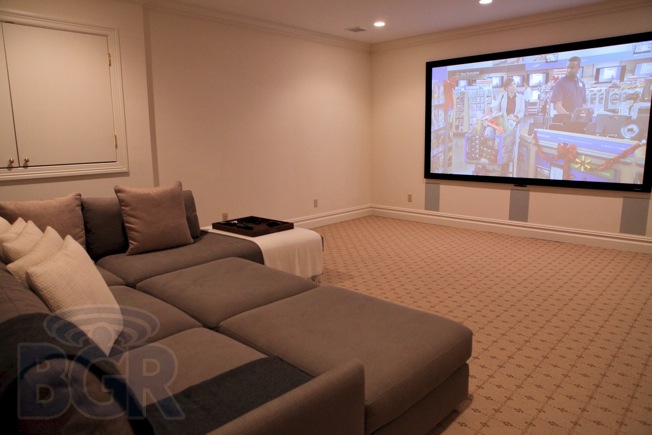
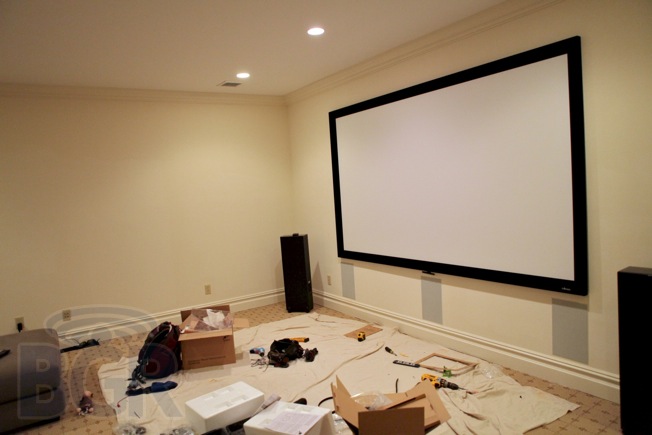
I settled on a 118-inch projection screen. Centered, it would take up approximately half of the wall I was mounting it on, and I figured that would be perfect. After looking at various projection screen manufacturers, I decided to go with a Carada Criterion series screen.
Now that I had the screen figured out, it was time to find a projector. I bounced around between a Panasonic PTAE7000u and Sony VPL-HW30 for a good month. The Panasonic wasn't out yet, but review units were out, so I was able to get feedback from other people on how the unit performed, while the Sony had been available for a month or so. I'm a huge Sony fan and from everything I had read, the HW30 was one of the best 3D projectors in the world in its price range, and the only other projector that competed with it was the Panasonic. There were other factors that influenced my decision to go with Sony, but the main one was that I trust Sony's ES line of products, and the reviews on the HW30 were stellar.
The screen was figured out, the projector was chosen, so now I had to move on to audio and components. One of the main pieces in any home theater besides the display and speakers is going to be the receiver, and I wanted to pick one that not only supported everything I wanted to do, but was also guaranteed to play nice with my projector. I couldn't have any HDMI handshake issues especially, since I had been through that before in another set up. I do have a soft spot for Sony gear, so after looking around I started to drift towards one of their ES receivers.
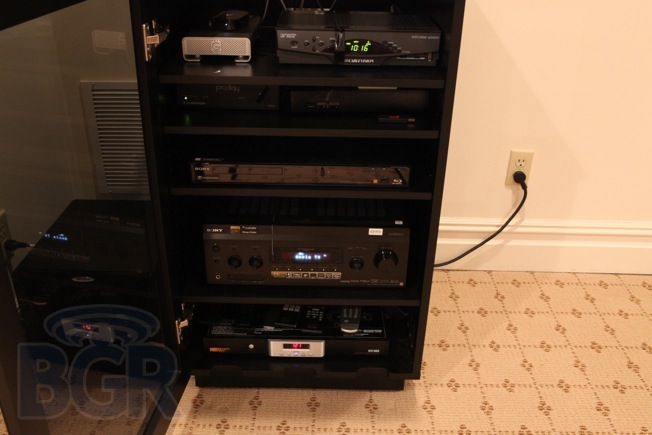
Sony sells three different ES receivers, though all three have similar features. Since I didn't need the ability to add a second zone, I decided to go with a Sony 3600ES receiver (Sony replaced the 3600ES with an almost identical 3700ES a few weeks after I purchased mine). 3D HDMI pass-through, 5 HDMI ports, ethernet, iOS and Android control apps, and everything else I'd want in a receiver in 2011 were all included.
I wanted some good sound in this room, but I didn't want to go too crazy. When I asked my friends at JD Audio & Video Design to help me with the project, they asked me if I wanted to feel it in my chest when a helicopter crash scene was playing. I said one notch back from that. We decided to go with three Sonance VP85 in-wall speakers for the front wall, two Sonance VP63R in-ceiling speakers for the rear, and a Velodyne Impact-10 subwoofer. I figured a 5.1 set up was more than decent for this room, and a 7.1 system would probably be overkill.
Before I settled on what components I was going to put in the room, there had to be a unified way to control everything. While I had used a Logitech Harmony 1100 and then a Phillips Pronto 9600, I found these controllers to be terrible for what I wanted. So I went with the best, Crestron.
Years ago, Crestron products were so expensive that they didn't make sense for most applications, but with the company's new Prodigy line, I felt it was worth doing. One remote that could control every single component, including the lights, and even heating if I wanted; no IR nonsense, no line of sight — just a remote solution that covered all the bases.
I also wanted to make sure I had a solid Blu-ray player that could perform well in my configuration. I went with a Sony BDP-S580 at first, but it was absolutely terrible and I quickly replaced it with a Sony BDP-S1700ES. In addition to Blu-ray, most of the computers and devices in my home are Apple (what, you thought I had one of those Windows 7 stores in my home?) so an Apple TV was a no brainer. I also wanted a way to watch all kinds of media and after looking at different products, I gravitated toward the Popcorn Hour A-300. Throw in the obligatory Optimum DVR, a Linksys 8-port ethernet switch for routing traffic (my house has ethernet ports wired throughout every room, how could I be happier?), a power conditioner and an Xbox 360, and I was ready to tear it up — literally, tear the walls up.
Installation / Programming
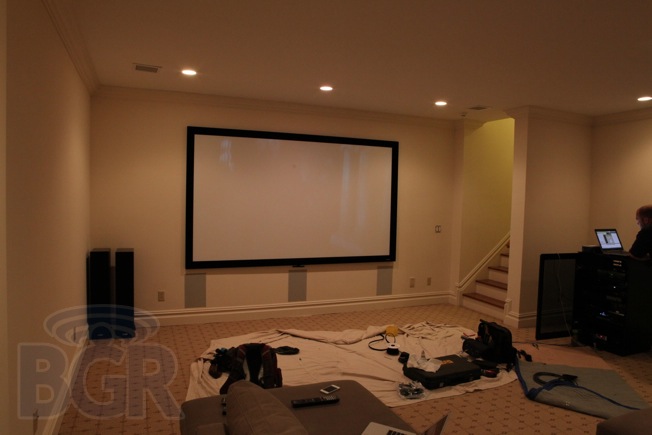
While I could easily connect and configure everything in this room without issue, I wasn't about to start breaking sheetrock, cutting, notching and running hundreds of feet of cable all over. This was something I used JD Audio & Video for. With the help of an electrician, we moved some power outlets and put one in the ceiling for the projector, installed the Crestron dimmers for the lights, and after that, it was time to run all of the necessary cables and wires.
Any good installer will try to future-proof your space by running extra cables in case you want to do something else in the future, or if a cable or two breaks, and since you can run basically anything over a CAT-6, we ran extra CAT-6 cables from front to back. In the front of the room, we needed to run three speaker wires for the three in-walls, and since this was a 3D set up, we needed to run a CAT6 for the 3D sync transmitter that would go under the projector screen. Those cables needed to go to the right side of the room where the component cabinet was placed. In the rear of the room, we needed to run two speaker wires for the in-ceilings, multiple CAT6 cables (so we could run RS232, IR, etc), two HDMI cables and more.
After all the cables were run, notches and holes had to be patched and painted. Once that was done, the set up and programming was next.
Cables were connected and Crestron programming started. Since I had some components that most people wouldn't normally use, like the Popcorn Hour for instance, those had to be programmed into the system one button a time to get the right codes. Start to finish, programming took a good seven hours. Imagine doing a full house with Crestron including alarms, IP cameras, gates, three or four floors of lighting, and you can see not only how intricate and powerful an integrated Crestron system can be, but also how meticulous you have to be to program it properly. Two major advantages of a Crestron system like the Prodigy are the ability to use an iOS or Android smartphone or tablet as a controller, and the ability to control your components and set up remotely. Forget to turn some of the lights off when you went out to dinner? Just tap the off button in the app and off they go.
After weeks of trying to figure everything out and several more days of installation and configuration, I had the media room that I've always wanted. Now I just have to figure out what to put on the three other walls.
Thanks to Carada projection screens, Sony, Popcorn Hour, and JD Audio & Video for helping to put this together.