You Can Build A Personal AI Chatbot Using Raspberry Pi - Here's How
Sure, we may have constant access to AI chatbots on our smartphones, sitting accessibly in our pockets, lessening the need for a dedicated portable device. But what if I told you that rather than purchasing the heavily criticized $200 Rabbit R1 (improved after a flurry of updates), you can build your very own USB-powered AI chatbot thin client from a $15 Raspberry Pi and a $36 expansion board with a built-in screen? Toss in a custom $40 battery, 3D print an FDM case, and you can tote your newly-built Whisplay-AI-Chatbot anywhere Wi-Fi is available for a little under $100, half the price of similar commercial products.
Essentially, with minimal investment, you can assemble a customized portable AI chatbot device that is fully under your control, meaning which AI client you connect to is your choice and can be changed at any time. If you wish to run AI locally, you'll have to upgrade to a Raspberry Pi 5 with at least 8GB of RAM. So, no matter if you prefer Claude, Grok, Gemini, or ChatGPT, you can switch to the service that suits your needs. Best of all, the build process is pretty straightforward if you're familiar with the ecosystem. Purchase and assemble the gear, flash an SD card with the necessary software, and you've built yourself a Whisplay-AI-Chatbot, complete with a functional screen, speaker, mic, buttons, Wi-Fi, and battery.
Add these two extensions to a Raspberry Pi Zero 2 W to get started
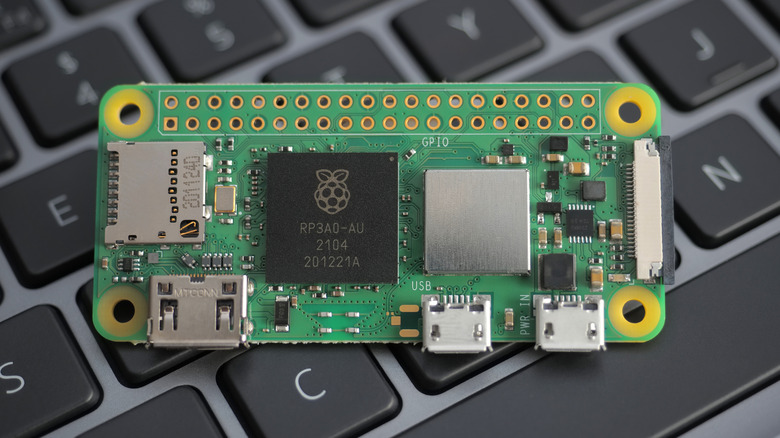
In order to kick this project off, you'll need to secure a Raspberry Pi Zero 2 W ($14.99), Whisplay HAT for Raspberry Pi Zero extension board ($35.99), and a PiSugar 3 1200mAh Raspberry Pi Zero Battery ($39.99), but you can find all three on Amazon. You'll also need a microSD card to store the device's software image, which must be at least 16GB, along with a PC that can run the Raspberry Pi Imager app (which supports Windows, macOS, and Linux) in order to prep the card for use in your Raspberry Pi.
What's great about this project is that it assembles relatively easily, since the Whisplay HAT connects directly to the Pi's header, same as the PiSugar 3 battery on the flipside. From here, you'll want to flash your microSD card with the initial firmware using the imaging app, setting up your Wi-Fi information in the process. At this point, your AI chatbot device will power on, and from here, you can wirelessly connect to the device to push the rest of the needed drivers to get the Whisplay HAT screen and AI chatbot functionality up and running.
Best of all, there's ample documentation available for anyone interested in this project. From tutorial videos (like the one at the top of this section) to detailed GitHub pages for the Whisplay HAT screen, the PiSugar Battery, as well as chatbot documentation. So you're covered on detailed directions, and since this is definitely a project that leans hard on affordability at around $100 all-in, dipping your toe into the Raspberry Pi hobbyist world won't be a strain on your wallet.
Polish your custom AI chatbot with a printed case
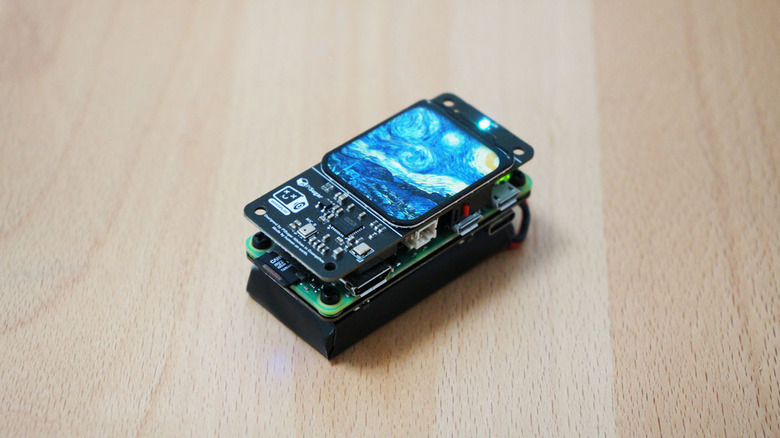
So now that you're up to speed how to assemble and program your Whisplay-AI-Chatbot, you might want to give it a last bit of polish with a case. While it doesn't look like PiSugar currently offers a case as it does for its Pwnagotchi, the company has made case files available so you can print your own, or at least use a professional service like JLC3DP to print one for you. PiSugar offers two file types: one for personal at-home use, designed for FDM printing, and one more useful when hiring a service to 3D print the case for you, say if you would prefer SLA resin. So, no matter which you prefer, you're covered.
Heck, if you are bold enough to build a Whisplay chatbot with a Raspberry Pi 5 for local AI, case options are available on the PiSugar GitHub alongside the slimmer Raspberry Pi Zero 2 W cases. So no matter what kind of Whisplay chatbot you choose to build, case options are available.
At the end of the day, you will have to build it yourself, install the necessary files, and if you wish to polish it off with a case, print one. While the end product of an adorable pocketable AI chatbot is plenty interesting, the journey to get there is also a major selling point. This is a project for tinkerers, and while the end product is plenty polished (especially if you print a case), like many hobbies, enjoying the ride can often be the actual destination.