11 Settings On Your Nintendo Switch 2 That Are Ruining Your Experience
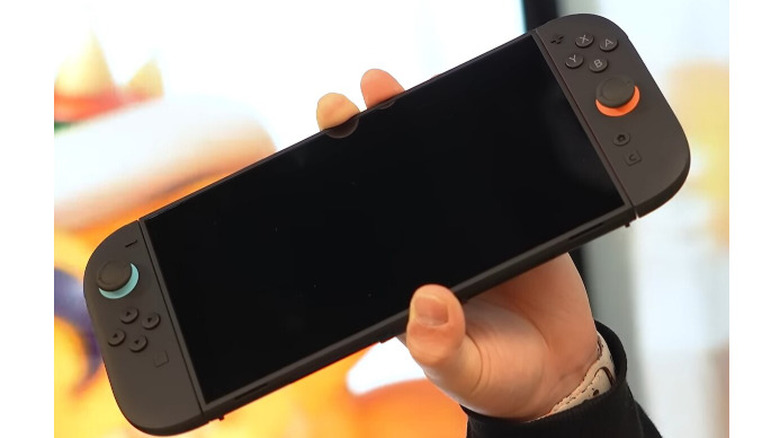
According to NVIDIA, the Nintendo Switch 2 has 10 times more graphics processing power than the Switch. Obvious, but that's one of the main reasons to buy the console. In terms of power, owning a Switch 2 is like owning a PlayStation 4; You can take it on the go and play without a television. However, the Switch 2 is far from perfect, and we don't just mean because the PlayStation 5 is readily available.
Like all video game consoles, the Nintendo Switch 2 is designed as a turnkey gaming platform. You plug it into an outlet and your TV, turn it on, and you can start playing games — after the initial setup and account creation/transfer, that is. Unlike gaming PCs or major PC brands in general, you don't have to fiddle with RAM or worry about software compatibility issues. To achieve this, the Switch 2 (and other consoles) has several settings active straight out of the box. These settings are designed to provide the best experience for most gamers, but there is a significant gap between the majority and all gamers. Depending on how you use the Switch and your gaming setup, you may want to tailor specific settings to fit your unique preferences, while others are best left unchanged. Here are settings you might consider tweaking on your Switch 2.
Resolution and framerates
When Microsoft and Sony unveiled the Xbox Series X (and Series S) and the PlayStation 5, marketing threw around terms such as 4K gaming and 120 FPS, implying the consoles could provide performance on par with $2,000 gaming PCs. That didn't turn out to be the case, and the same is also true with the Nintendo Switch 2.
One of the Nintendo Switch 2's selling points is the ability to play in up to 4K resolution and 120 FPS, but not simultaneously. If you want to play games at 120 FPS, you have to set the resolution to 1440p or lower. Open the System Settings menu, scroll down to Display, then select TV Resolution. Pick 1440p or lower — unless you don't mind playing games at 60 FPS. Also, double-check your dock is outputting at a 120 Hz refresh rate by opening System Settings, selecting Display, and picking the 120 Hz refresh rate.
While you can select any resolution you want, whether or not you can play in crisp detail depends on your television. The same is true for framerates. Let's say your TV can handle 4K resolution but only has a 60 Hz refresh rate. You will only be able to experience 60 FPS, so you might as well crank the Switch 2's resolution to 4K. Conversely, if your TV has only a 1080p resolution but a blisteringly fast 144 Hz refresh rate, you will have to deal with the comparatively low 1080p resolution, albeit at 120 FPS.
RGB and HDR

Color settings ultimately determine how graphics look when viewed. The first setting, RGB Range, dictates the color depth on the screen. The higher the range, the more colors are available for the visual palette. However, depending on the television model, using more colors might wash out the picture. To swap between the Switch 2's different RGB Range modes (Full Range, Limited Range, and Automatic), open the System Settings, then select RGB Range. Select Full Range, but if you don't like the look, choose Limited Range or Automatic.
Another deciding factor is whether or not you use High Dynamic Range (HDR). This system makes the darkest blacks appear even darker and the brightest whites appear even brighter. Unlike the RGB Range, HDR is calculated via game software. Therefore, while titles that can utilize HDR look drop-dead gorgeous with the setting, forcing HDR on titles that don't support it makes them visually suffer. To activate HDR, open the System Settings menu, select Display, and scroll down to HDR Output. Set HDR to Compatible Software Only so you don't have to keep turning it on and off. While HDR is mostly software-based, it still requires a compatible TV. Therefore, if you don't own one, for the best results, you might as well set HDR Output to Disabled.
Theme color
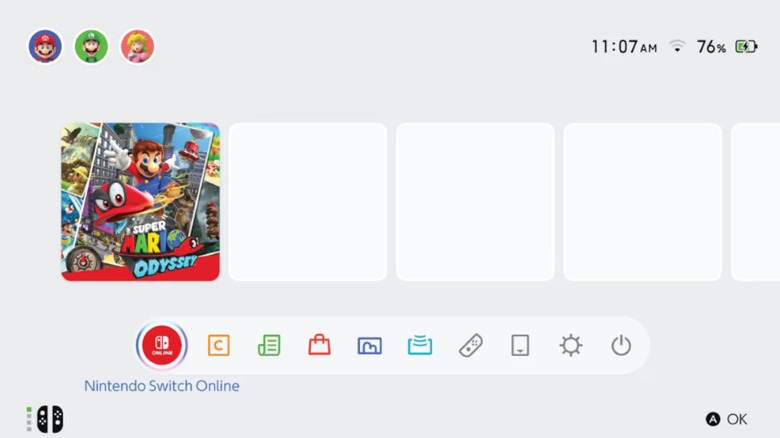
Modern game consoles are veritable one-stop solutions to all your entertainment needs. You can play numerous games and watch multiple streaming services without ever inserting a disc or cartridge, but you also have to brave a menu to access all these apps.
Like the Xbox Series X/S and the PlayStation 4 (but not the PlayStation 5 for some reason), the Nintendo Switch and Switch 2 have menu themes. Although, calling them themes might be a stretch. You don't get to pick different wallpapers, just whether the background is white or darkish gray. But that can make all the difference.
Regardless of your color preferences, the Dark theme is objectively beneficial, as it is easier on your eyes when playing at night. Also, the Switch and Switch 2's Dark themes might help save a bit of battery power, but that is up in the air. Some users say the Dark theme only preserves battery life on OLED screens and doesn't affect the Switch 2's LCD screen, but it doesn't hurt to try. To swap themes, open the Switch 2's System Settings menu, scroll down to Themes, and select the Dark color. If you want your Switch 2's themes to resemble the wallpapers of other consoles, you will have to mod your Switch 2, but doing so runs the risk of Nintendo bricking your device.
Button Mapping
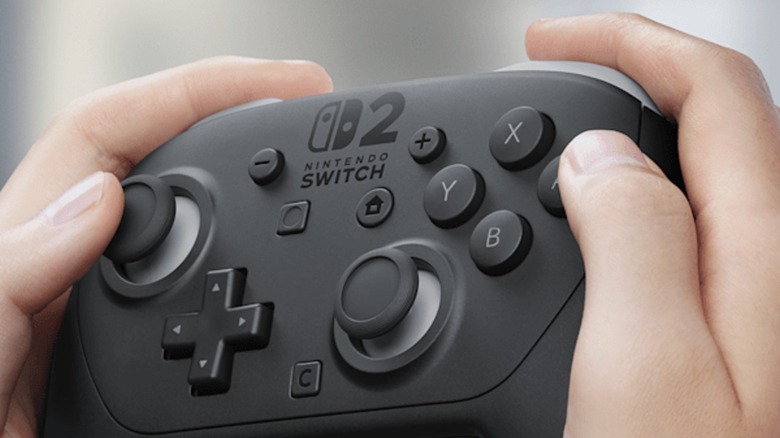
Video game controllers used to come in a wide variety of shapes, but modern controllers are more homogenized. No more three-prong designs like the Nintendo 64 or buttons of various shapes like the GameCube. The only controllers that seriously deviate from the standardized design are the PlayStation 5 DualSense and various Switch controllers. While the former's changes are ergonomic, the latter's can be problematic.
Even when the symbols are different, most controller face buttons use the same functionality layout. The bottom button confirms choices, and the right button backtracks through menus. All Switch controllers follow a different control scheme, which may be confusing and difficult for gamers accustomed to Xbox and PlayStation controllers. To ease the transition, you can swap the functions of the Switch 2's A and B buttons. Just open System Settings, select Controllers & Accessories, and toggle "Swap A and B."
The Nintendo Switch 2's Joy-Cons can function like mice, which might sound unusual since the console doesn't have a web browser, but mice are generally more accurate than controllers in first- and third-person shooters. Indeed, the Joy-Con 2's mouse mode provides superior precision, but the trigger button functions are the opposite of standard controller triggers. To make them more comfortable and intuitive, you need to change up button mapping by going into the System Settings, selecting Accessibility, choosing Button Mapping, and then swapping buttons. Just remember that the Switch 2 remembers layouts (and the changes made to them) for every controller, so you have to revert the buttons back to play other games. However, titles such as "Cyberpunk 2077" automatically swap buttons for you when using mouse mode.
Security (or lack thereof)
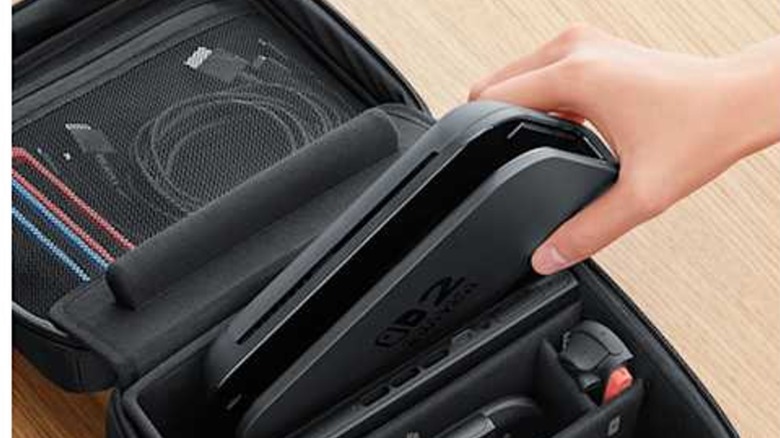
Security isn't a huge issue for video game consoles. Your accounts, definitely, but your console, not so much. It's not like you are taking your PlayStation 5 on the plane every time you travel — that's what the PlayStation Portal is for. But the Switch 2 is more portable than other mainline consoles, so it requires more protection.
The Nintendo Switch 2 — and by extension the original Switch — has a Lock PIN system you can use to prevent other people from using your console. To set it up, open the System Settings menu, select System, and toggle "Console Lock." Then you must create the PIN number by using the analog stick and X and Y buttons. Tilting the stick in different directions and pressing the buttons represent different numbers, so create something that is difficult to guess but easy to remember.
While the PIN provides added security, you only really need it when you leave the safety of your home. However, by the same token, you must use your PIN every time you turn on your console until you deactivate the setting. It slows down your gameplay sessions and drains the battery, as the console remains active even when you enter the PIN. Still, this setting can provide peace of mind when you're in situations where someone can steal your Switch 2. Once you leave those situations, however, you're better off deactivating the Lock PIN.
Battery life
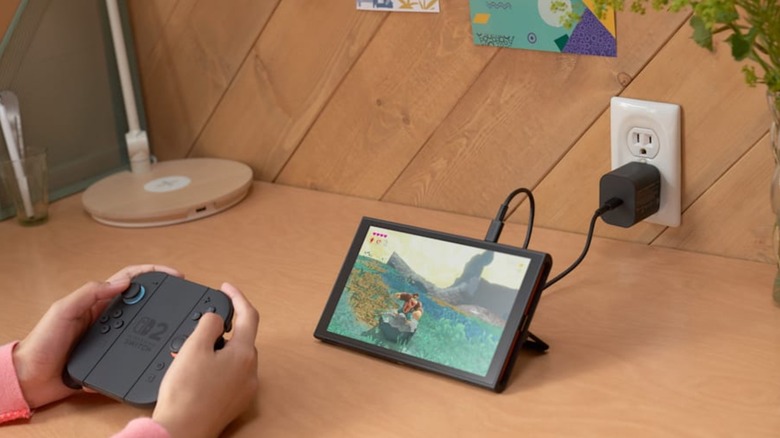
The Nintendo Switch 2 is superior to the Nintendo Switch in almost all respects. The only place where it suffers is battery life. The internal power source lasts barely over 2 hours, which is almost enough to dissuade you from using the console's most exciting features – or from using the console at all, unplugged. However, if that's not a problem, you can adjust the battery to last longer.
The Switch 2 features a unique power setting accessible through its System menu. To find it, open the System Settings menu, then scroll to System. In this menu, you will eventually find "Stop Charging Around 90%." The setting is self-explanatory: No matter how long you keep the console plugged into the dock or wall, the battery will never exceed 90%. This might sound counterintuitive since the console's battery doesn't hold a huge charge, but it's an open secret that keeping any rechargeable device's battery at 100% for an extended period makes it deteriorate faster. Many modern laptops include a feature that cuts off battery charging after they reach a certain level, allowing them to stay plugged into wall sockets without harming their lifespan. This Nintendo Switch 2 setting is basically that, but for the hybrid handheld — a first for game consoles.
While capping the Switch 2's battery charge at 90% will keep it healthy longer, you should deactivate the setting while traveling just so you can squeeze a bit more game time out of the battery. It won't be much, but it will be more than other Switch 2 owners get when they don't activate the setting while at home.
Sound
While graphical fidelity and art design are recurring talking points in the world of video games, audio design is the other side of the presentation-themed coin. The right sound effect or song at the right moment can immerse audiences, but only if they hear it as intended.
The Nintendo Switch 2 has several audio settings that shine in different setups. Out of the box, the console is set to "Automatic," which is okay for most scenarios, but this setting won't cut it if you splurged on an expert-tested soundbar or surround sound system. For the best, uncompressed experience, use the Switch 2's PCM 5.1 Surround setting. To activate it, open the Switch 2's System Settings menu, scroll down to Audio, and select TV Sound. Toggle "Linear PCM 5.1 Surround," and you can enjoy eight channels worth of crisp audio.
One of the PlayStation 5's key selling points was its 3D audio capabilities. This was designed to provide more immersive game worlds — and sell accessories like the Sony Pulse 3D headset. While Nintendo didn't really advertise 3D audio for the Switch 2, it's still available for players who want more engrossing experiences. All one must do is open System Settings and access the Audio menu. However, the console has two 3D audio options: System Virtual Surround and Headphone Virtual Surround. As the names suggest, they are only compatible with soundbars and headphones, so turn on whichever is most suitable for your listening preferences.
Match TV Power State
Televisions are getting more advanced. The latest smart TVs include a wide variety of features, such as the ability to watch streaming services on your living room screen. However, sometimes these features get in the way, especially if you want to start playing a game and not wait for numerous apps to load. But that's where a different smart feature comes into play.
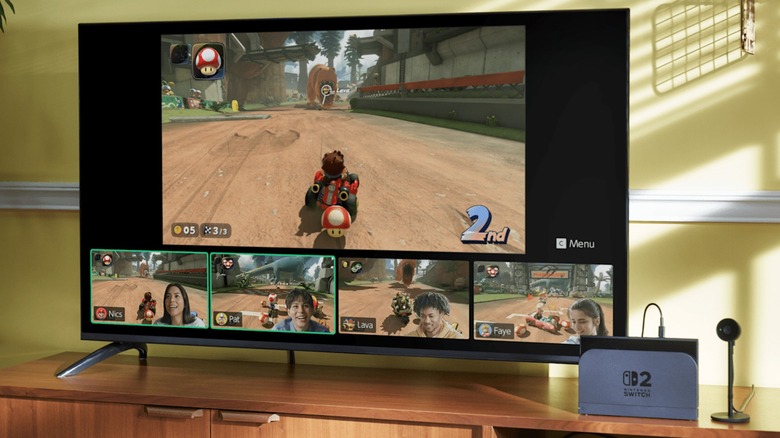
The Nintendo Switch 2 — and by extension other modern game consoles — has a special mode called "Match TV Power State." Through the magic of HDMI cables, you can turn on your TV by turning on your Switch and vice versa. This system also activates attached peripherals, such as soundbars, and automatically switches the TV to the appropriate output, eliminating the need to fiddle with remotes. To activate this setting, open the System Settings menu, select Display, and toggle "Match TV Power State."
Unfortunately, this setting isn't compatible with all TV models, so it might not work even when active. Moreover, while matching Switch 2 and TV power settings streamlines and speeds up gaming sessions, unless you use the TV exclusively for gaming on the Switch 2, the setting is more trouble than it's worth. If you own more than one game console or just want to watch some live TV (or use a streaming service), you should deactivate "Match TV Power State." Otherwise, your premium TV will become a glorified Switch 2 screen.
Skip user profile selection
Video game profiles are more than just ways to personalize your username for multiplayer titles. Progress is usually linked to profiles, so friends can't accidentally delete your saves if they add their own profile to your console. However, swapping between these profiles can be annoying and time consuming. The only thing worse is selecting your profile when you only have one.
Some games force you to pick a profile before they start. Not all, but enough to make you wonder why Nintendo even bothered letting you pick one on startup. Even if you only play one game that requires this extra step, you will no doubt soon tire of selecting your profile every single time you want to play the game. You can turn off this user selection screen by opening the System Settings menu, scrolling down to User, and toggling "Skip Selection Screen."
On the surface, this setting appears to be a godsend, but it has some unusual limitations. First, games that share save data across all users don't activate the selection screen, so if you only play those kinds of games, you don't even need this setting. Ironically, however, if you have two or more user profiles on the Switch 2, the system deactivates your ability to deactivate the profile selection screen, forcing you to pick your profile each time you play the game. One would think this setting was designed with those kinds of scenarios in mind, but apparently not.
Auto Brightness
When buying a television, you have numerous specifications to consider, especially if you plan to use it for gaming. One important deciding factor is how the television handles brightness.
Every device with a screen has unique default brightness settings, including the Switch and Switch 2. You can always adjust it so it doesn't strain your eyes, and like smartphones, the console can automatically adjust the brightness depending on the environment. To activate this setting, open the System Settings menu, select Screen Brightness, and toggle "Auto-Brightness." But just because you can do something doesn't mean you should.
On paper, Auto-Brightness eliminates the need to manually adjust the Switch 2's brightness settings. Just turn it on, and the console will pick the best setting, right? Not according to many users. Many Switch 2 owners recommend turning off Auto-Brightness or not enabling it in the first place. According to users, the setting makes the screen too dim and leaves colors muted, especially in dark environments. In fact, the effect is even worse in titles such as "The Legend of Zelda: Breath of the Wild." Whatever battery life Auto-Brightness saves just isn't worth the diminished presentation.
Lower Max Headphone Volume
Since the Nintendo Switch 2 is a handheld console, you can take it virtually anywhere. However, using a mobile gaming platform's built-in speakers in a crowded train or bus is a social faux pas. If you don't want to disrupt other passengers, you need to play with a good pair of headphones and, more importantly, the proper settings.
As we previously went over, the Switch 2 has settings that give headphone users crisp, downright decadent immersive audio. The console also has a headphone-related setting designed to ensure users don't go deaf: Lower Max Headphone Volume. As the name suggests, this setting caps the maximum headphone volume to prevent hearing damage and loss. Just open System Settings, scroll down to Audio, and toggle "Lower Max Headphone Volume." This setting works for all headphones, including those that plug directly into the Switch 2's audio jack, connect to the dock via a USB port, or sync with the Switch 2 using Bluetooth technology.
Despite Nintendo's best intentions, many users don't like this setting. When Lower Max Headphone Volume is active, they find the volume is way too low on the Switch and Switch 2, which is further diminished by the Switch 2's already low system volume. Sometimes, games and headphones have built-in volume settings that can mitigate some of the headphone sound intensity problems. However, if you switch on Lower Max Headphone Volume, you will have to twist these physical and digital volume knobs far higher than necessary.