Say Goodbye To Tech Clutter With This Cute Dollar Tree DIY
When you have a work desk at home or in the office, it's only a matter of time until it becomes cluttered with all manner of odds and ends. While many people manage to keep things in a state of organized chaos, it might be to your benefit to sort things — at least a little bit. There are various tricks you can employ in doing so, like using some elaborate work-from-home gadgets or purchasing a wire organizer from Amazon. If you want to add a little personality to your desk for cheap, though, you can make a neat little storage box for yourself out of simple wooden components from your local Dollar Tree.
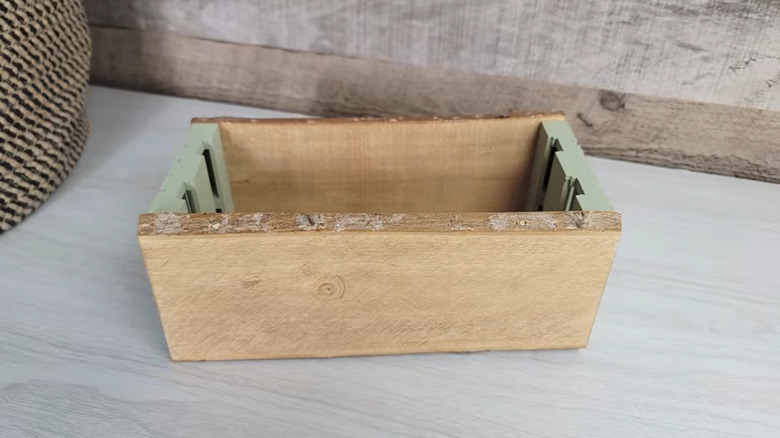
Reducing clutter on your desk can be as simple as having a dedicated spot to put all miscellaneous cables, notes, and stationary. YouTube user Crafting with JC has a step-by-step for a simple storage and organization box made using small wooden slices and pallets, all purchased on the cheap from Dollar Tree. While this box is technically for decorative purposes, like holding succulents, it would also work great for cutting down the clutter on your desk.
A few pieces of wood make a nifty storage box
To assemble this simple box, you can find just about everything you need at Dollar Tree. The linchpins are the wooden slices, which Dollar Tree sells in a variety of shapes and sizes. You want two of roughly the same size, so they'll fit well together. You can also find the small wooden pallets necessary for the ends of the box at Dollar Tree. Beyond that, you'll just need a tube of wood glue, a few square dowels, and craft sticks to make the base of the box.
Just use some pliers and a staple remover to remove the hangers from the wooden slices, and arrange the slices lengthwise, with the pallets — oriented vertically — bookending them. All of these wooden components have been pre-treated, so you don't need to do any sanding or buffing, though you can apply some paint or wax if you'd to add some personality. Otherwise, just apply the wood glue on the narrow outside face of both pallets, stand them up, and press the wooden slices into them to create the walls of the box.
Retrieve the square dowels and craft sticks and apply some more wood glue to the inside bottom edge of the pallets. Press the dowels in so they're flush with the bottom edge, then apply some glue on top of the dowels and press the craft sticks into them to complete the base. Just like that, you've got a nifty box for your desk, ready for decorating or organizing or for gifting to your favorite remote worker.