4 Money-Saving Features Every Android User Should Know About

Android devices make one-click shopping really easy, especially if you use the Amazon Shopping app regularly and have a payment method saved. Plus, if you manage subscriptions in an app, the Google Play Store usually keeps your previously used method on file. However, this can be a double-edged sword, as accidental microtransactions can occur if you share your device with a family member, such as a tablet.
It's not fun, especially if your kids spend money without meaning to. Sometimes those transactions become irreversible, and the issue ends up costing you more than you'd like to admit.
Thankfully, there are a few protection methods that can prevent accidental payments, and even customizable hard caps that prevent you from spending beyond your means, like a monthly budget for games and apps, or setting a limit on your data plan so that you don't incur overage charges.
Turn on verifications for payments in the Google Play Store

A sure way to prevent accidental purchases by users other than yourself is to enable verification on Google Play. There are actually two types of verification you can enable: one for purchasing and the other for confirming payment. The main difference is that one's done directly through Google, while the other depends on the payment method set up on the account.
The purchase verification can have a specified frequency, but if you share this device with another person, you should keep this to "Always" to avoid issues. Google notes that verification may not be required for every payment method, even if the frequency is set to always. You'll find the purchase verification and the frequency option under "Payments & subscriptions." You just have to toggle on "Biometric verification" and select the "Verification frequency" below it.
To further prevent payments from going through on the wrong card, for example, if there's a spending allowance on someone else's card or a more controlled way for spending, you can always use a payment method verification instead. The second verification occurs when someone tries to buy an app or game and selects a particular payment method. This one is tied to a specific payment method when selected, forcing the user to verify before it's sent. Keep in mind this is not a method controlled by Google; it would need to be done with a card, such as a bank transfer through an app supported on the Google Play Store.
Set monthly budgets for apps and games
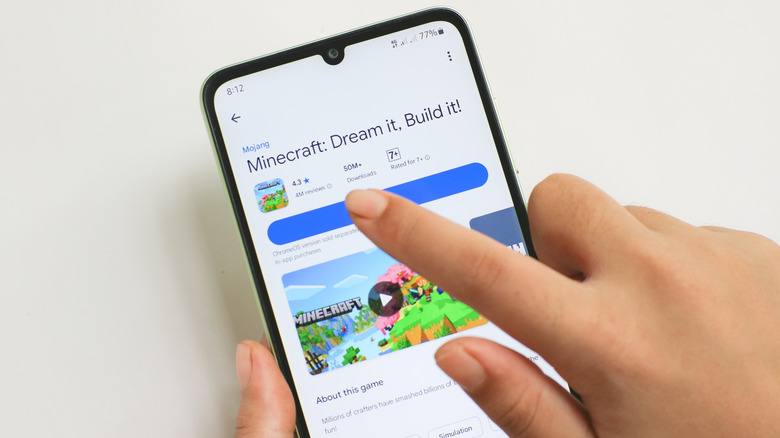
If you want to ensure controlled spending, even if just for yourself, there's a really easy way to do so: make purchases through the Google Play Store. Though it does require some discipline to keep your spending centralized, this method isn't very useful if you don't, since it only accounts for purchases made on that particular platform. But if you're managing your monthly subscriptions, such as for your favorite streaming service, this can be a bit of an eye-opener for how much you're spending, since you can view your expenditures in the "Budget & history" section (but it only gets saved for a year).
Setting up a budget is also fairly easy. Open the Google Play Store, select "Payments & subscriptions" > "Budget & history", then choose "Set budget." Specify the amount and tap "Save." You can technically edit this budget later, so it isn't set in stone.
The point is that when you're getting close to going over budget, every time you make another purchase, a message will prompt you about it — it doesn't prevent you from making the purchase. Hence, this is more about helping you be conscious of your future purchases without being overly aggressive.
Set calendar reminders to cancel subscriptions
Google Calendar is a great free productivity tool to integrate into your routine, tasks, and other Google-bound applications. You can use it to set reminders to cancel subscriptions if you haven't already. As soon as you start a subscription, enter the date it ends, or the day before it renews, so you can set a monthly (or yearly) reminder when the recurring fee takes effect.
Plus, it doesn't necessarily have to be subscriptions; you can do this for free trials as well, since many options require a payment method upfront and charge you for the first month after weeks of usage, which can sneak up on you if you lose track of time.
If you use your calendar for other events, color-code them so they stand out from the others in your app. You can do this for an existing event by tapping the edit button to change the assigned label, or when you create a new event, add a new one. Choosing a red label is a helpful warning to let you know you are approaching the end of your trial or subscription.
Add a limit on your data plan

If you don't pay for unlimited data, be careful not to go over, as that can rack up unwanted charges on your phone bill. Thankfully, Android has a nice way of warning you if you accidentally get close to the limit you set. If you want to be on the cautious side — which you should if you share a phone or tablet with another person — you can set a hard limit on your mobile data.
You can technically turn on data saver to reduce your personal mobile data usage, so not all apps can access background data as frequently, or even bloatware from taking up precious resources when it shouldn't. To enable "Data Saver," open your Android settings, tap "Network & internet" or a similar option menu, then select "Data Saver" and toggle it on. On Samsung devices, the data saver option is in the data usage settings under "Connections."
To set a limit or warning, open your Android settings, tap "Network & internet" or a similar option, then, next to your carrier, tap the gear icon to open the settings and choose "Data warning & limit." Select "Data warning & limit" > "Set data warning", tap "Data warning" and choose "Set" to finish the process. In the same section, you can toggle on "Set data limit" to begin setting one up. The process for Samsung is slightly different but very similar. In your settings, open "Connections" > "Data usage" > "Billing cycle and data warning," toggle on "Set data warning" or "Set data limit" to specify values for each setting below it.