5 Hidden iOS 26 Features That Are Actually Useful
Since iOS 26 came out, everyone's been talking about its most prominent features. There's the sleek but ever-polarizing Liquid Glass design that gives the interface a more dynamic look. You have the new Hold Assist that saves you time while waiting for a live agent. Another highlight is the Live Translation in Messages that automatically translates text from supported languages. But while these are indeed interesting iOS 26 features to enable after you update your phone, Apple has packed more useful functionalities into the major update than just these fancy enhancements.
Most of these handy tools are neatly tucked away and aren't as obvious to the casual user. But that doesn't mean they're not worth exploring. In fact, they might actually change how you use your iPhone for the better. If you want to get the most out of iOS 26, here are five hidden gems you can try on your iPhone today.
Name recognition
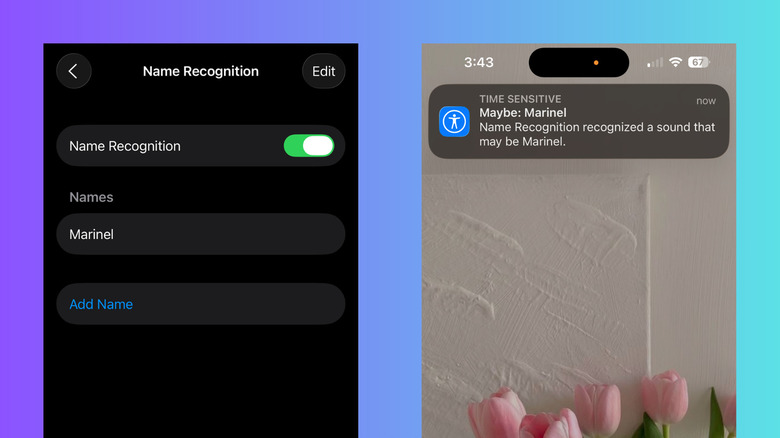
Sometimes, when you're too focused on what you're doing, it's easy to miss someone calling your name. This is especially true for people who are deaf or hard of hearing. If you want to stay more aware, you can use your iPhone's new Name Recognition feature. It tunes into your surroundings and sends you an alert when it hears your name being called. Follow these steps to configure Name Recognition on iOS 26:
- In your Settings app, open Accessibility.
- Under Hearing, tap on Sound & Name Recognition.
- Choose Name Recognition.
- Press Set Up Name Recognition.
- Hit Next.
- Enter your name.
- Tap on Next.
- Play the auto-generated pronunciation of your name to check if it sounds alright. This will be the pronunciation your iPhone will look out for.
- If you want a more accurate pronunciation, select Record Your Pronunciation and say your name three times.
- Press Done to save the name.
- Allow Name Recognition to send you notifications.
You should now see an orange light on your iPhone's dynamic island, meaning your device is constantly listening to your surroundings. If it hears your name, you'll get a notification. If you have multiple names or multiple ways of writing your name, you can add new names in Settings > Accessibility > Sound & Name Recognition > Name Recognition. Just hit the Add Name button. To delete a name, press Edit in the top-right corner, tap the red icon next to the name, and choose Delete. You can also turn off Name Recognition from the Settings if you no longer need it.
Customized file folders
Have you ever tried looking for a document in your iPhone Files app, but realized how time-consuming it was because the folders look the exact same? It would be so much easier if they were organized by color instead. Well, iOS 26 actually lets you do that. You can color-code your File folders, so you can quickly find what you need without having to read the label on each one. On top of changing the folder color, you can also add an icon over it to make it stand out even more. Here's how to customize your File folders on iOS 26:
- Go to your Files app.
- In the Browse tab, select the location where your folders are.
- Press and hold on one folder.
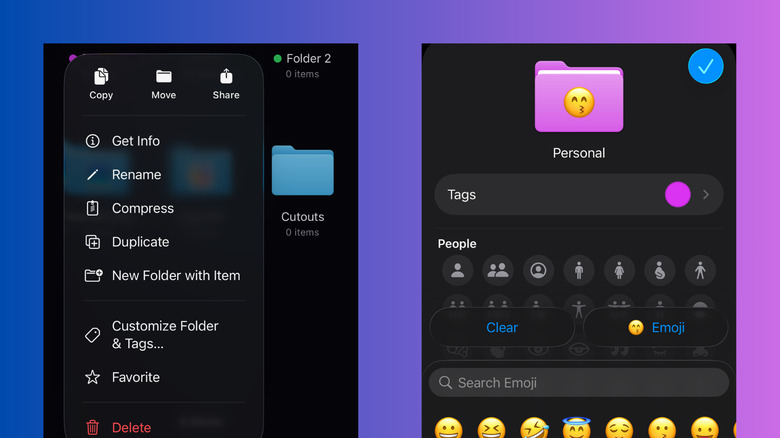
- Choose Customize Folder & Tags in the menu.
- Tap on Tags.
- Select one of the color options. This will become the color of your folder.
- Press the back button.
- Choose any of the available black and white icons or tap on Emoji if you want to use an emoji instead.
- Press the check icon to save your customization.
- Repeat for the rest of your File folders.
Your Files app will now look like a color-coded filing cabinet. The best part is that these customizations will actually reflect on your iPad and Mac computer too. If you want to change the folders back to their default look, go to Customize Folder & Tags in the folder menu. Then, just pick the color blue for Tags and press Clear to remove the icon/emoji.
Spam filtering
With the introduction of iOS 26, your iPhone gained a few new privacy tools to protect you from spam calls and messages. iOS 26 can now screen calls for you, silence calls from unregistered numbers, and hide notifications from suspected spam messages. Besides the convenient real-time detection, the major update lets you remove spam from your call history and message threads as well. That way, your recent calls and conversations will look cleaner with just the important calls and messages. Here's what you need to do to set up spam filtering for both your calls and messages:
- Launch Settings.
- Scroll down to Apps.
- To filter spam messages:
- Select Messages.
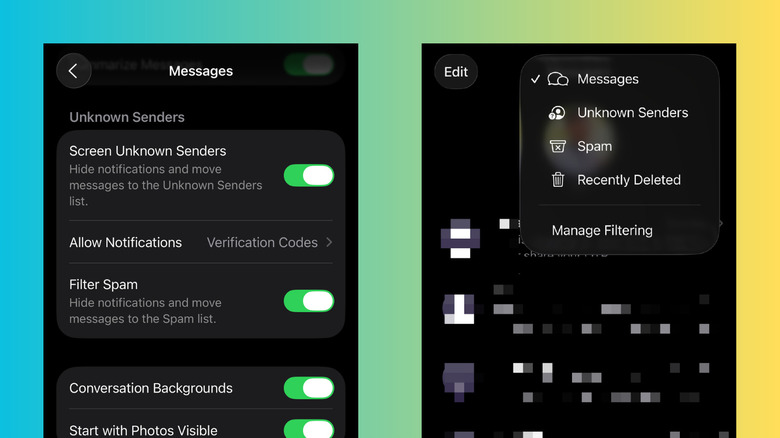
- Under Unknown Senders, turn on Filter Spam.
- If you also want to hide texts from numbers that aren't in your contacts, enable Screen Unknown Senders.
- To filter spam calls:
- Go to Phone.
- Under Call Filtering, enable Spam.
- If you want to filter out calls from unknown numbers, toggle on Screen Unknown Callers.
All calls and texts from suspected spam and unregistered numbers will now move to a separate list in your Phone and Messages apps. This will leave only the calls and messages from your contacts in the main call log/inbox. Moving forward, any incoming call and text from spam and unknown numbers will be silenced and end up in the separate list too. You can still view them in the Phone/Messages app by tapping on the filter icon in the top-right corner and choosing Unknown Senders/Callers or Spam.
Call back reminder
You probably don't catch every single call that comes in. Maybe you're driving to the movies. Or perhaps you're in the middle of a presentation for your manager. If you want to remember to call the person back, you'll have to set a reminder for it. This can be a hassle, though, especially when you're preoccupied and only have a few seconds on your phone. That's exactly why you eventually forget about returning some calls.
iOS 26 solves this dilemma with the built-in call back reminder in the Phone app. It's a more convenient way to create reminders as it only takes a few quick gestures. Follow this guide on how to use iOS 26's call back reminders:
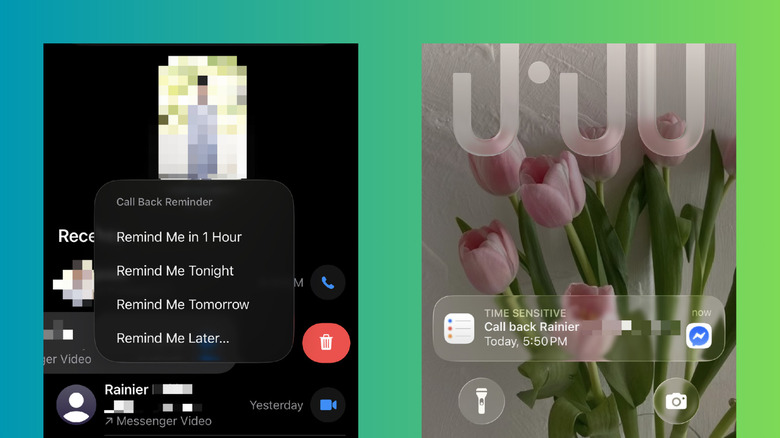
- In the Phones app, go to the Calls tab.
- Slowly swipe left on a recent call you missed or declined (also works on any other entry in the Recents list). Don't swipe all the way since this will delete the call entry.
- Tap the clock icon.
- Select one of the preset times (one hour, tonight, or tomorrow), or choose Reminder Me Later to set a specific time and date.
A new Reminders section will appear above your Recents list with all the contacts you want to call back. If you want to edit a reminder, go to the Reminders app and look for it in the Today or Scheduled folders. You should then receive a reminder notification on your preferred schedule. However, the contact will remain in the Reminders section even after you return the call. To remove it, swipe left on the call entry, press the clock icon, and choose Mark as Completed.
AirPods as camera remote
If you're into iPhone photography, one of the simple Apple Watch features you'll love is its ability to double as a camera remote. This tool has been around for a couple of years now and can be pretty handy when you're alone and want to capture more than just selfies. Simply place your phone within Bluetooth range (~33 feet) and use the Apple Watch to snap a photo.
Come iOS 26, this feature has been brought to AirPods too. Your AirPods can now take a picture or start and stop a video recording on your iPhone from a distance. It works on AirPods Pro 2 and 3 and AirPods 4. Here's how to set it up:
- Connect your AirPods to your iPhone.
- Go into Settings.
- Tap on AirPods at the top.
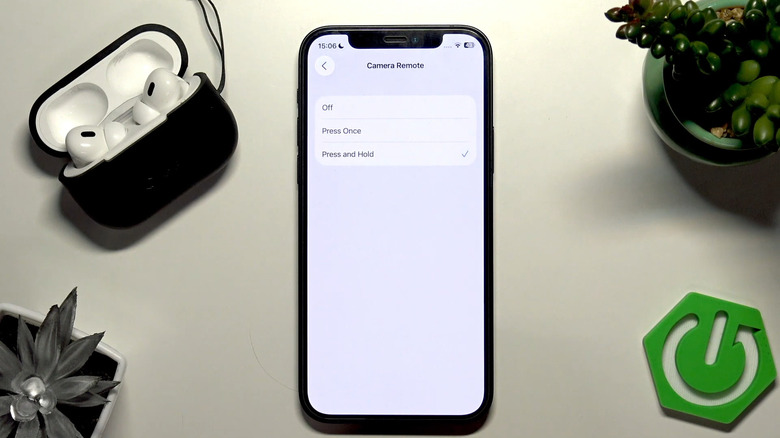
- Under Camera Control, open Camera Remote.
- Select Press Once or Press and Hold.
While wearing your AirPods, open the Camera app and try pressing once or pressing and holding the stem to test out the camera remote functionality. In Video Mode, the recording should start/stop right away, while in Photo Mode, you'll get a three-second countdown first. Keep in mind, though, that by using your AirPods as a camera remote, you'll lose some of the native controls. For instance, you can no longer control media when Press Once is enabled and you can't switch between listening modes or activate Siri with Press and Hold as a camera remote gesture. You can still turn off Camera Remote from the Settings when needed.