5 Clever Ways To Use Your Old Raspberry Pi As A Travel Companion
A Raspberry Pi is probably the last thing you'd think to bring on a trip, especially when your bag is already stuffed with phones, cameras, and other essential gadgets. But you might be surprised to learn how handy this tiny computer actually is on the go. Designed for versatility and portability, the Raspberry Pi is lightweight but powerful enough to handle all sorts of travel-related tasks. For instance, it can help you back up your travel photos and videos and give you directions on where to go without requiring internet connectivity.
If you're looking for unexpected practical uses for your Raspberry Pi, we've rounded up five projects you can take on to maintain the Pi's usefulness while on the move. From travel routers to portable network attached storage (NAS) solutions, these nifty Raspberry Pi setups might just be what you need to make your next adventure in the city (or the wild) a whole lot smoother.
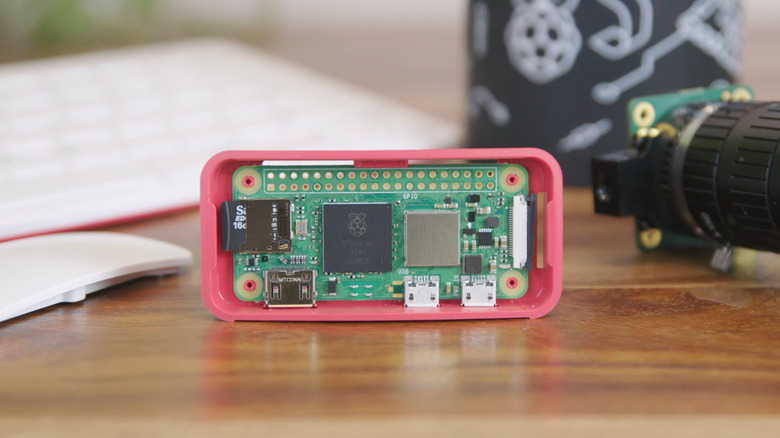
Smart luggage tracker
The last thing you want to happen when traveling is for your luggage to go missing. It's frustrating to deal with the airline's reps, and you're not even sure when, and if, you can get your belongings back. For your peace of mind, consider packing a luggage tracker with your belongings. You don't have to buy an expensive one, though. If you already have a Raspberry Pi lying around, you can turn it into a smart luggage tracker for your travels — one of the many Raspberry Pi projects that can save you money.
A Pi-powered smart luggage tracker is essentially a GPS tracker that sends location updates via cellular network in real time. To get the GPS data, you'll need a GPS module like the Neo 6M. It uses satellite signals to determine the current latitude and longitude. Once you have that data, the Pi then needs to send it to the cloud to get displayed. A SIM800L GSM module with a SIM card would work well for this job. What it does is provide cellular data that lets the Pi connect to the internet. For stronger reception, try adding antennas to the GPS and GSM modules.
Once in the cloud, the data gets displayed using the free GeoLinker tool by electronics website Circuit Digest. GeoLinker creates an interactive map, where the past and current GPS data are plotted in real time to show a route. It's accessible from your browser, so you can track your luggage easily. When the system goes offline, though, the GPS data is saved locally on the Pi for the interim. The board still uploads that stored location data as soon as the internet connection is restored. You can opt to fit the components in a compact case for convenient attachment to your luggage.
Travel router
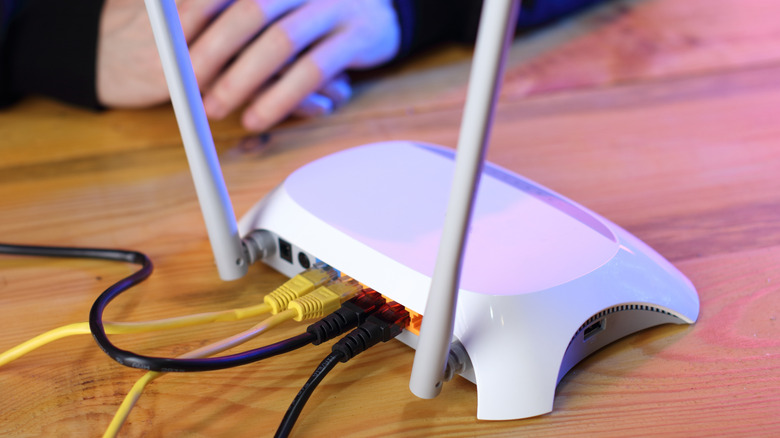
During your trips, you might have encountered accommodations that charge per device for Wi-Fi access. This can put quite a dent on your travel fund, especially if you're with family or are using your tablet and laptop, on top of multiple phones. Instead of paying for a raft of connected devices, you can just use a travel router. It connects to the accommodation's Wi-Fi network and then broadcasts that connection for your other devices to use. This saves you money, and even reduces privacy and security risks when on unsecure public Wi-Fi networks. While you can easily buy a travel router, a DIY one powered by Raspberry Pi can work just as well.
For this project, you'll need any Raspberry Pi with an on-board Wi-Fi chip and a third-party USB network adapter that supports connection to a Raspberry Pi. The Pi's on-board Wi-Fi will connect to your accommodation's network to gain internet access, as it normally does. On the other hand, the external USB network adapter will serve as the hotspot for your other devices to connect to. This setup is made possible using wireless router software like RaspAP. RaspAP allows the Pi board to function as a Wi-Fi client (that connects to the network) and an access point/router at the same time.
Setting this project up is pretty straightforward. As soon as you have the Pi ready, with the Raspberry Pi OS installed and the USB dongle inserted, you can proceed with installing RaspAP (or your preferred wireless router software). Then, simply configure the software — connect to the accommodation Wi-Fi, change the hotspot SSID and password, and set up a VPN and ad blocklist — via its web interface, and you're good to go.
Offline GPS navigator

Some places you travel to will lack an internet connection. Some forms of public transportation don't offer free Wi-Fi, or a landmark you may visit might be too remote for reliable cell service. Instead of relying on your phone for offline navigation, you can use a Raspberry Pi-based offline GPS navigator to save your phone's battery — and your sense of direction.
Just as you might expect, what this offline GPS navigator does is help you determine your current location on a map, even without connecting to Wi-Fi or cellular data. It's powered by a GPS module like the Reyax GNSS, which collects GPS information from a satellite network and sends it to the Raspberry Pi. The Pi then displays your current location as a dot on the map. As you move in the area, the map gets updated with your new location. This means you can easily explore the area without worrying about getting lost. While the device can work offline, the map needs to be downloaded and loaded onto the Pi first. It's pretty similar to how you download offline maps on navigation apps like Google Maps for later use.
Hardware-wise, you can technically use any Raspberry Pi for this project. But if you're looking to make it lightweight, you might want to go with a smaller Pi board that also consumes less power — like the Pi Zero 2. Any Pi-compatible screen will do as well, although an e-paper type would be more suitable for outdoor use as it's more readable in the sunlight. For portability, go with a long-lasting battery to power the project. For the software, you'll need knowledge of terminal commands, Python, and Flask.
Travel NAS

When you're out on an adventure, you're probably taking as many photos and videos as you can. But while snapping pictures and recording clips, it's just as important to back them up — especially if you're recording on an action camera or drone, where the only copy you have is on the SD card. A laptop works perfectly fine for backups, but to avoid lugging it around, you can just make a travel NAS out of the more portable Raspberry Pi.
This setup calls for only a few hardware components: a Raspberry Pi, a large enough Pi-compatible external storage drive (for holding your pictures and videos), and an SD card reader (if you're backing up an SD card). This makes the portable NAS one of the best quick and easy Raspberry Pi projects for new users. To build it, you can use CasaOS, which essentially functions as a personal server/dashboard and lets you install and manage web apps.
From here, you need to pair CasaOS with the free web app Syncthing. The latter software syncs the folders on one device (like your Pi) with a remote device (like a NAS you already configured at home). That means anything you add to your Pi will automatically be copied over to your at-home NAS in just a few seconds. The system works via the internet, so during backups, keep your Pi connected to Wi-Fi or mobile data. To make it even more convenient to copy files to the Pi itself, you can run a script that automatically imports the contents of a USB drive/SD card reader to a Pi folder. This way, you won't have to connect the board to a monitor, keyboard, and mouse.
Pocket language translator

Your phone already does a solid job at translating from one language to another, letting you easily talk to locals in a foreign country. But what if you want to save your phone's battery for more important things like making emergency calls? In that case, it might be better to use a separate translator device — maybe one powered by a Raspberry Pi.
A Pi-based pocket language translator works like most translation apps out there: It takes in what the speaker says, and then responds with the spoken translation. In the background, though, the process actually takes four steps. First, the Pi records your voice and saves it as a WAV file. That means you'll need a microphone connected to the board. It's quicker to use a USB model that you can simply connect to one of the Pi's USB ports. Next, the WAV file is transcribed into text with the SpeechRecognition Python library. That output text is what the Google Translate Python library then translates into the target language. Finally, the translated text is converted back to speech using Google Text-to-Speech and played through the 5W speakers paired with the Pi. For clearer audio, you might want to add an amplifier module like PAM8403.
The project includes two push button switches to control the translation direction. One button translates from Language A to Language B, while the other does Language B to Language A. To let you know what's happening behind the scenes, a display is connected to the Pi. It relays the progress updates, such as when the Pi is still recording, or whether it's done converting the audio to text. The project runs on a 5V 2A power supply, but you can try replacing it with a battery for portability. Make sure you also connect to Wi-Fi or cellular data, as the translation requires internet access.