4 Smart TV Settings You Should Change ASAP, According To Consumer Reports

You dropped a bunch of money on a brand-new 65-inch TV and even spent a few extra hundred on one of the best soundbars. You did all your research to ensure you wouldn't make any mistakes while shopping for a TV and performed the day-one software update. So, why does the picture quality look so cruddy?
While most TVs are designed to look halfway decent when you turn them on for the first time, you should dig into the picture settings if you're not a fan of the out-of-the-box look.
As a matter of fact, the experts at Consumer Reports concocted a helpful list of picture refinements that require you to dive into some manual controls. Don't worry, because none of these adjustments are particularly difficult to access and tweak. If you don't like the results, the reset option in the settings will put everything back to factory defaults. These are all TV settings worth exploring, so let's get into the nitty-gritty of your smart TV's picture tech.
Choose the right picture preset
Whether you own a QLED, OLED, or traditional LED-LCD TV, all TVs have a series of picture presets you'll be able to choose from. This often involves simply pressing the Menu or Settings button on your TV remote and navigating to the sub-menu or tab labeled Picture. Common image presets include Standard, Vivid (sometimes called Dynamic), Sports, and Cinema. According to the experts at CR, it's best to stay away from sports mode, as this preset tends to introduce over-boosted colors, contrast, and brightness levels, along with unnecessary motion smoothing.
Generally speaking, Cinema is one of your best bets for a natural-looking picture that doesn't overdo brightness. CR also recommends choosing Filmmaker Mode, especially if you're a cinephile who wants your picture to look as close as possible to the director's vision. If your TV's HDR settings are enabled (more on this later), certain audio-video components may trigger specialized presets related to Dolby Vision or HDR10+. If you plan on watching a 4K HDR movie or firing up a PlayStation 5 game, we recommend leaving these auto-HDR presets alone, save for adjusting brightness for viewing comfort.
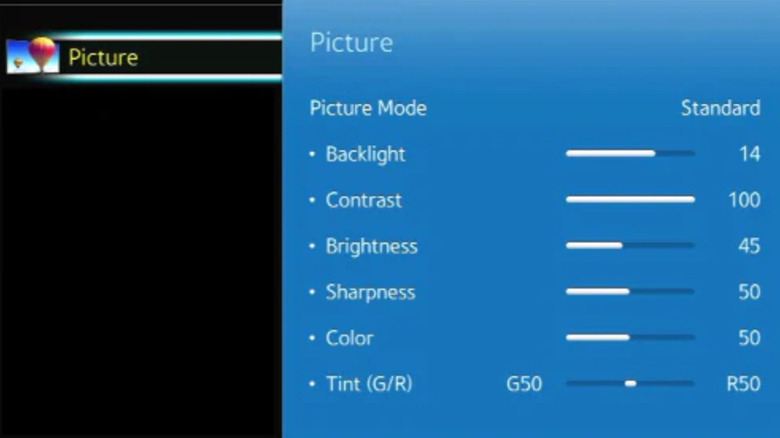
Adjust the preset's individual settings
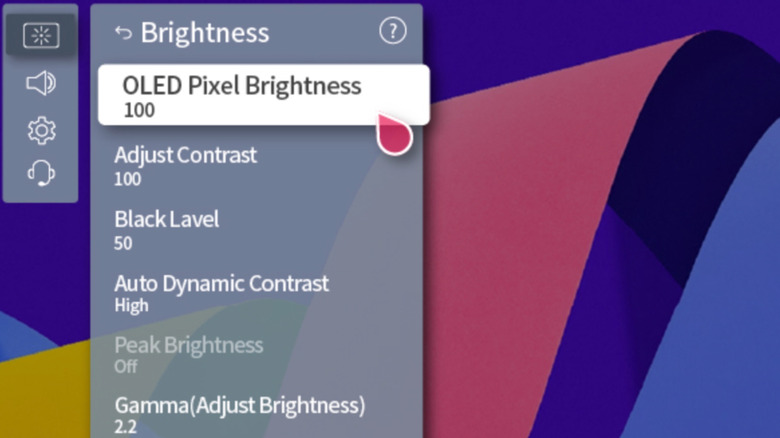
Once you've settled on a picture preset that looks best to you, CR suggests going a layer deeper to tweak individual picture elements within your chosen preset. Brightness should be your first adjustment, and the goal is to get your TV to produce natural-looking black levels. You also don't want to sacrifice any picture details that darker areas could obscure. CR recommends adjusting until black levels are deep and inky, then gradually raise brightness until you can start making out picture details in darker zones.
Contrast should be next on your list, and this adjustment is almost the exact opposite of Brightness: instead of adjusting for black levels, you'll be adjusting for whites. The idea here is to lower the adjuster until you can clearly make out all shadow details in your test image. Then, gradually increase the contrast to get the picture as bright as possible while still being able to see those details.
If you'd like to adjust color and tint, ideally, aim to strike a balance between realistic skin tones and vivid colors that aren't overly bright. Out of the box, your TV's sharpness level may be set to zero, which we recommend leaving it there. Sharpness only becomes important if you think the picture looks too soft, or if the edges of subjects aren't as defined as they should be.
Enable HDR and HDMI-CEC
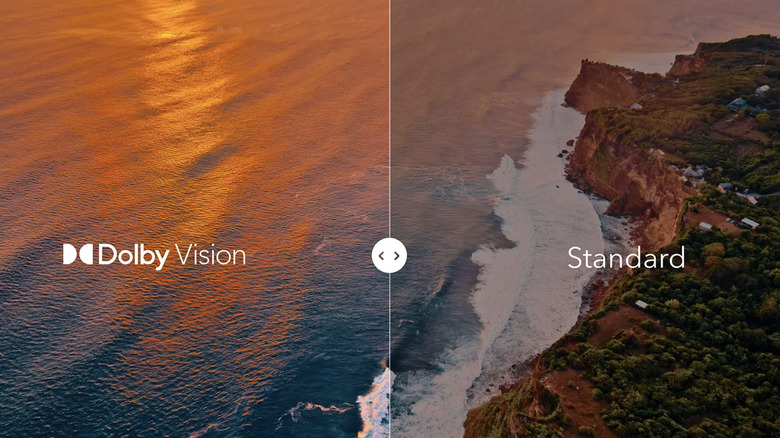
High Dynamic Range (HDR) is a staple of modern 4K TVs, and streaming services like Netflix and HBO Max can reproduce 4K HDR content. This feature allows your TV to achieve a wider black-to-white range, and it also helps to dial in something called "specular highlights." You can think of these as small, temporary areas of ultra-brightness (such as a big lightning strike or an explosion in an action movie) that HDR formats are engineered to handle.
Out of the box, most modern 4K TVs support HDR10 at a bare minimum, and these settings are typically enabled by default. Brands like LG support HDR10, Dolby Vision, and HLG, while Samsung and Panasonic swapped Dolby Vision for HDR10+ support. Companies like Hisense and TCL handle all three mainstream formats, as well as HLG. If your TV's HDR decoding is turned off, you can find the toggle somewhere in the Picture settings.
We also recommend turning on HDMI-CEC (Consumer Electronics Control) on both your TV and all your AV components. Not only does this allow you to control multiple devices with one remote, but it might also help prevent any communication issues that can get in the way of HDR functioning correctly. For best performance, your AV components should be wired using HDMI 2.1-rated cables connected to your TV's HDMI 2.1 ports.
Reduce (or disable) digital enhancements
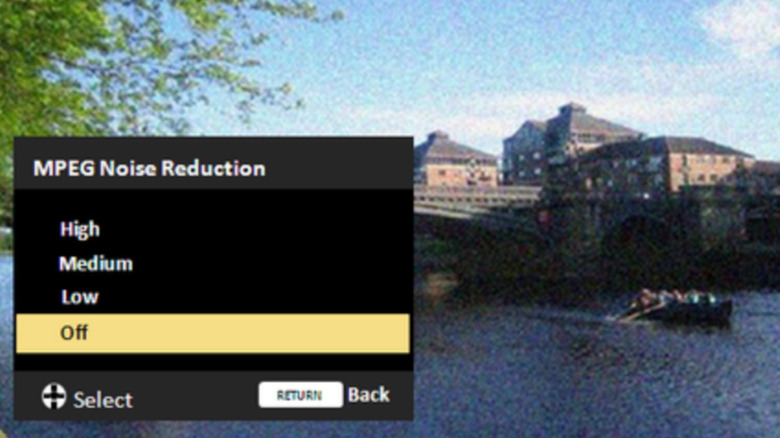
As you scan through your TV's picture settings, you'll likely come across options for noise reduction and digital motion enhancements (like Auto Motion Plus on Samsung TVs and TruMotion on LG TVs). CR recommends disabling these settings, and we wholeheartedly agree. When noise reduction and digital motion are cranked too high, you potentially open doors to the "soap opera effect," which is when the picture appears smooth to the point of uncanniness.
Aside from all these settings, there are several other ways to boost your TV picture quality. You always have the option of paying for professional calibration, but if you're not willing to part with $200 or more, this CR breakdown of picture-perfecting tips should leave you with a much better-looking QLED, OLED, or LED-LCD set.