5 Things You Never Knew Your iPad Could Do
iPads might seem like a glorified iPhone to some, but they're actually more powerful than you think. In fact, you can use your iPad as a laptop replacement. The new windowed app feature lets you open multiple apps and resize and arrange them just like how you would on a computer.
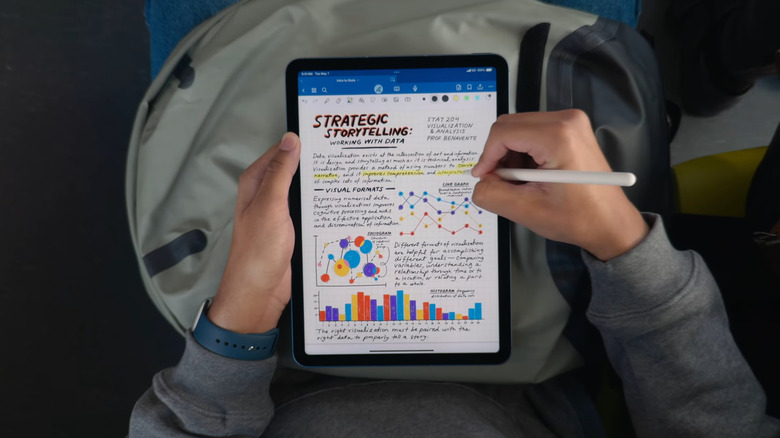
Your iPad also comes with nifty tricks for taking notes. For instance, you can enable a setting in the Notes app to refine your handwriting and add grids or lines as the background. Then, there's other handy iPad features like the floating keyboard option, full-page screenshot in Safari, and multi-finger navigation gestures for everyday tasks.
Beyond these iPad tips and tricks are several lesser-known functionalities you might have been missing out on. They're hidden in plain sight, but once you discover them, they can quickly change how you use your device. To that end, here are five of the cool functions you probably didn't realize your iPad can do.
Merge files into a PDF in the Files app
There are times when you'd need to merge several files into a single PDF. Maybe you're sending different artwork samples to a client. Or perhaps you prefer accessing all your bills and receipts in one place. Instead of dealing with multiple files, you can combine them into one PDF. This way, you can declutter your storage and share the file much easier.
To merge files into a PDF, you'd normally rely on a third-party app. But on an iPad, you won't need to install one. There's already a built-in feature in the Files app that allows you to quickly convert a set of files into a PDF. You can use it to create a PDF out of the same file type, such as all JPGs or all DOCs. But it also supports combining different file types — say one JPG, one PDF, and one TXT file. Here's how to merge files with this tool:
- Go to the Files app.
- Locate the files you want to merge into a PDF.
- Press Select at the top.
- Mark the files.
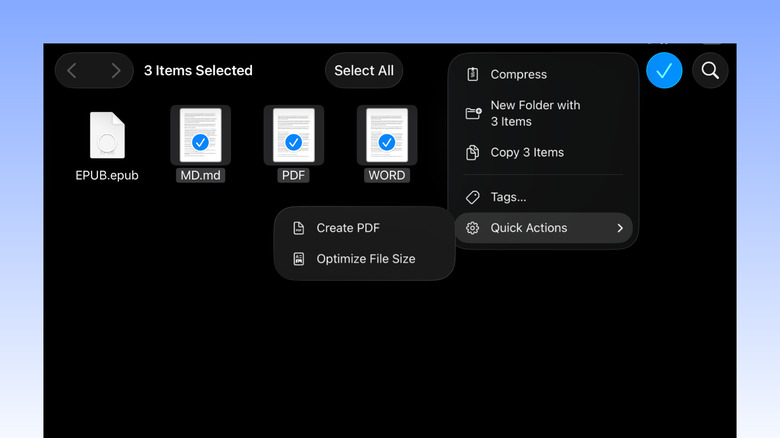
- Tap the More icon (three horizontal dots) in the upper-right corner.
- Choose Quick Actions.
- Hit Create PDF.
The generated PDF will then appear in the same folder as the files. You can open it with any PDF reader to check the output. Keep in mind, though, that the files you added to the PDF won't automatically be deleted. If you no longer need them, you'll have to delete them manually.
Quickly open a note with an Apple Pencil gesture
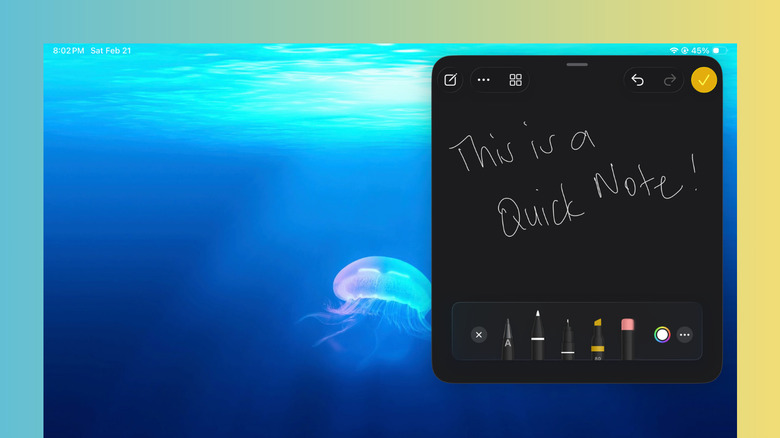
Ideas can strike you anytime, and before they slip away, you'd want to jot them down. A quick way to do so is with an Apple Pencil and iPad. All you have to do is tap once on the Lock Screen with your Pencil. If your iPad is already unlocked, simply swipe up from the bottom-right corner of the screen. Both Pencil gestures will open a new Quick Note, and you can start scribbling away. However, saving the note works differently between the two methods. When it's opened from the Lock Screen, you need to hit All Notes and unlock your iPad. When it's opened from the corner, it takes a single tap on the yellow checkmark at the top.
Conveniently, Quick Notes opened from the corner also lets you do more. For instance, you can move the window around by grabbing the handle at the top, or even temporarily hide the Quick Note by swiping the same handle to the right. To open it, just tap on the arrow on the side of the screen. Like any other notes you make, your Quick Note will be accessible anytime on the Notes app. You can find it under the Quick Notes section and in the Notes folder. While this Apple Pencil feature comes in handy for Apple Pencil owners, you don't really need to buy one to do the same gesture (at least for the corner swipe). You can also use your finger. To enable it, follow this guide:
- Go to the Settings app.
- Navigate to Multitasking & Gestures.
- Toggle on Swipe Finger from Corner.
This gesture is only available in the Full Screen Apps mode, though, not in the Windowed Apps or Stage Manager mode.
Add File folders in the Dock
By now, you probably already know you can personalize your iPad Dock for quicker access to frequently used apps and app folders. But besides apps, there's actually one other thing you can pin to the Dock to boost your productivity: Files folders.
Just like how you can add folders to your macOS Dock, you can now do the same thing on iPads running iPadOS 26. This feature can come in handy if you find yourself constantly going to the Files app to open work reports or favorite eBooks. Instead of switching to a different app and breaking focus, you can simply go to your Dock and access the folder right there. Here's a quick guide on how to pin folders to your iPad Dock:
- Launch the Files app.
- Go to the folder you want to add to the Dock.
- Press and hold the folder.
- Select Add to.
- Tap on Dock.
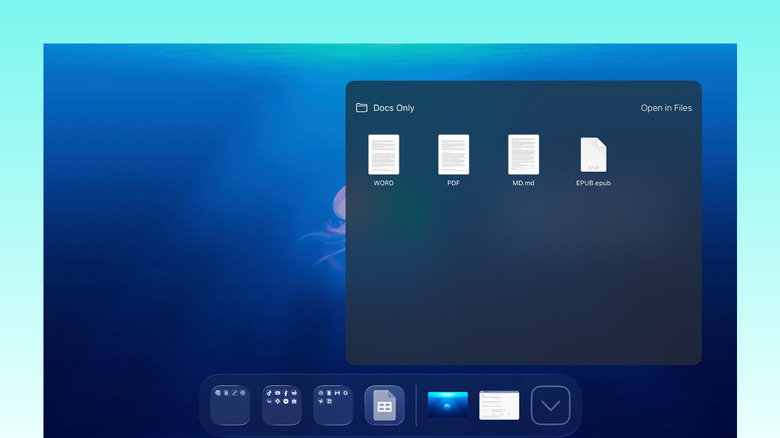
You're free to place multiple folders in the Dock, and they'll show up as a small stack of files. That means if the folder has documents, you'll see a tiny stack of papers with lines; if the contents are pictures, the images themselves will appear in the Dock. You can easily customize the files' arrangement in the stack by long-pressing on the folder in the Dock. Then, under Sort by, select how you want to sort them (e.g., by name, date modified, kind). There's also an option to change how the folder opens when you tap it, either in a fan style or as a grid. If you no longer want the folder in the Dock, press and hold it, go to Options, and tap on Remove from Dock.
View files and folders like a Mac
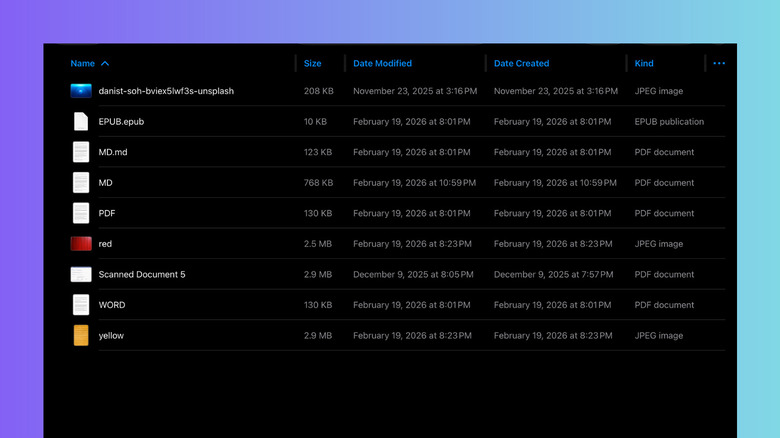
The Files app on iPad might look similar to the Finder on macOS, but it really didn't function the same way, especially when it comes to displaying file details. To know a file's size, kind, and relevant dates, you'd need to open its info panel first. But that was until iPadOS 26 came into the picture. Now, you can easily check the details of files and folders by just changing the view layout. This is one of the iPadOS 26 features that turn your iPad into a touchscreen MacBook. To set this up:
- Open the Files app in landscape mode.
- Go to any of the options under Locations (e.g., iCloud Drive, On My iPad).
- Tap the rectangle icon in the top-right corner of the left side panel to close it.
- Press the View settings (four-square icon) next to the search icon at the top.
- Change the view from Icons to List.
- Select the three horizontal dots next to Date Modified.
- Mark the details — like Size, Date Created, and Tags — you want to add to the view.
From here, you're free to change how the layout looks. You can rearrange the order of details by pressing and holding the top of each column and dragging it to your preferred position. If you want to sort the files, tap on the blue column heading to toggle between ascending and descending.
To divide the view into groups, go to the View settings again and select View Options. Then, tap on Group By and select how you'd like to categorize the files — by Kind, Date, Size, or Shared by. To fit more items onscreen, navigate to the View Options and switch "Icons and List Size" to Compact.
Open two windows of the same app
So, you're trying to compare two products from different websites on Safari, but the constant back and forth between tabs just makes things more confusing than it really is. It'd be so much more efficient if you could open two Safari windows right next to each other and compare the products side by side. Well, your iPad can do exactly that.
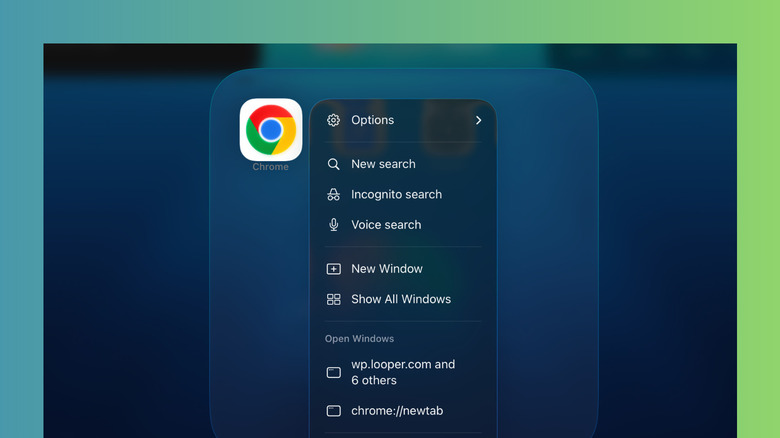
On iPadOS 26, you can open multiple windows of the same app and place them right next to each other, just like on a computer. This works for most of the native apps like Safari, Pages, and even Calendar. Some third-party apps, including Google Chrome and Microsoft Word, are also supported. To open an app in two different windows on iPad, here's what you need to do:
- In your home screen or app library, find the app you want to run in two windows.
- Press and hold the app icon.
- From the menu, choose New Window.
- Long-press the app icon again.
- Tap on New Window to open the second window.
You can then resize and move the windows as needed. In certain apps, pulling up a second window is as simple as long-pressing an item — like a folder in the Files app, a note in Notes, or a search result in Chrome — and selecting Open in New Window. You can also try dragging and dropping the item anywhere on the screen to create a new window. If you minimize a window or want to see all the opened windows of a certain app, you can retrieve them by long-pressing the app icon on your home screen or app library. Then, go to Show All Windows. All these windows will also show up in your Recent apps screen.