5 Things You Never Realized Your iPad's Magic Keyboard Could Do
The iPadOS 26 update turned the iPad into a computing device that behaves more like a MacBook than ever. The addition of a windowed multitasking mode that allows users to resize apps and use multiple apps at the same time as well as the new menu bar and the improved file management system are some of the exciting changes in iPadOS 26 that can improve productivity. Adding a keyboard dock to an iPad running iPadOS 26 can turn the device into a good laptop alternative. Apple's own Magic Keyboard can be a good keyboard choice if you own a compatible iPad Pro or iPad Air model, as it packs plenty of advanced features.
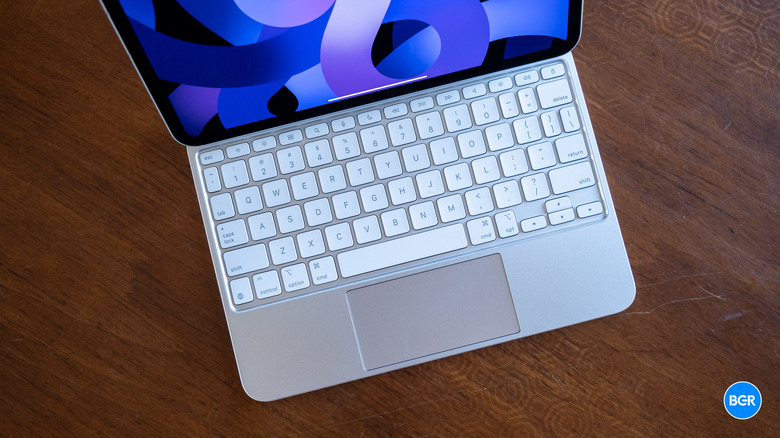
The Magic Keyboard is more than a physical keyboard that can make it easier to type long-form text on the iPad. It has an ingenious design that lets you attach the iPad magnetically to the Magic Keyboard and experience the screen hovering above the keyboard at the desired angle. And it's not just the thin profile of the keyboard or the fact that the iPad's three-dot connector on the back powers the keyboard that you'll appreciate. The Magic Keyboard has various capabilities that may improve your entire iPad experience, including a few hidden settings, several useful shortcuts, and support for all kinds of gestures that make it a powerful iPad accessory.
Knowing how to set up the Magic Keyboard properly and how to take advantage of built-in (but customizable) shortcuts and gestures will make a huge difference. It'll speed up your workflow as you'll be able to perform several actions quickly — and directly from the keyboard — without needing to reach for the touch screen. Knowing these tricks can also help you understand why the Magic Keyboard is such an expensive iPad accessory, priced at $299 (iPad Pro) and $269 (iPad Air).
Start with Tap to Click and the initial trackpad setup
All you need to do to start typing on the Magic Keyboard after you take it out of the box is to connect the iPad Pro or iPad Air by attaching it magnetically to the lid. But you should not stop at simply attaching the iPad to the Magic Keyboard when first using the accessory. The iPad's Settings app offers several options you should tweak in the early days of using the Magic Keyboard to ensure a better experience.
The Magic Keyboard's trackpad is your alternative to touching the display (more on that later). When setting up the keyboard, head to Settings > General and look for the Trackpad or Trackpad & Mouse menu to change the speed of the trackpad. Play with the trackpad to determine how fast you want it to be. This speed will affect scrolling in apps and websites later. You should also decide how you want to scroll by toggling the Turn Natural Scrolling menu on or off. Depending on how you set up this feature, the scroll will follow the direction of your finger on the trackpad or move against it.
The key settings to change here are the Tap to Click and Two-Finger Secondary Click options. The first lets you tap the trackpad instead of pressing the trackpad to perform an actual click. It's a speedier way to take action on the screen than clicking. The second gesture is similar to right-clicking with a mouse. Long-pressing on the screen brings up the Quick Action menu for apps and websites. Tapping the trackpad with two fingers will let you perform that action from the Magic Keyboard, so you won't have to reach for the screen every time you need to access a secondary menu.
Never lose the pointer again
Before we look at the various gestures that you have to learn to manage the iPad as if you were touching the display, you may want to ensure the pointer is visible. You can customize its appearance by going to Settings > Accessibility > Pointer Control to adjust the color, size, animations, and inertia. The pointer also has its own scrolling speed that you may want to adapt to your liking.
But the most important settings in this Accessibility menu concern improving the pointer visibility. Find the Automatically Hide Pointer menu in the Pointer Control menu and disable the setting so the pointer isn't hidden after a number of seconds passes. The Pointer Size in Pointer Control lets you increase the diameter of the pointer, which can help with visibility. In addition, you can go to the Color menu and set a color ring for the pointer, that way it's more visible than the default.
Finally, you can turn off the Pointer Animations option in Pointer Control to ensure the pointer is always visible, including when hovering over apps or other iPad UI elements where the pointer may auto-hide.
Let the trackpad replace the iPad display
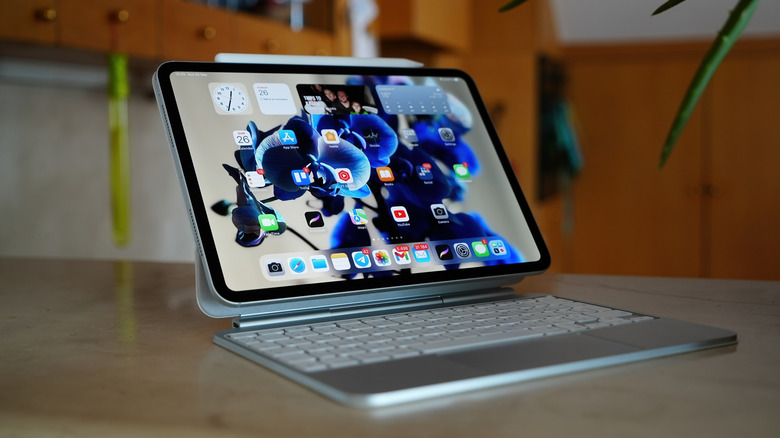
The trackpad gestures that follow can be used in combination with the Magic Keyboard shortcuts you'll find in the next section (or replace some of them). The gestures (and shortcuts) should minimize the time you spend reaching for the screen to multitask, zoom, or touch an icon or menu item.
- Swipe down with two fingers: Bring up Spotlight Search
- Swipe up with three fingers: Go to the Home screen
- Swipe down with one finger twice (once until the Dock appears, and once again past it): Go to the Home screen
- Swipe with one finger past the bottom of the screen: Show the dock
- Swipe up with three fingers and pause before lifting or pinch four fingers together and pause before lifting: Open the App Switcher
- Select the status icons at the top right and swipe down with one finger: Open Control Center
- Use one finger to move the pointer past the top of the screen in the middle: Open the Notification Center
- Swipe left or right with three fingers: Switch between open apps
- Pinch to zoom in and out: Zoom in and out
- Swipe past the right edge of the screen: View Slide Over apps
- Click the trackpad when the iPad is turned off: Wake the iPad
Set an Escape key and learn the key shortcuts
You can use the Magic Keyboard to control the iPad Pro or iPad Air while they're docked as long as you know the right shortcuts that will get the job done. The more you use the shortcuts, the easier it'll be to remember them. The first shortcut you should learn is pressing and holding the Command key to see what shortcuts are available for the content displayed on your screen. This shortcut — and others – can be customized by going to Settings > General > Keyboard > Hardware Keyboard and choosing the action you want for the various Modifier Keys available on the Magic Keyboard. Importantly, the Modifier Keys option lets you set up a shortcut for a virtual Escape key, which the Magic Keyboard doesn't have.
The following Magic Keyboard shortcuts should be the first simple ones you learn, as they'll help you perform key actions on the iPad instead of touching the display:
- Command-Space: Bring up Spotlight Search
- Globe-H: Go to the Home screen
- Globe-A: Show/hide the dock
- Globe-Shift-A: Open the App Library
- Globe-C: Open Control Center
- Globe-N: Open the Notification Center
- Globe-Q: Open a Quick Note
- Globe-Left or Right Arrow: Switch between open apps
- Command-Tab: Switch between apps
- Control-Globe-Arrow: Split-screen apps
- Command-Shift-3 (or 4): Take a screenshot
- Command-Plus (+) or minus (-) sign: Zoom in and out
- Click and hold the Globe key when typing or Globe-E: Access the emoji keyboard
- Press any key when the tablet is asleep: Wake the iPad.
The video above will show you most of these shortcuts, so you can compare them with the screen gestures you'd use to perform the same actions.
Use the Full Keyboard experience

Pressing a Magic Keyboard key or the trackpad to wake up the iPad is actually a great way to unlock the tablet, especially the iPad Pro, which supports Face ID authentication. Just perform the gesture, and you won't have to worry about initiating the Face ID unlock. The tablet will be unlocked as long as the sensor can scan your face.
iPad users who want to rely on the Magic Keyboard to control the iPad can turn on the Full Keyboard Access setting in Settings > Accessibility > Keyboards. This feature enables additional shortcuts that let you navigate the iPad without having to touch the screen. The Full Keyboard Access menu contains a Commands menu that lets you customize these specific shortcuts. Here are a few of the defaults and what they do:
- Tab-H: View available Full Keyboard Access commands
- Tab: Move forward
- Shift-Tab: Move backward
- Space bar: Activate the selected item
- Fn-H: Go to Home
- Fn-Up Arrow: Open the App Switcher
- Fn-C: Open Control Center
- Fn-N: Open the Notification Center
Some of these shortcuts may overlap with the shortcuts and gestures mentioned in the previous sections. It's up to the user to select which shortcut or gesture to use to perform a specific action. The best part about the Full Keyboard experience is that it allows you to set up special keyboard shortcuts for other actions, including gestures that are available on the trackpad, like swiping.