5 3D Printer Projects To Take Your Raspberry Pi Builds To The Next Level
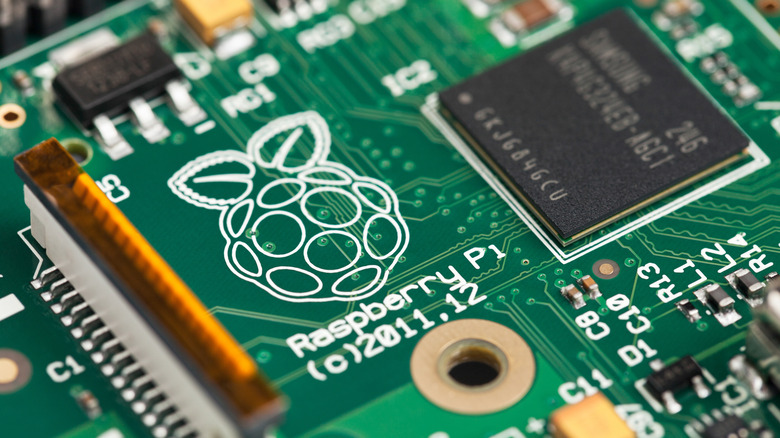
If there were two technological developments representative of the creative future of design and engineering, they'd be the 3D printer and the Raspberry Pi. The former allows you to create just about anything with the right model, while the latter can be used to create all kinds of compact, miniaturized devices. Using these two technologies in tandem does require some specialized know-how, but if you've got the skills for it, you can use a 3D printer to create all kinds of fascinating cases and gadgets, which a Raspberry Pi can then bring to life.
Users across 3D-printing enthusiast sites like Printables and Thingiverse have pushed their ingenuity into overdrive to realize their wildest dreams. With a 3D printer and a Raspberry Pi (along with supplemental skills like coding in Python and wiring digital displays), they've created practical gadgets, recreations of their childhood computers, and even entire functional robots. They're not the most beginner-friendly projects, as there are much easier projects out there for new users, but if you're looking to take your tinkering to the next level, you can try their designs for yourself.
Snap-Fit Raspberry Pi Case
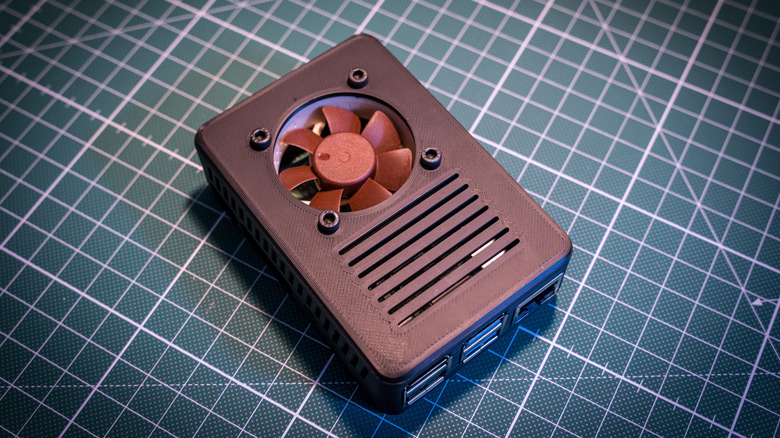
Let's start with something practical. One of the obvious drawbacks of your typical Raspberry Pi module is that it's a naked circuit board, with little to no built-in protection. If you're looking to experiment with a lot of different builds and projects, it would probably be a good idea to get that thing some physical defenses. Not only can you make that protection with a 3D printer, but you can also make one that assembles as easily as a snap-fit plastic model.
Printables user Sneaks designed a sturdy, mountable 3D-printed case for their Raspberry Pi module, which would keep it protected while also offering optional perks like a built-in cooling fan and a slot for a small OLED display. What's nice about this case is that it doesn't require any hardware to assemble; it's completely snap-fit. Just print the parts, insert your Raspberry Pi module, and lock the joints together on top of it, and it'll hold strong. Sneaks does caution, however, that this case is designed for Raspberry Pi models 2B, 3B, 3B+, and 4, and they don't know if it'll fit older or newer models.
Articulating Raspberry Pi Camera Mount
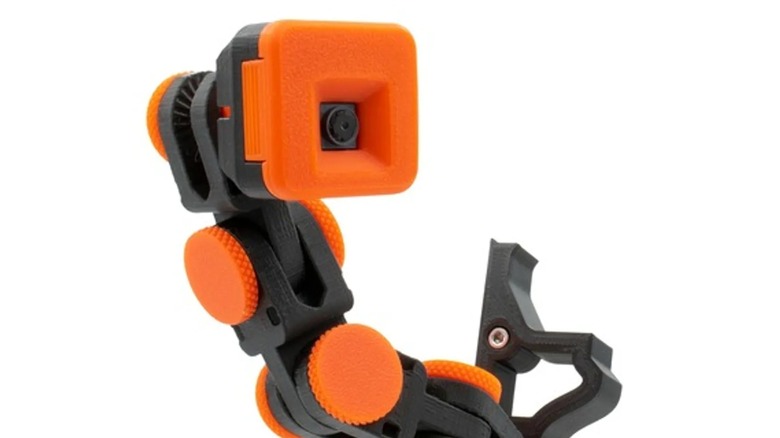
When you're using a 3D printer, it's important that you can clearly see what's going on in the bed while it's working. You never know when you may need to make a minute adjustment, after all, but depending on your printer's placement and dimensions, it may be hard to get a good look with just your eyes. If you need a closer look from anywhere on the bed, try making a Raspberry Pi-powered mounted camera.
Another project from Printables user Sneaks, this mounted camera was specifically designed to solve a problem they were having: constantly needing to move and adjust their viewing camera while using their printer. The solution was a fully adjustable camera built from 3D-printed parts, a Raspberry Pi module, and additional materials such as a standalone camera lens. The mount is made up of interlocking, jointed parts, which you can print in whatever quantity you need to make it longer or shorter. When you want to adjust your view, just loosen the locking bolts, then change the angle by tightening them to re-lock it in place. Sneaks suggests using PETG material with extra infill when printing the screws, or they'll be too brittle.
Retro Desktop PC Raspberry Pi Case
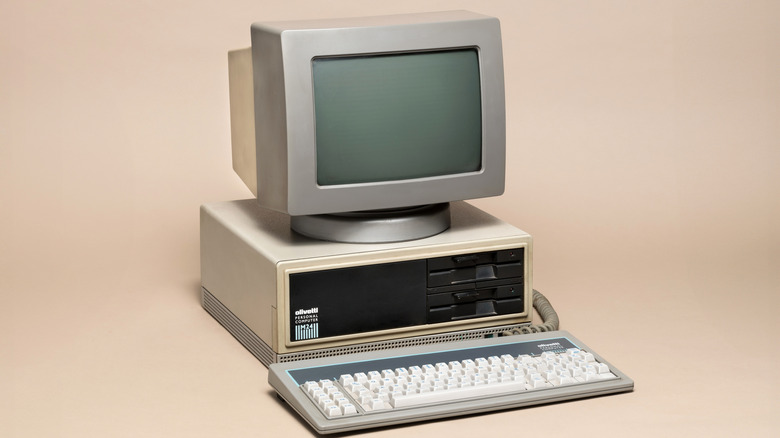
What is a 3D printer if not a tool to bring your fantasies and memories to life? For example, if you had a favorite childhood device that you've lost track of and can't replace in the modern day, a 3D printer could be used to revive it, or at least create a facsimile of it. Printables user Fantasticmrdavid did exactly this by creating a specialized Raspberry Pi case based on their childhood desktop PC.
This cute case is based on the classic 286 desktop PC, including both its tower and a thick monitor. A Raspberry Pi is installed in the tower case, with a copy of DOSBox booted up via an SD card inserted into the tower's front floppy disc slot. The Raspberry Pi is connected to a small flat-screen HDMI display, which is mounted in the monitor and connected via a hole in its bottom. The back of the tower has slots for USB and Ethernet ports, where you can plug in your mouse, keyboard, and internet cables. Put it all together, and you've got a compact recreation of a DOS-era personal computer, perfect for playing classic point-and-click adventure games.
Raspberry Pi Pip-Boy 3000
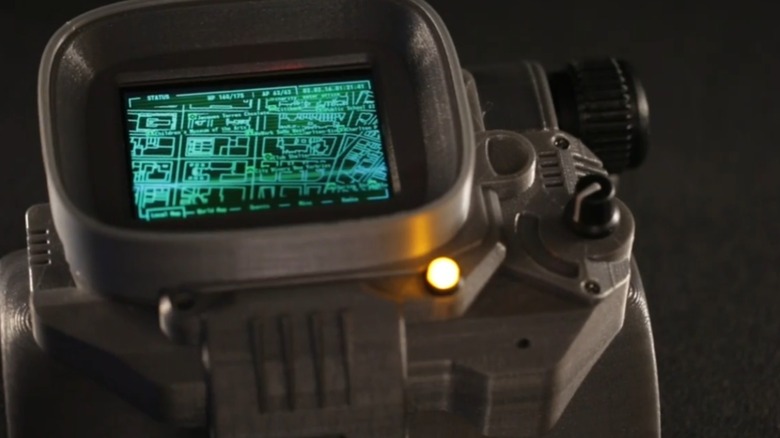
When you think of personal computing devices in pop culture, one that frequently springs to mind is the Pip-Boy from the "Fallout" series, both the games and the live-action Amazon Prime show. This nifty wrist-mounted monitor has appeared in every game in the series, with the 3000 MKIV model used in "Fallout 4" being the most elaborate one to date. With a 3D printer and Raspberry Pi, you can make a game-accurate Pip-Boy to wear yourself.
Thingiverse user Adafruit, which represents a homebrew electronics brand of the same name, designed a remarkably true-to-life 3D-printed Pip-Boy 3000 MKIV with a fully-functional screen and switches. The internals consist of a Raspberry Pi running a proprietary OS and an Adafruit PiTFT display, and include an audio amp and speaker, an analog rotary switch, and a 2200mAh battery. When fully assembled, you can navigate the Pip-Boy's menus using the rotary dial on the top, just like in the game, as well as browse the game's maps and play songs from its soundtrack. The 3D-printed case also has cutouts for the Raspberry Pi's ports, allowing you to plug in peripherals like a mouse and keyboard or a charging cable for the battery.
ZeroBot Pro Raspberry Pi Robot
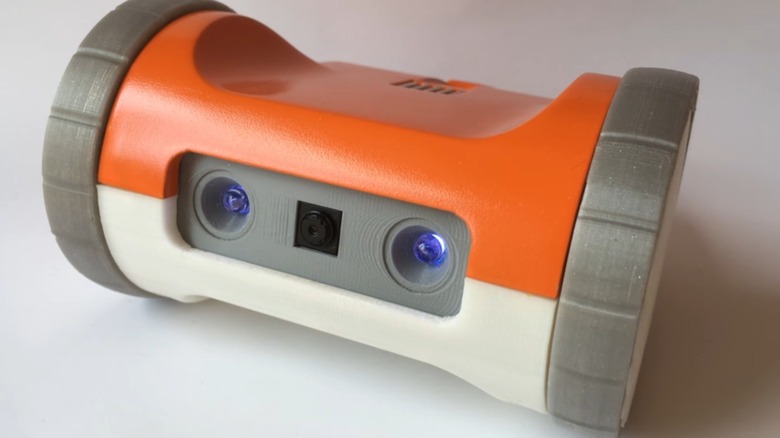
Arguably, one of the end goals of science-fiction replication technology is to create incredibly elaborate constructs, such as fully articulated robots, almost instantly. While we haven't quite figured out the "almost-instantly" part, it is very possible to create a robot using a 3D printer and a Raspberry Pi. In fact, that's exactly what Thingiverse user Wingman94, AKA Max Kern, did in creating the ZeroBot Pro.
Originally created for a Hackaday project, the ZeroBot Pro is a cute little 3D-printed robot that rolls around on the ground using a pair of grippy, articulated wheels. The homemade OS loaded into the SD card inserted into the internal Raspberry Pi allows you to wirelessly connect to and control it using your PC or smartphone. The ZeroBot is equipped with a front-facing camera, so you can see what it sees as it rolls around via its simple user interface. There's a cutout in the rear for a charging port, so you can power it up again easily whenever it runs out of juice.