4 Cool Things You Didn't Know Your iPhone's Weather App Can Do
No list of essential iPhone apps would be complete without the iPhone Weather app, and for good reason. It's one of the few apps that's useful whether you're at home or out and about. Without its temperature and rain forecasts, it becomes much harder to plan what to wear, what chores to finish, what to bring outdoors, and where to go for the weekend.
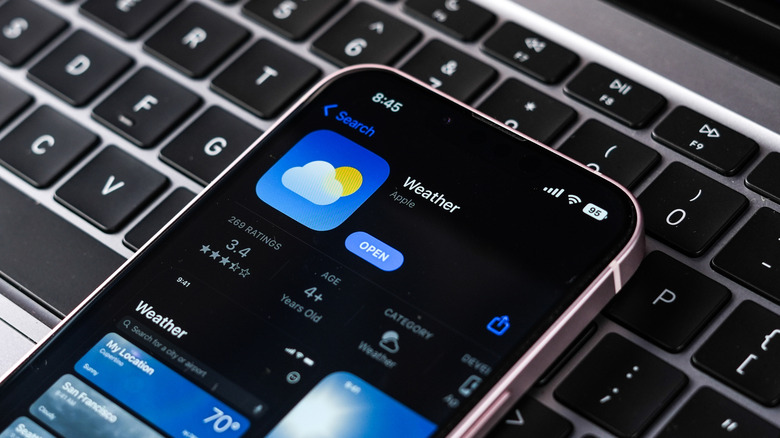
But if you thought that the iPhone Weather app is designed only for telling you the temperature and current weather conditions in your area, you might want to think again. It's actually a treasure trove of weather information, offering much more than just the standard details. In fact, it includes at least ten different data points, such as air quality, wind speed, UV index, humidity, and even visibility level. Under the hood, it has several other nifty functionalities you might not have realized even existed. We'll show you four of these hidden features to help you make the most out of the iPhone Weather app.
Monitor the lunar phases
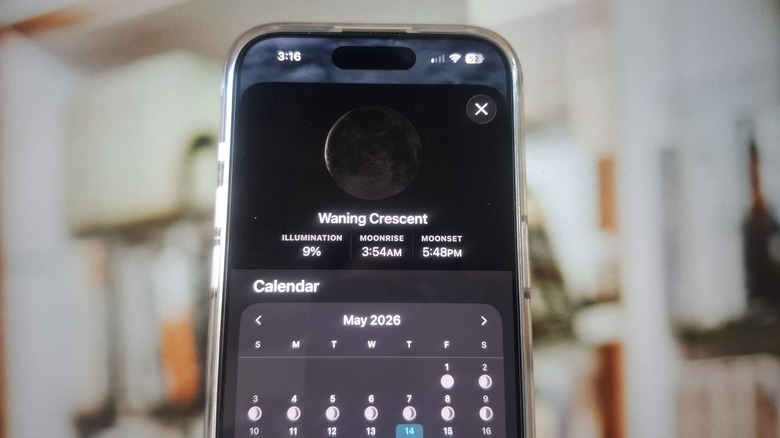
If you often enjoy fishing, boating, skywatching, or taking astrophotos, then you probably monitor the phase of the moon all the time. Normally, you'd just hop on your browser to check, but with the iPhone Weather app, you really won't need to. You can simply open the app and view the moon conditions from there. These conditions include details like what the current moon phase is, how much it is illuminated by the sun, and how far the moon is from Earth. It will also tell you the times for the moonrise and moonset for that day and the number of days until the next full moon arrives.
For convenience, the iPhone Weather app also comes complete with a moon phase calendar. Here, you'll see what the phase of the moon is for certain days and which days the new and full moons fall on. This allows you to plan your coastal or skywatching activity more efficiently. You can also select any day on the calendar to check the moon details for that day. If you need to reference the previous month or plan ahead for next month, the iPhone Weather app features a moon phase calendar for those months, too.
To view all this information, go to the Home screen on the Weather app and scroll to the bottom until you see an image of the moon. This image represents the current moon phase. Tap on the tile to see the lunar details and calendar.
Check the weather conditions from your Home Screen and Lock Screen
There are instances when you want to quickly see the weather conditions in your area but don't want to go through the hassle of unlocking your phone or opening the app. Thankfully, the iPhone Weather app offers some nifty widgets for both the Home Screen and Lock Screen. All you need to do is customize your iPhone's Home Screen and Lock Screen and add your Weather widget of choice. Here's how to do so on your Lock Screen first:
- Go to your Lock Screen.
- Touch and hold an empty space.
- Press Customize.
- Tap on Add Widgets.
- Go to Weather.
- Choose which widget to put on your Lock Screen. Options include Temperature, Conditions, UV Index, Sunrise and Sunset, Moon, Precipitation, Wind, and Air Quality. Depending on which widgets you picked, you can add up to three or four.
- Tap outside the widget panel.
- Hit Done in the upper right corner.
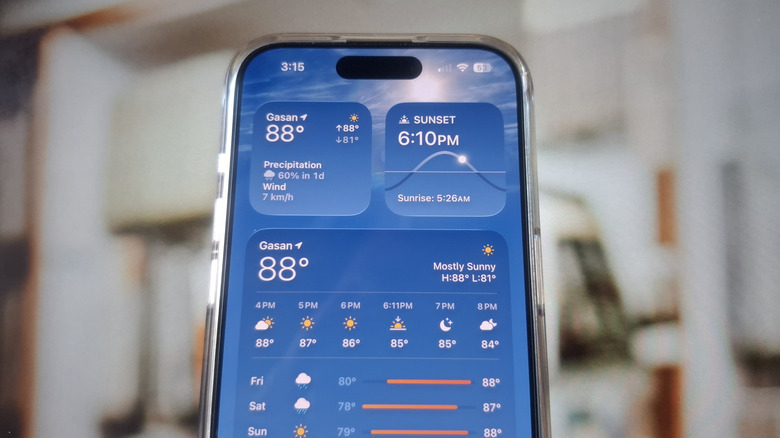
You should then see the widgets whenever you wake your screen. If you have Always On Display enabled, the widgets will also show up there. To pin Weather widgets on your Home Screen, just long-press on the Home Screen, press Edit, and select Add Widget. Open Weather from the menu to view all the available widgets. Compared to the Lock Screen widgets, though, the Home Screen widgets for the Weather app are more limited. You only have the current forecast, current weather details (UV index, wind, precipitation, temperature), hourly forecast, daily forecast, detailed multi-day forecast, and sunrise and sunset times.
Get rain alerts for the next hour
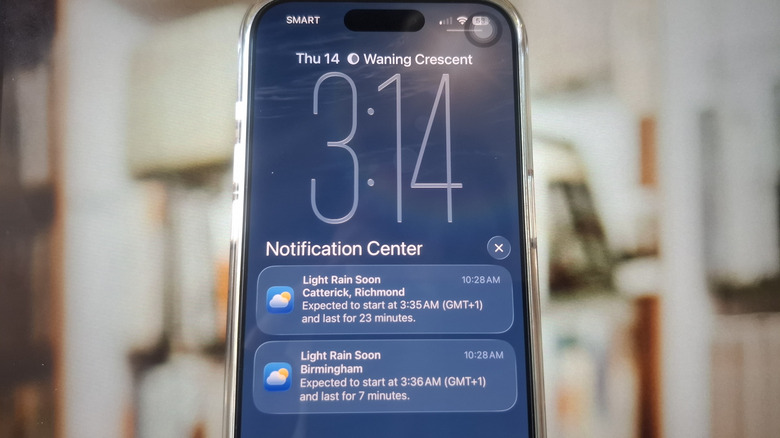
The weather can be so unpredictable in some locations that you might still feel unprepared even after checking your weather app. To make sure you don't get caught in a rain shower while on the go, it's a good idea to turn to one of iPhone Weather's hidden features: Next-Hour Precipitation notifications. Once enabled, you'll get forecasted rain alerts to help you prepare. These alerts tell you what time the rain is expected to start, how heavy it will be (light, moderate, heavy, or extreme), and how long it will last. This feature isn't switched on by default, though, so you need to manually enable it. Here's how:
- On the Weather app Home page, tap the list icon in the bottom-right corner.
- Select the more icon (three dots) at the top-right.
- Go to Notifications.
- When prompted, press Continue to give the Weather app the necessary permissions.
- Tap on your location.
- Toggle on Next-Hour Precipitation.
- Press the checkmark to go back to the locations list.
If you don't see your location or the Next-Hour Precipitation option, your location likely doesn't support it. As of May 2026, this feature is only available in select countries, including the United States, the United Kingdom, Australia, Japan, and Ireland. In some locations, you can make your iPhone warn you about severe weather instead. Other than the notifications, the Weather app also shows you a minute-by-minute rain forecast for the next hour for a specific location. For instance, you might get a message saying, "Rain is expected to stop in 3 min and start again 11 min later," or "Chance of light rain in the next hour."
Interact with a global map of weather conditions
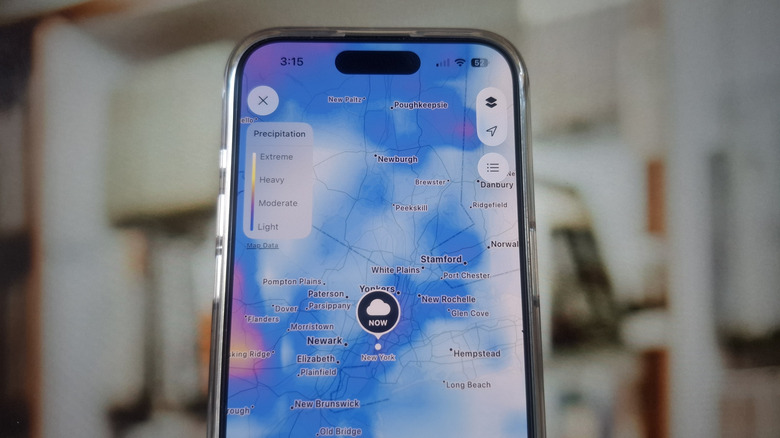
The iPhone Weather features a host of data to help you prepare for today and the upcoming days. But with all the different charts and figures, it can get quite overwhelming to make sense of the forecast. If you're a visual person, you might better understand the data with a weather map instead. The iPhone Weather app has one right on the Home page, and it lets you track four key data points: precipitation, temperature, air quality, and wind.
To open this map, navigate to the Home screen on the Weather app and press the map icon in the bottom-left corner. You'll then see an interactive map of the world with the specific forecast data layered on top. To read the map, refer to the color legend on the left of the screen. It shows you what color corresponds to a specific value. For instance, on the Temperature map, -40 degrees Fahrenheit shows up as violet, 30 degrees Fahrenheit as blue, 90 degrees Fahrenheit as red-orange, and 130 degrees Fahrenheit as deep red. Keep in mind that some data, like air quality, aren't available everywhere in the world, so certain locations will appear colorless.
You can easily switch between weather data types by tapping on the layers icon in the upper right corner of the screen and choosing an option from the menu. For the Precipitation and Wind maps, a forecast timeline will pop up at the bottom. You can scrub the timeline manually or let it play out automatically.