5 Router Settings That Might Finally Fix Your Wi-Fi Dead Zones
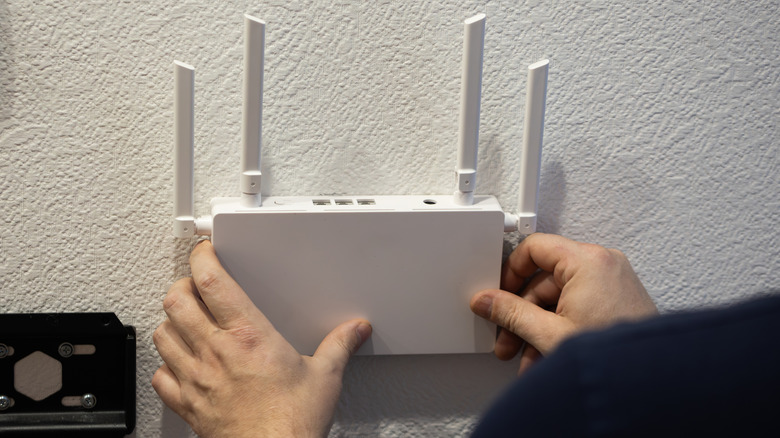
If you are paying for a high-speed internet plan but are still experiencing slow internet, the first thing you need to check is whether the affected device is placed in a dead zone. Dead zones are areas with limited or no Wi-Fi connectivity. This means devices in those areas will suffer from poor speeds, lag, and frequent disconnects. In most cases, these dead zones are caused by physical objects blocking signals, say a wall or metal cabinet, poor router placement, and Wi-Fi interference from other devices. But sometimes, it could be your router's settings to blame, and a few quick changes can improve Wi-Fi coverage.
Modern Wi-Fi routers are packed with features, and not all are optimized for signal strength. The defaults are often configured for convenience. So, if you haven't checked the router settings, it's time you do. Improper or automatic channel selection may be hurting wireless connectivity, or your router may have power-saving modes set up, which will affect Wi-Fi signals. Apart from that, built-in features like beamforming can help send signals in the direction of devices near dead zones, improving connectivity.
If you don't want to invest in hardware upgrades like range extenders or mesh networks to fix Wi-Fi dead zones, these smart settings can improve coverage. The changes may not be dramatic, but with the right settings, you will enjoy better coverage around the house.
Change the Wi-Fi channel
Routers broadcast wireless signals over channels, and if too many nearby routers use the same channel, it will lead to Wi-Fi interference. This is more common in apartments and shared spaces, where too many routers operate close to one another. Keep in mind that the idea isn't just to change channels, but to switch to the least congested one.
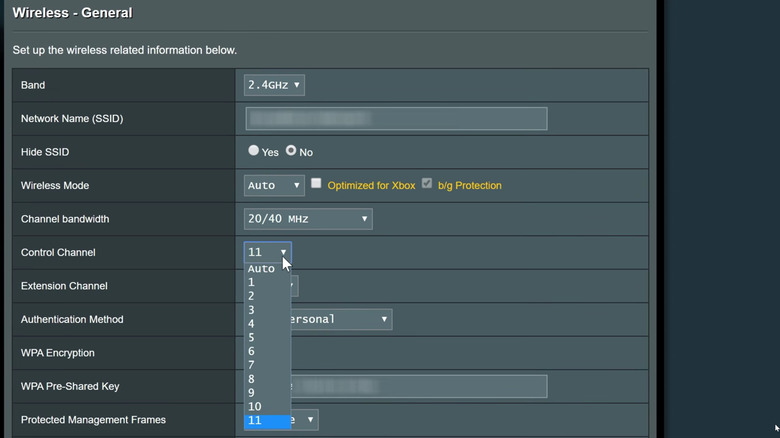
First, install a Wi-Fi analyzer app on your phone. There are several available on the Google Play Store. Once you have the app, run a network scan to find out which channels are the most and least congested. We have to avoid the former and prioritize the latter. Now, open a browser on your PC, and access your router's admin panel through its IP address. For most routers, it's 192.168.0.1 or 192.168.1.1. Enter the login credentials. If you don't know the credentials, look for a sticker on the router for this information. Once inside the admin panel, go to Wireless Settings, and then pick the 2.4GHz band. Choose Manual from the dropdown menu, and enter 1, 6, or 11 as the preferred channel, whichever is the least congested. Similarly, for 5GHz, you should pick between 36, 40, 44, and 48, but there are more options to work with.
This won't magically extend Wi-Fi coverage, but it will improve the connection's stability. This way, you shouldn't face frequent call drops or lags in dead zones.
Switch between 2.4GHz and 5GHz Wi-Fi bands
Another common issue that leads to Wi-Fi dead zones is the band selection. If you have a dual-band router, you will have two bands, 2.4GHz and 5GHz. While 2.4GHz offers better coverage, the 5GHz band delivers better speeds, which can make choosing between the two a lot more confusing. The trick is to pick the right band, depending on signal strength and requirements.
For instance, in areas farther from the router, defaulting to the 2.4GHz band may help you enjoy a more reliable connection compared to the 5GHz band. As for devices that are close to the router, the 5GHz band is more suitable. The reasoning is simple: the 2.4GHz frequency is better at penetrating walls and other objects compared to 5GHz. A simple solution for this is to only connect to the 2.4GHz band on devices far from the router. If any device keeps connecting to the 5GHz band, forget that network entirely within the system settings.
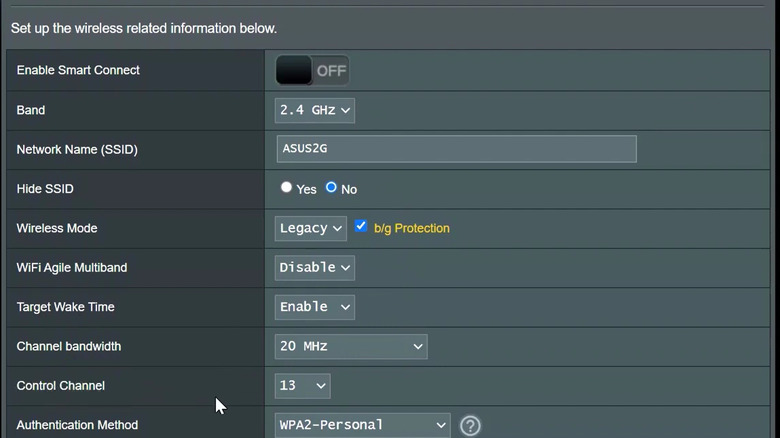
Another option is to utilize a built-in feature called Smart Connect or band steering. It basically merges available bands under a common Wi-Fi name, whether it's 2 or 3 (if the router supports 6GHz as well), and then automatically assigns the best band to every device on the network. To enable the feature on supported routers, access your router's admin panel, go to Wireless Settings, and turn on Smart Connect or a similar option.
Enable beamforming
Beamforming is an often-ignored feature on routers that can improve wireless signal strength for important devices, say your smart TV, PC, or smartphone. In simple terms, the technology helps routers direct signals toward connected devices. By default, routers broadcast signals in all directions. But by focusing those signals toward the device, you will experience better connectivity. There are two types of beamforming, Implicit Beamforming and Explicit Beamforming. The former, Implicit Beamforming, works across devices, even if the device doesn't support beamforming. Explicit Beamforming, on the other hand, only works with devices that support the technology.
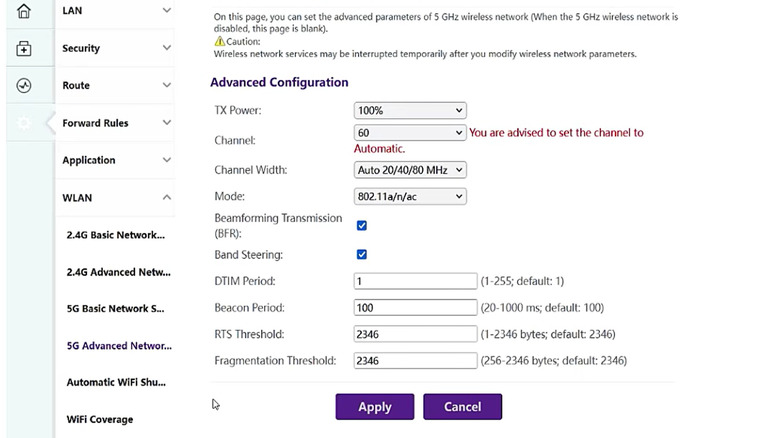
Also, beamforming is generally enabled by default on routers that support the feature, but you should still verify that. This quick change can improve wireless performance and connection stability for devices near existing dead zones. To do that, open the router's admin panel, head into Advanced Wireless Settings and tick the checkbox for Enable Implicit Beamforming. Depending on the manufacturer, it may appear under a different name or section, but it's usually easy to find.
Disable power-saving modes
Some modern routers come with features like Power-Saving or Eco-Mode, which are designed to minimize energy consumption, especially during periods of low activity. Theoretically, it's a good idea since routers are one of the devices you should unplug to save on electricity bills. But in practice, power-saving mode may lead to reduced performance and range, and dead zones with already poor connectivity might be the worst impacted areas.
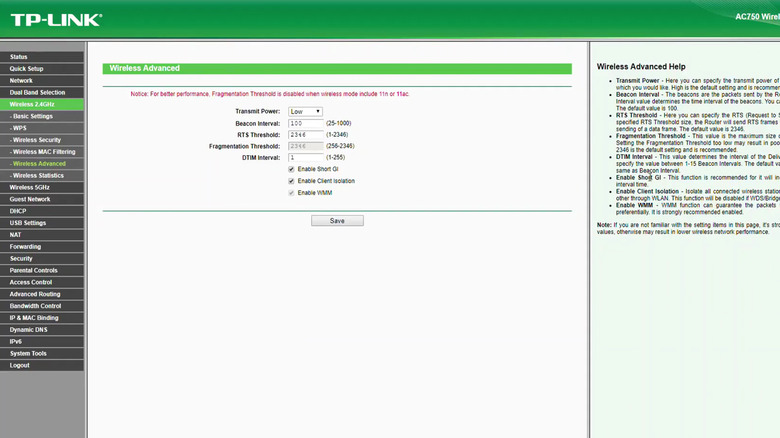
On supported TP-Link routers, you will find options like "Normal Mode," "Power-Saving Mode," and "Ultra Power-Saving Mode." These are usually found inside System settings under Advanced. If you have either Power-Saving or Ultra Power-Saving mode set up, you should switch to "Normal Mode". On other routers, you will find a similar setting, sometimes labelled as "Eco Mode." Apart from that, there could be other power-saving features set up, say the ability to reduce transmitting power. Make sure that, too, is set to 100%. The idea is to disable all such features that might be reducing the performance or coverage of your router.
Reset the router
If nothing else worked, resetting the router could do the trick. Remember, resetting doesn't directly improve Wi-Fi coverage or performance, but if improperly configured router settings are responsible for poor coverage and dead zones, it should help. When you reset the router, everything reverts to its default settings.
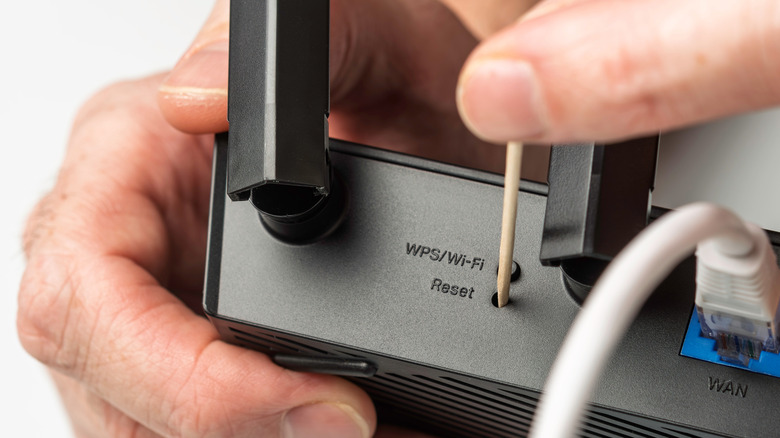
Most routers have a dedicated reset button. If yours has that, hold it for 5-15 seconds to reset the router. On some models, you also have the option to reset through the admin panel or the router's app. Post-reset, you will have to reconfigure everything from scratch, including the network name and password. Also, after the reset, check for any available firmware updates and install them. You shouldn't ignore firmware updates on devices like routers as these improve performance and security.
Keep in mind that while reconfiguring settings or resetting the router can improve signal strength and internet speeds, the effect might not be significant if the problem is caused by improper router placement or Wi-Fi interference. So, always ensure your router is placed in the best spot, or consider using a Wi-Fi extender or mesh network to get rid of dead zones.