5 Emergency Features To Enable On Your iPhone Before It's Too Late
While Apple's iPhone can be a great tool for keeping in touch, capturing memories, surfing the web, and entertainment, it's also a useful safety tool in the event of an emergency. There are many safety features baked into the device to help you in the event of an unfortunate situation, whether it's when you feel unsafe, are lost, were in a car crash, or suffered a medical emergency.
Some of these features are enabled by default, like emergency satellite SOS, which works with iPhone 14 or later allowing you to text emergency services even if you're off the grid with no Wi-Fi or cellular connection. It's free for two years and requires a clear view of the sky to work automatically once you try to make a call in an emergency situation. Another feature that's on by default on supported iPhones and Apple Watches is Crash Detection, perhaps one of the Apple Watch safety features you maybe didn't realize existed. It will sound an alarm for 10 seconds, then contact emergency services on your behalf if a severe crash is detected.
But other features need to be manually enabled to work. As with any precautionary measure, you don't want to let these sit on your "to-do" list only to realize it's too late and you missed a valuable, potentially critical tool just when you needed it. A quick check through the settings of your phone will help you verify if the most useful emergency features are ready to go.
Medical ID
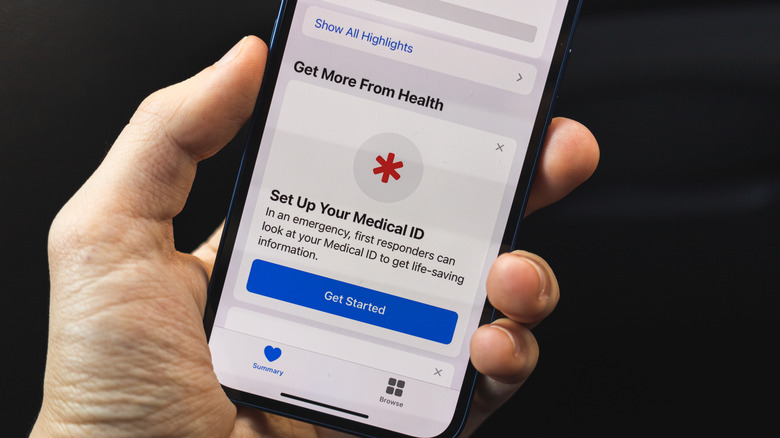
One of the first things you should do after setting up the core details for a new iPhone is add your Medical ID information. But don't worry, you can still add it later if you haven't already. This is crucial information that will appear on the Lock Screen in the event of an emergency, without someone having to enter your passcode. You can include pertinent details like medical conditions, allergies, and your emergency contact person, all of which can make a huge difference to first responders on a scene, or even random people who might be looking to help if something happens in a public place.
To set it up, open the Health app on your iPhone and select Summary. Select your profile photo in the upper-right corner and choose Medical ID. From here, enter details like what medications you take and conditions you might have. There's even a space to add notes, like advising of your blood type or previous surgeries you have had. Lastly, make sure to turn on Show When Locked — failing to set this up is one of the things you should never do with your iPhone.
Fall Detection
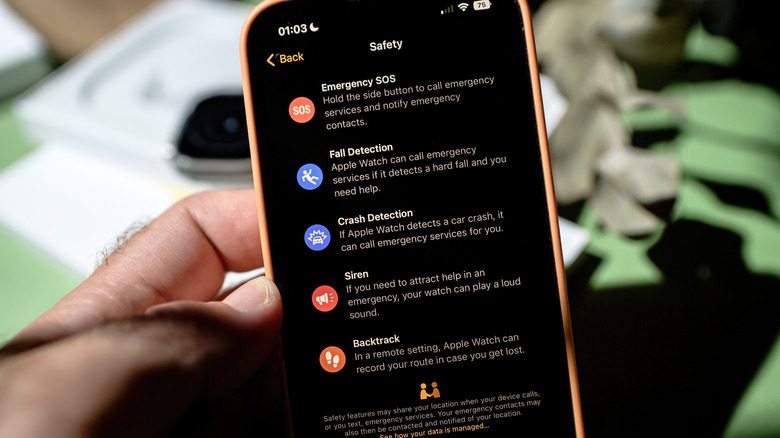
Anyone who grew up in the '80s remembers the iconic "I've fallen and I can't get up" commercials promoting medical alert products. Now, your iPhone working alongside an Apple Watch can serve as that critical aid. With Fall Detection, if the Apple Watch detects a hard fall, it will sound an alarm and show a message asking you to confirm. You can choose to make an SOS call to emergency services or indicate "I'm OK." If a minute goes by without a response, the device will make the call for you as long as your phone is connected and nearby (or if you have an Apple Watch Cellular and a plan). It will also send a message to your emergency contacts advising of the detection and providing your location.
For this to work, alongside having a compatible Apple Watch (Series 4 or later) and iPhone (14 or later if you want to take advantage of satellite-based Emergency SOS), you will need to enable the feature first. On your iPhone, open the Watch app, select My Watch, then Emergency SOS followed by Fall Detection, then adjust the slider to turn it on. There's also an option to have it always on or only when you're in an active workout.
Receive government and safety alerts
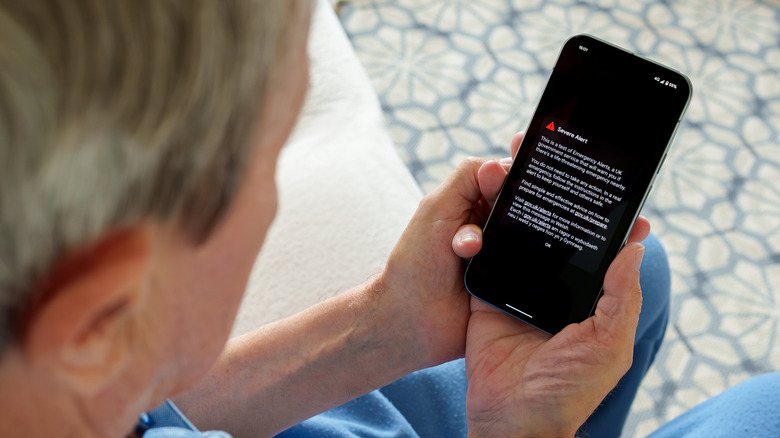
Is there an AMBER alert for a missing child? A pending severe weather condition or an imminent threat? You want to know about it, and you don't want to have to check social media, turn on the news, or wait for a friend or family member to call. You can set up government, emergency, and safety alerts so they are delivered right to your iPhone in a timely fashion, allowing you to respond accordingly to a situation where every minute counts.
Go to Settings on your iPhone and select Notifications. Scroll all the way to the end and choose Government Alerts, then turn them on. Enhanced Safety Alerts, available in the same menu, can also be turned on for things like earthquakes and other imminent threats. Note that these alerts only work with iPhones that have an active SIM or eSIM and they may not be available in all countries. In some countries, they are not optional, in which case, you won't see the toggle in this menu. For example, in Canada, cellular carriers are mandated to push these notifications out, so the setting to opt out or disable them is not present.
Add a Legacy Contact

No one ever wants to think about death, but along with taxes, it's one of those inevitabilities of life. When someone sadly passes on, without a passcode, it's nearly impossible to retrieve their iPhone data. You can make this easier for loved ones by adding a Legacy Contact to your account, one of the features added with iOS 15 way back in 2021. This is an individual that you give express permission to access certain data, like photos, messages, notes, files, and device backups, in the event of your death. They won't, however, be able to access subscriptions or data in your iCloud Keychain like payment information and passwords. Once you set them up, you get a special access key to give them that they can then provide to Apple along with a death certificate should the need come. Only then will Apple release your information.
With an iPhone running iOS 15.2 or later (and iPad and Mac), go to Settings, select your name, choose Sign-In & Security, then Legacy Contact. Select a member from your Family Sharing group, or if you don't have one, select Choose Someone else and select the desired person from your Contacts list. From there, give the trusted individual, who can be anyone over the age of 13, the required access key. It's a good idea to also store the access key with your estate planning files.
Adjust Emergency SOS features
You probably already know that your iPhone has Emergency SOS features, but did you know you can also adjust how they work so it's most comfortable for you? You'll also want it to be easy to remember in the event of an emergency. Under Settings > Emergency SOS, there are various options you can turn on or off. Turn on Call with Hold and Release, then if you hold down the right-side button with either of the left-side volume buttons continuously for a length of time, a countdown will begin until an alarm sounds. Release the buttons and the phone will instantly contact emergency services. There's also the option to Call with 5 Button Presses so that if you press the side button rapidly five times in succession, the same will happen.
Turning on both will give you options if you forget one method. You may find one generally easier than the other, or one more conducive to your comfort or a specific situation than the other. If you have trouble holding down the buttons for an extended period because of a loss of strength, the five-button rapid press might be easier. Conversely, if you don't have the dexterity to press five times, the hold and release method might be simpler. All these safety features are ones you should set up on your iPhone, designed to help you during critical times, but in hopes that you'll never actually need them.