6 Unexpected Practical Uses For Your Raspberry Pi
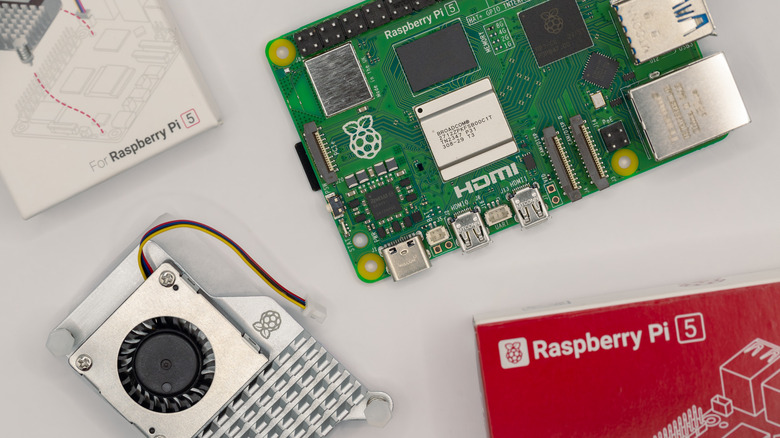
The Raspberry Pi is a small-factor PC that can easily fit in your palm, but despite its miniature size, these computers can still pack a punch, with the latest Raspberry Pi 5 featuring 16GB of RAM and a quad-core processor, all for a reasonable price tag of $120. Even though these computers are mainly used for educational purposes, such as learning programming or robotics projects with the onboard GPIO pins, the overall use of these micro workstations is virtually limitless, and there is a whole community dedicated to creating DIY projects.
If you own a Raspberry Pi and are looking around to play with these computers, we've chosen a select few uses for them that involve anything from creating a cloud server to blocking network-wide ads and more. These ideas come cheaply, are practical, and will help out with everyday tasks requiring minimal setup, with only a few accessories needed to supercharge your project.
Set Up Your Own Raspberry Pi-Powered Cloud
Data preservation is essential for every computer owner, and if you don't have a backup of your valuable information, you're risking losing months or even years of hard work. Creating a copy of your data on the internet can be convenient, but using third-party services like Google Drive and iCloud+ isn't always an ideal solution, and there are certain things you should never keep in cloud storage, as they are susceptible to data breaches and hacks.
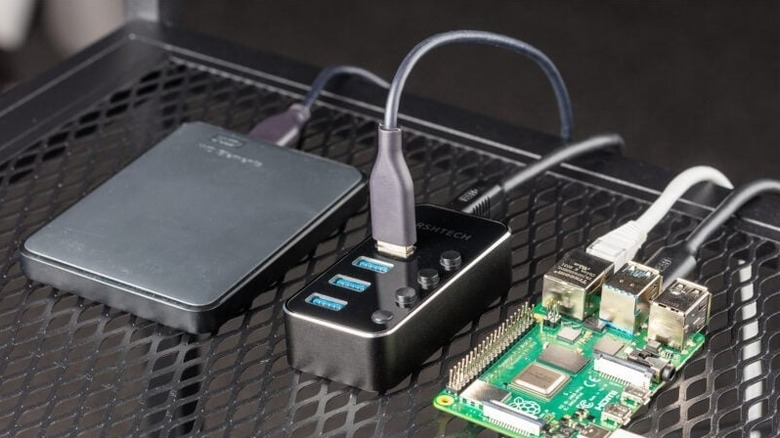
Therefore, you can create your own cloud for cheap using a Raspberry Pi and keep your private data off the internet. This cloud storage setup can be self-managed 24/7 with complete control and at no recurring cost since it requires only a one-time fee. For this configuration, a USB 3.0 and decent RAM are recommended, which you get from a Raspberry Pi 4 or later. Then, you'll need storage drive(s), a case to protect them, a power supply, an SD card to install the OS, and an Ethernet cable.
Pi My Life Up has a great tutorial on setting up a cloud server on a Raspberry Pi with NextCloudPi, a community project with a user-friendly interface and mostly free features. While this cloud layout provides local access to files, you can also forward ports on your router to enable remote access.
Upgrade Your Old Monitor Into a Smart TV

Parting with old tech isn't easy, and chances are, you might have tons of gadgets stashed somewhere in your house. There are interesting ways to recycle old electronics to go green and avoid harming the environment. Specifically, you can repurpose your old TV or a display with a Raspberry Pi. These mini-PCs make them much more flexible than new Smart TVs, with full PC functionality, and the best part is that they won't even clutter your setup because of how tiny they are, and can be hidden anywhere.
To transform your display into a smart TV, you'll need to install LibreElec on an SD card via Raspberry Pi Imager, software used to install different OSes for your mini-PCs. You'll also have the option to choose a version specific to your Raspberry Pi since this OS is specifically optimized for these microcomputers. From there, install Kodi on top of LibreElec, an open-source entertainment hub that lets you install add-ons for YouTube, various streaming services, weather forecasts, and more. Kodi is a versatile media player that can also allow you to manage local files on your network, stream live TV, and play music via Spotify, all without ads from the platform itself. Other than that, it also supports integration with smart home systems.
Host Your Very Own Minecraft Server

Having your own Minecraft server is a flex, but renting one is sometimes not the best option, considering the restrictions you may be imposed by the third-party providers. As such, you can self-host a Minecraft server if you have a Raspberry Pi, and the setup is relatively cheap. Self-hosting gives you instant and complete access, with the option to customize it to your needs, whether that's installing mods, plugins, or more settings. It is important to note that if you plan on inviting many players to this server, you'll need a newer Raspberry Pi with better RAM to manage such a server load.
For the complete guide, Tom's Hardware has a nice tutorial that involves installing Java and the Minecraft server on your Raspberry Pi, then putting it on the internet to make it accessible. The entire process is pretty easy, even for those who aren't very tech-savvy.
Stop Online Ads Before They Hit Your Devices

Ads are probably the most annoying parts of using the internet, and especially those pop-up commercials that can ruin the browsing experience. Disabling ads has also been tough since many websites like YouTube don't allow ad blockers, which in itself can hog up quite a few of your PC resources. As such, the Raspberry Pi can be deployed to block ads for your entire network so they don't reach your devices, ensuring an easier internet experience.
Pi-hole can be used to block network-wide ads right from your router. The way it works is that it acts like a DNS sinkhole and filters out domains that typically serve ads or tracking services. For this setup, you'll need a Raspberry Pi, an SD card, a power supply, an Ethernet cable, and a USB cable. Then install Raspberry Pi OS on the SD card, insert it into your mini-PC, install Pi-hole, and configure your network to use Pi-hole. The detailed procedure with a step-by-step walkthrough can be found on the official Raspberry Pi website here.
Self-Host a Website for Free

Instead of letting the internet control you, you can control the internet for once by self-hosting your website and ultimately getting complete autonomy over your website and not having to pay a subscription fee. Another practical use scenario for the Raspberry Pi is to make it host your own website, and as complex as the process may sound, doing so is reasonably easy.
To do so, install a web server, grab your Raspberry Pi, ensure that it's up-to-date, and ensure that Apache2 is uninstalled from the computer so that it doesn't interfere with the following steps. Then you can install a web server like NGINX, fetch the local IP address, and open it in any browser. Since NGINX isn't configured for PHP, you'll need to go through a few additional steps to actually build dynamic websites and applications. Moreover, external access will necessitate additional router configuration. Here's a tutorial on Pi My Life Up that explains each phase of the procedure.
A Mini Retro Game Console

Video game emulation, in a sense, preserves older media that would otherwise be lost to time. It doesn't take much to replicate the hardware of vintage consoles like PlayStation, SNES, Atari 2600, and Nintendo 64. Making a retro gaming emulator is one of the best beginner projects for the Raspberry Pi, and it is much better than even the best retro handhelds because of its flexibility.
RetroPie is arguably the best platform for this purpose, and it bundles nearly a dozen emulators for retro consoles, including NES, SNES, Nintendo 64, Game Boy, and many more. The best part is that you get tons of features not present on the original hardware, including shader enhancement, customizable aspect ratio, extensive controller support, personalized themes, and more.
To install RetroPie, you'll get an option to flash the SD card via Raspberry Pi Imager, with options for each version of Raspberry Pi you'll have. Then, you can boot up the SD card on your Raspberry Pi, attach a controller, and configure the buttons. While the platform comes with most emulators installed, you'll still need to add legally-owned ROMs on your own, as the emulator doesn't come with anything included. For that, you'll need an external storage option such as a USB stick or maybe even an SSD.