5 Smart TV Settings That Can Fix Washed-Out Colors
If your smart TV has washed-out colors, if the picture looks faded or gray and not rich and vibrant, it rarely has to do with the display panel. More often, the issue stems from misconfigured display settings, an incorrect picture preset, or modes designed to alter the display. The smart TV is doing exactly as instructed, the instructions just aren't right.
This is even more common with new smart TVs, because models on display in stores usually have high brightness and vivid levels to make them appealing under fluorescent lighting. But the lighting in homes is typically not as bright, and when the TV is operated with the same settings, the colors may look washed-out. Keep in mind that when it comes to display settings, there's no universal preset. Instead, the ideal settings come down to the individual setup, lighting conditions, and display source.
The good news is that fixing washed-out colors often takes less than a few minutes, once you identify what's triggering the problem in the first place. But generally, reconfiguring a few does the trick and brings picture quality back to life.
Switch to another picture mode
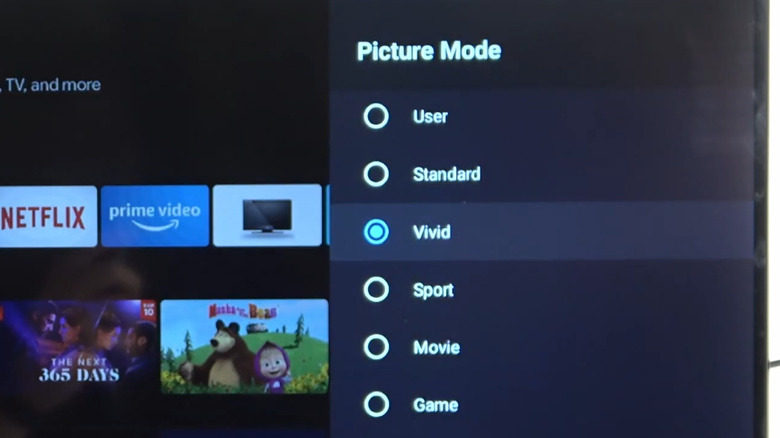
One of the most common reasons behind faded colors is the configured picture preset or mode. On new smart TVs, it's generally set to Vivid, Dynamic, or Standard. If you never changed the default settings, it's time you start with the picture mode.
To change the picture mode, open your smart TV's settings, and head into the Display or Picture settings. Here, you'll find the different presets. Choose "Cinema," "Movie," "Calibrated," or "Filmmaker" from the list. These may be labeled differently depending on the manufacturer. The idea is to select a different preset, one that aligns with the kind of content you watch on the smart TV. For instance, if it's movies or shows, the "Cinema" or "Filmmaker" mode should be the top choice.
After you make changes, the picture may initially seem dimmer or warmer, and it's normal. These are the true colors. And once your eyes get used to the new mode, the image will look much richer.
Adjust the brightness, backlight, and contrast
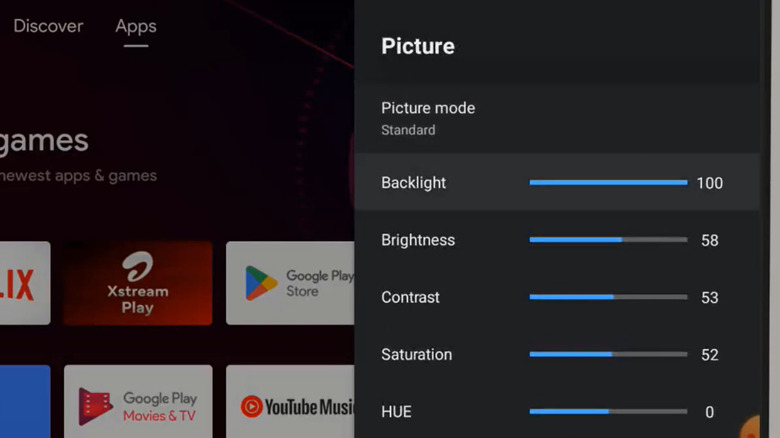
When colors look faded or washed-out, many assume that adjusting brightness or contrast alone will fix the problem. However, that's not always the case. You must get all three — brightness, backlight, and contrast — right. The "Brightness" setting, also referred to as the black level, on your smart TV controls how dark the darker parts of the picture get. To adjust brightness, find a dark scene from a show or movie, preferably a night scene, and hit pause. Now, lower the brightness until the black gets really black. Then, gradually increase the brightness and aim for a level where you can clearly see the details in those dark parts of the screen.
The "Contrast" setting on your smart TV controls how bright the brighter parts of the picture get. To adjust it, find a frame with a lot of bright spots like a daytime sporting event with white clouds visible in the background. Even a beach shot will do. Now, increase the contrast to a high level, then start decreasing it gradually until the white parts are crystal clear. This is the ideal setting.
Backlight, often confused with brightness, controls the light output of the display, and it's as critical as the other two. The optimal backlight levels depend on the lighting around the TV and the viewing experience you want. Generally, it should be on the higher side for brighter rooms, and on the lower side for darker spaces.
Disable power saving mode
As surprising as it may sound, if your smart TV is currently running in power saving mode, it could be causing the colors to appear washed-out. In power saving mode, the TV automatically lowers the brightness and backlight, which often makes colors lose depth. Several manufacturers enable it by default, so it's worth checking.
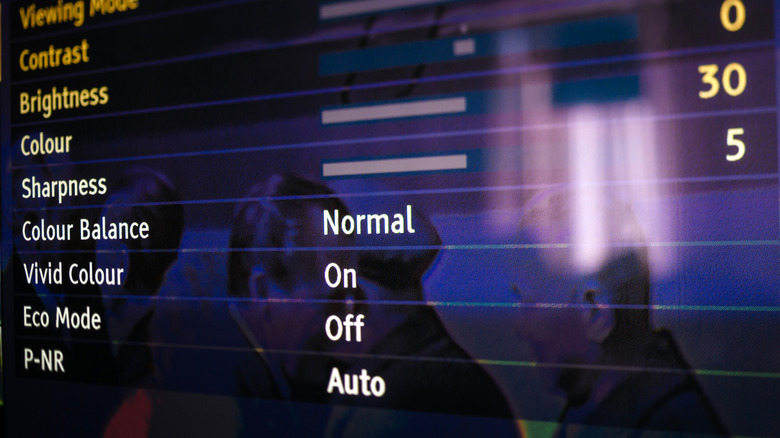
To disable power saving mode, enter your smart TV's settings, go into the General or System section, and look for an option labeled "Eco Mode" or "Power Saving Mode" and disable it. Also, if you find an "Adaptive Brightness" setting, turn that off too, since it auto-adjusts the brightness based on the room lighting.
Disabling power saving mode does have a downside. It'll increase the TV's power consumption. The extent varies from model to model, but it's usually never too high. If picture quality matters more than small power savings, disabling power/eco mode is the smart choice.
Adjust the RGB range
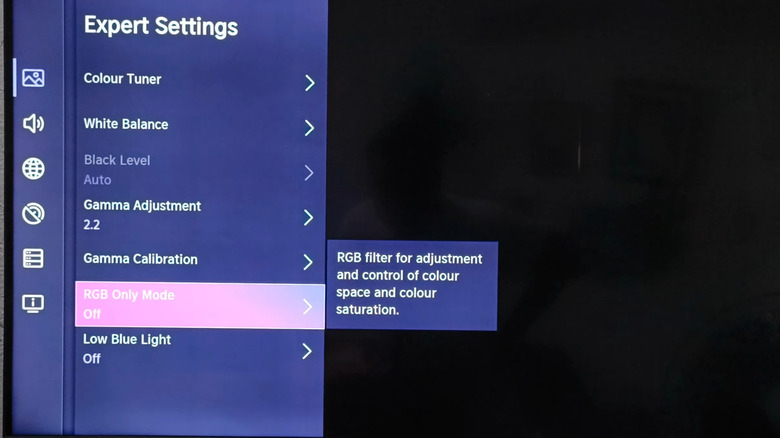
If you're watching content from another device, say a computer, console, or streaming stick, an RGB mismatch between the two could trigger the problem. While computers usually operate on a full RGB range (0-255), smart TVs, Blu-Rays, and other similar devices use a limited range (16-235) for a better viewing experience. When the device sends Full and the TV expects Limited range, it interprets black as grey and ultimately colors start to look washed-out. The fix is to match them.
To verify whether RGB mismatch is the issue, check if colors look deeper on built-in apps but faded and washed-out on connected HDMI devices.
To adjust the RGB range, open the smart TV's settings, enter the advanced picture settings, and look for "HDMI Black Level" or "RGB Range." In here, you'll see the "Auto," "Limited," or "Full" options. Select Auto or Limited if you're watching movies or shows since that's the adopted industry standard. For gaming or when using the TV as a computer monitor, go with the Full option. It ensures an optimal viewing experience.
Check Game Mode and HDR settings
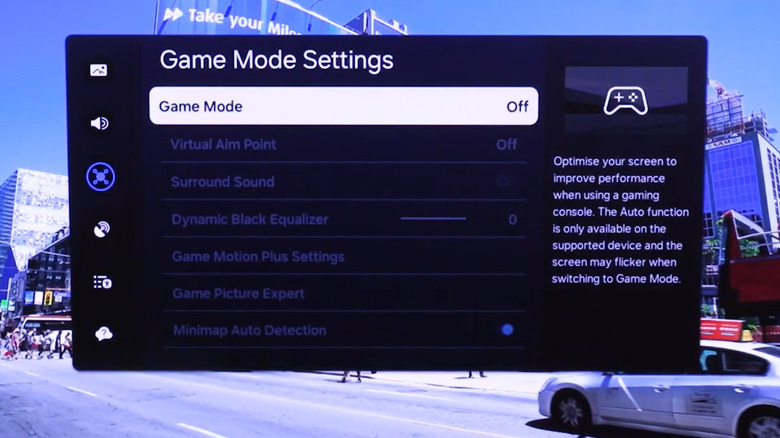
Game Mode is another common issue behind poor video quality. The mode basically disables certain image processing features to minimize input lag, which helps during gaming. But when it comes to watching movies and shows, Game Mode can actually make the colors look faded or less deep. So, if it's currently turned on, disable it and check whether the picture quality improves and colors no longer look washed-out.
Other than that, the HDR functionality, if not configured properly, can make images look dim and grayish. First, if you recently made any changes to HDR settings, revert to the previous setup. If that doesn't work, you can run HDR calibration for the connected device if supported.
Lastly, you can try disabling HDR. For some smart TVs, even this did the trick. Again, there's no universal preset here. The best option depends on the TV's capabilities and how you use it.