8 Essential Macbook Trackpad Features You Didn't Know About
Laptops have shipped with various pointing devices over the decades. Built-in trackball mice were once quite popular, but there's also that weird rubber nub that's now a hallmark of Lenovo ThinkPad laptops, which the company has dubbed the TrackPoint. However, given Lenovo is one of the most successful major PC brands, maybe they were on to something with that design choice.
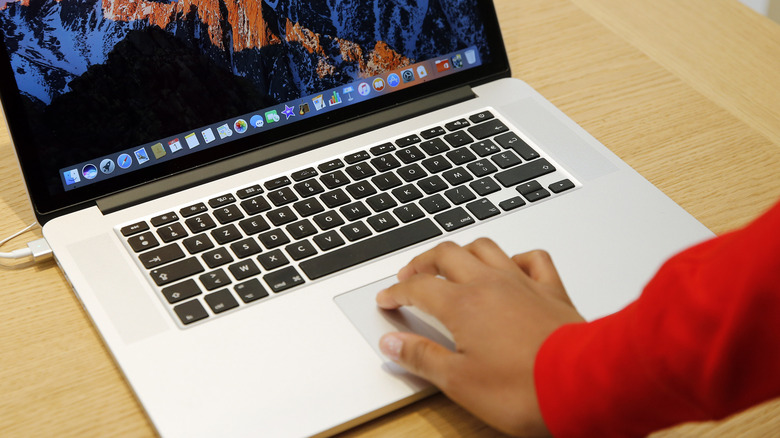
Regardless, the trackpad has become the de facto default pointing device of choice for laptops, and the Apple MacBook is widely regarded as having the best trackpad in the business. It's large and responsive, and few laptops on the Windows side of the fence come close in terms of both feel and functionality. In our MacBook Neo Review, we found that even Apple's cheapest, most budget-friendly laptop ever has a trackpad that's "responsive, smooth, and very high quality."
Here's the thing, though: While the MacBook trackpad is amazing just for its basic vanilla features, there's so much more functionality built into the unassuming rectangle than one might think. With the various gestures your MacBook trackpad can understand, paired with various settings afforded by macOS, you can transform the way you navigate your MacBook using the trackpad. With certain tweaks, you might even find that you prefer using the trackpad over an external mouse! Best of all, most of the MacBook's built-in trackpad superpowers can be customized to your needs.
Force click unlocks hidden actions across macOS
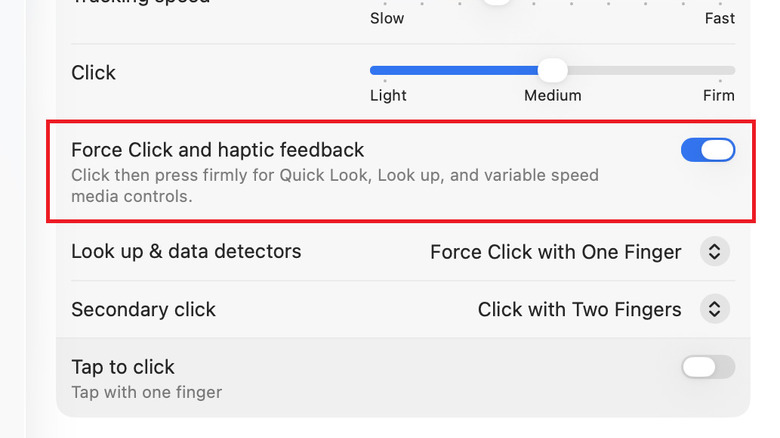
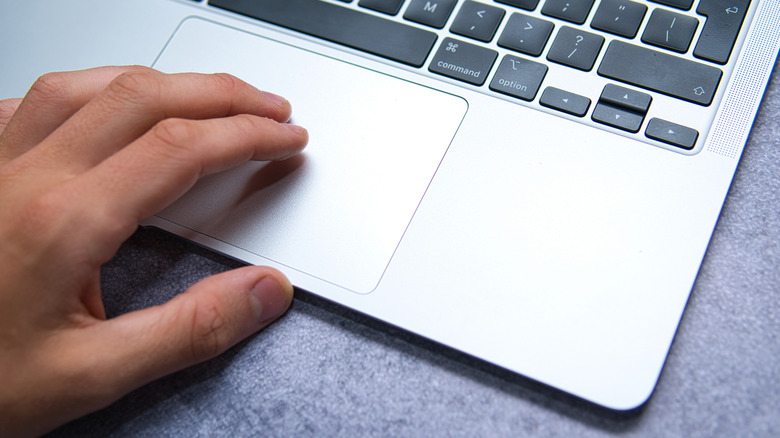
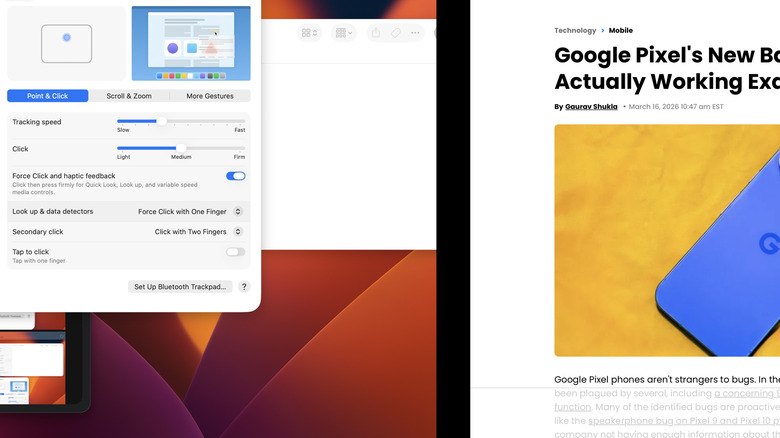
With the exception of the MacBook Neo, current MacBooks don't actually have mechanical trackpads. Instead, they feature Force Touch pads with a haptic feedback motor and pressure sensitivity. So, when you "click" them, that feeling of the pad engaging is a clever illusion created by Apple's Taptic Engine. This allows for a neat party trick in the form of Force Click — which officially has nothing to do with Star Wars, but the sleek functionality might indeed make you feel like a mystical space wizard when you use it. Force Click is active by default, but you wouldn't necessarily know about it unless you discovered it by accident or read about it somewhere.
To use Force Click, simply hover your mouse pointer over the icon or screen element that supports Force Click actions. Press the touchpad until you feel the first click, then keep pressing until you feel a second click. It should feel like your finger is pushing into the trackpad, but again, that's just a haptic illusion. As an example, you can use this feature to rename or preview all sorts of file types in Finder, including PDFs, video files, and text documents. Apple's official Force Click reference page has a list of all the ways you can use Force Click.
Three-finger dragging makes moving UI elements dramatically easier
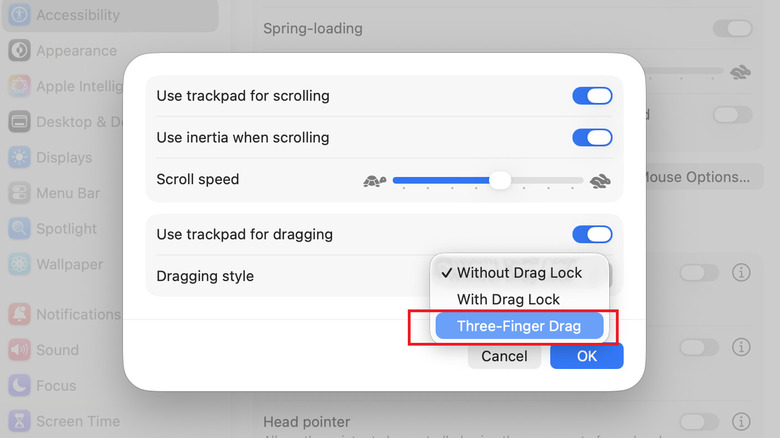
Three-Finger Drag is an accessibility option in macOS that you'll find under System Settings (or System Preferences) > Accessibility > Pointer Control > Trackpad Options. Once there, toggle on the "Use trackpad for dragging" option, then change the dragging style to Three-Finger Drag.
What does going through this process get you? The whole point of Three-Finger Drag is to allow you to click and drag onscreen items without needing to apply pressure to the touchpad. This makes for a welcome accessibility feature, since it can help those who may be unable to maintain consistent pressure on the trackpad while moving their fingers across it. However, even if you don't have such troubles, some may find it more comfortable to use the Three-Finger Drag feature regardless.
Once you've activated Three-Finger Drag, as soon as you have three fingers on the touchpad, it will be interpreted as a click-and-hold input. Move your three fingers in unison to drag an item wherever it needs to go, whether it's an application window, a file, or any other kind of draggable UI element.
Swipe up with three fingers to instantly see everything
Swiping up with three fingers is one of the most useful gestures on any Mac with a trackpad. Even if you're using an external mouse with your MacBook, sometimes it's worth switching to the trackpad for an easier, more streamlined experience of performing certain actions using pre-defined gestures. The three-finger swipe is just one of many such efficient gestures.
Using an upwards three-finger swipe, you can instantly activate Mission Control. This interface gives you an overview of everything happening on your computer. That includes not just your current desktop but also all of your virtual desktops. You can easily move app windows from one virtual desktop to the next, close what needs to be closed, and manage all your applications from a bird's eye view. This works even if you're a dual monitor user, since each monitor connected to your MacBook has its own set of virtual desktops and apps.
To exit Mission Control, just swipe down with three fingers and you're back to your prior screen. The trackpad isn't the only way to open Mission Control, though. The next-best way is to press the Mission Control shortcut on a Mac keyboard. It's usually the F3 key, although you may need to press and hold the Fn modifier key if you've set your Mac keyboard's function row to act as function keys.
App Exposé shows only the windows for the current app
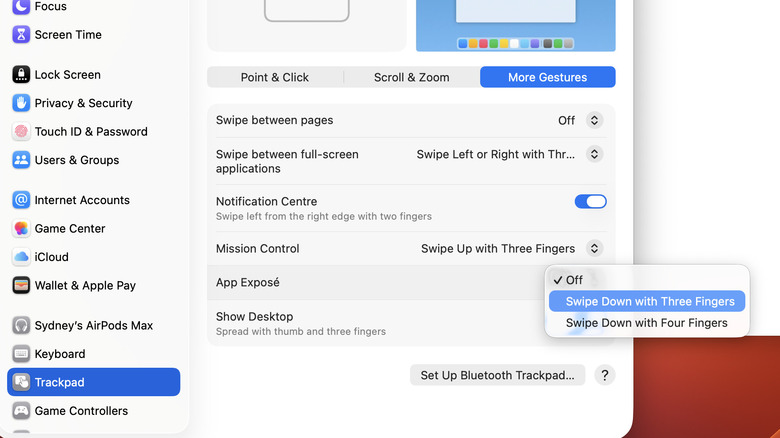
App Exposé is a rather interesting macOS feature. With the feature activated, swiping down from a normal desktop view will show you all windows associated with the currently active app. So, for example, if you have numerous browser windows open and have one of them active on the screen, this gesture will bring up all open windows for that same browser.
To enable App Exposé, go to the Trackpad section of System Preferences (or System Settings) and look under More Gestures, where you'll find it under its own little section. There, you can choose to activate it with either a three- or four-finger downward swipe.
If you never have multiple windows open for the same app, you wouldn't necessarily need this feature, and Mission Control would suffice for you most of the time. However, if you're a professional who uses several app windows for a single application simultaneously, App Exposé could be the lynchpin of your workflow.
Three-finger tap or Force Click instantly looks up words
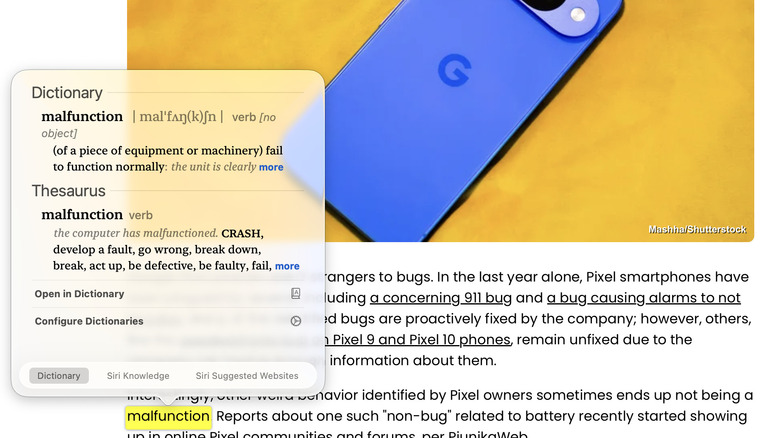
You know how on e-readers like Kindles or Kobos, you can look up any word in a book you're reading by tapping on it? Well, macOS has a similar feature. By using the Look Up function you can instantly get a dictionary definition or short encyclopedia excerpt for a word or term you've selected.
If you have a MacBook with a Force Touch haptic touchpad, then the Force Click gesture will activate the Look Up feature. If you have an older Mac, or the new MacBook Neo, you can use a three-finger tap to do the same job. If you prefer using the three-finger tap on a Mac with a haptic trackpad, you can change your preference under the "Look up & data detectors" section found under Trackpad > Point & Click.
This works on text in both apps and browsers, and it also works with images and photos. When the Look Up window is open, you can tweak the output by changing dictionary sources or even refer to Siri Knowledge relating to the selected text.
Swipe between full-screen apps with three fingers
The three- or four-finger swipe is the backbone of multitasking on a MacBook, and it should be enabled by default. While Mission Control gives you a great overview of your virtual desktops and lets you rearrange them or move apps between them, it's the three- or four-finger side swipe that will likely end up being a core part of your workflow. Whether you can use three or four fingers as a swipe gesture depends on the macOS version you're running.
This gesture does exactly the same thing as the Control + left arrow or Control + right arrow keyboard shortcut. That is, it switches between full-screen apps and virtual desktops as if they were slides. This is especially useful on MacBooks with smaller screens. While many apps work fine in a split-screen configuration, using this swipe gesture lets you quickly toggle between adjacent apps that require a full-screen interface for usability or efficiency's sake.
While the keyboard shortcut variant of this feature is still relatively quick, you can easily perform the three- or four-finger swipe gesture one-handed, which may feel more comfortable to you.
Your trackpad can work like a touchscreen without the screen
In all this talk about the superlative trackpad, one adjective that's easy to miss is "multi-touch," which happens be the key technological innovation that made the iPhone and iPad such successes. In essence, the modern MacBook trackpad is an iPhone screen minus the screen. It's useful to think of it that way, because many of the gestures we've learned on our phones also work on a MacBook trackpad.
You can use two fingers to rotate items in apps like photo editors or 3D modeling apps. Pinch-to-zoom works just as it does on a smartphone, too. On MacBooks, Apple has even provided gesture-enabled notification access just as it works on a phone or tablet. In the same way you can swipe from off-screen on those devices to see notifications, swiping left from the far right of the trackpad with two fingers will reveal the notification center.
In our experience, a surprisingly high number of third-party apps play well with these gestures; there's no harm in trying them in your favorite apps to see what happens. If you do, you just might find a faster and more intuitive way to use your software — and that includes video games. We've rated "Baldur's Gate 3," for instance, as one of the best games to buy with a Steam gift card because it offers so much playtime for the money. But beyond that, it also happens to be ported to macOS; the game plays like a dream using the MacBook trackpad. You can pinch, zoom, and rotate your way through hundreds of hours of adventure. We know because we've done it!
Some basic tweaks can speed up your workflow
Some of the gestures and features we've covered so far slant toward power user territory, but when it comes to navigation fundamentals, there's still some tweaking to be done that can seriously improve the ergonomics of working on your MacBook. If you do want to augment your MacBook with a peripheral ergonomic mouse, there are many quality options, but we've found that the Logitech MX Master 4 is the best one for the job.
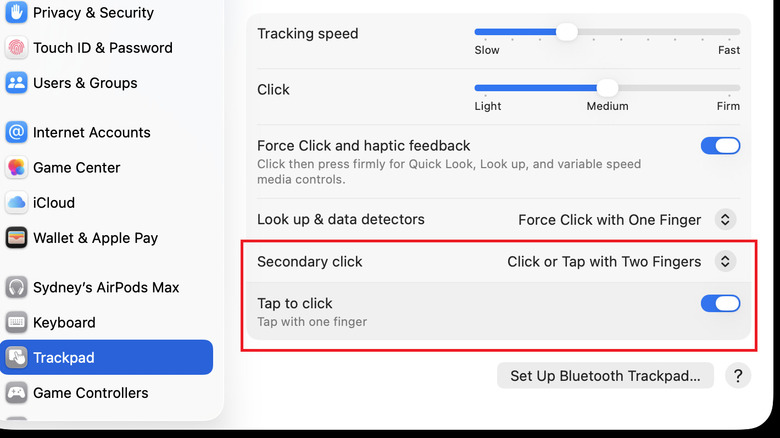
Macs only had a one-button mouse up until the year 2000, but today, your MacBook's "secondary click" can be performed by holding the Control key and clicking with a mouse. This input combination performs the Mac equivalent of a right click on other operating systems. Luckily, with a simple setting change, you can switch to performing a secondary click using a "Click or tap with two fingers" setting, bringing the Mac trackpad's behavior more in line with right-clicking on a Windows machine. This is slightly quicker than using the keyboard's Control key as a modifier, and using the same gesture for the same function across different operating systems makes life more convenient for cross-platform computer users.
Another trackpad setting that makes the MacBook trackpad more Windows-like is "Tap to click," which removes the need for a Force Touch click, and lets you click by — you guessed it — simply tapping on the pad. Some people may find it tedious to click with force every time they want to perform a secondary click, so it's nice to have a more relaxed option. And if you're contemplating buying Apple's own Magic Mouse to use gestures as you would on your MacBook's trackpad, you may want to reconsider — it's actually among the Apple products we suggest you skip.