The 3 Best Ways To Safely Back Up Your iPad

For some people, the iPad is merely a YouTube and Netflix machine, which means it doesn't usually have any important local data. But if you use the iPad as a laptop replacement or a drawing tablet, you probably have all sorts of documents, photos, design files, and private conversations stored on your device. With all this critical data, the last thing you want to deal with is your iPad getting stolen, lost, or damaged beyond repair. So before that even happens, it's a good idea to back up your iPad to keep your essential data safe.
There are several different ways to create an iPad backup. You can use one of the many third-party software options out there, but more often than not, they either require a hefty yearly subscription fee or are unreliable. If you want the best way to back up your iPad, you're better off going with official methods instead: using iCloud Backup, your Mac computer, or a Windows PC.
Method 1: Upload to iCloud Backup
Your iPad conveniently comes with a built-in backup system — the iCloud Backup — that uploads your data to the cloud. It's automatically turned on as soon as you sign into your Apple account during the initial setup process. However, you won't notice it running since it works in the background. Once your iPad is plugged into a charger, locked, and connected to the internet, that's when iCloud Backup starts discreetly performing the backup process.
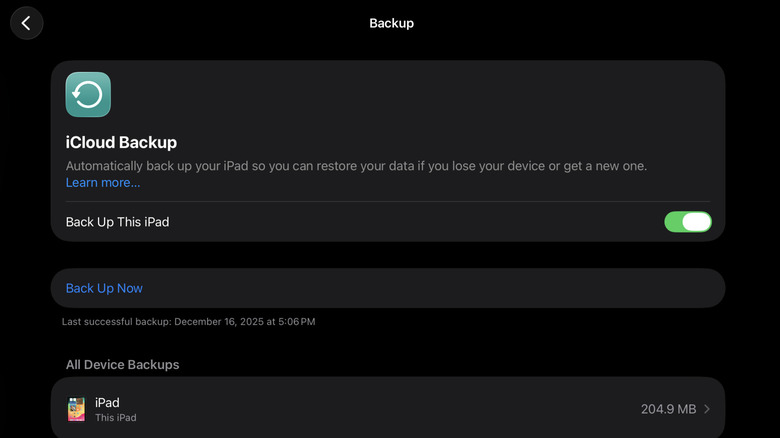
While iCloud Backup works automatically, there's still an option to manually back up your iPad if you want an updated version. Follow these steps to do so:
- Open Settings.
- Tap your name at the top.
- Select iCloud to open the iCloud settings.
- Tap iCloud Backup.
- Hit the Back Up Now option.
From here, all you need to do is wait until the process is finished. Make sure you won't be disconnected from the internet during this time. You can check whether the latest backup is successful by launching the Settings app and tapping on your name at the top, then going to iCloud. You should see a dot next to the "iCloud Backup" entry. A green dot means the backup was completed, while a red dot means the backup was unsuccessful and needs your attention, usually due to low iCloud storage.
If you'd like to add end-to-end encryption to your iCloud backups for safety reasons, you can enable this feature from the iCloud settings. There's also an option to exclude certain apps from the backup if you prefer to do so. From iCloud Backup, just tap on iPad under "All Device Backups" and toggle off your apps of choice.
Method 2: Back up to your Mac computer
Not everyone is a fan of online backups. If you prefer a local backup for your iPad, you can use your Mac computer. Here's how:
- Plug your iPad into your Mac via a USB cable.
- Unlock your iPad.
- Go to Finder.
- When prompted, establish trust between the two devices.
- Click on your iPad under Locations in the left side panel.
- Go to the General tab.
- Scroll down to the Backups section.
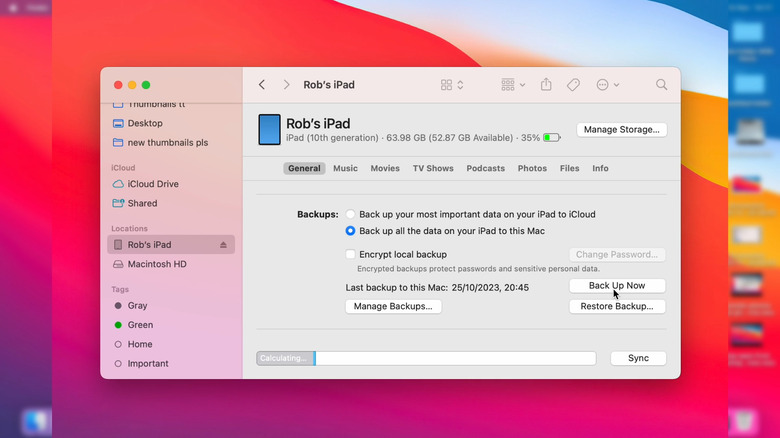
- Select Back up all of the data on your iPad to this Mac.
- To encrypt your backups (meaning, save sensitive data like password and health information), check the option for Encrypt local backup and set a password.
- Click Back Up Now.
- If you opt for encrypted backups, type the password you set and choose Allow.
When the backup is successful, the current date and time will appear next to "Last backup on this Mac." You can now safely eject your iPad. You can leave the backup on your Mac, but if it consumes more space than you'd like, you can always transfer it to an external SSD. Any model from the major SSD brands would do, as long as it's large enough to accommodate your backup.
To move the backup from your Mac to an SSD, connect your iPad again and open it from Finder. Then, click on Manage Backups. Right-click on the iPad backup you want to transfer and go to Show In Finder. A new Finder window will open with the iPad backup folder highlighted. From here, just copy and paste the folder to your SSD. You're free to delete the backup afterward, but remember the exact location of the original Backup folder, where you'll move the backup from the SSD when it's time to restore your iPad.
Method 3: Back up to your PC
If you don't have a Mac computer but own a PC, you can use that to safely back up your iPad. Here's what you need to do:
- Install the Apple Devices app from Microsoft Store.
- Open Apple Devices.
- Press Agree to proceed.
- Hit Start.
- Use a USB cable to plug your iPad into your PC.
- If you get an "Unlock iPad to use accessories" alert on your iPad, unlock the device.
- Back in the Apple Devices app, press Trust to allow the iPad to sync with your PC.
- On your iPad, select Trust on the popup.
- Enter your passcode.
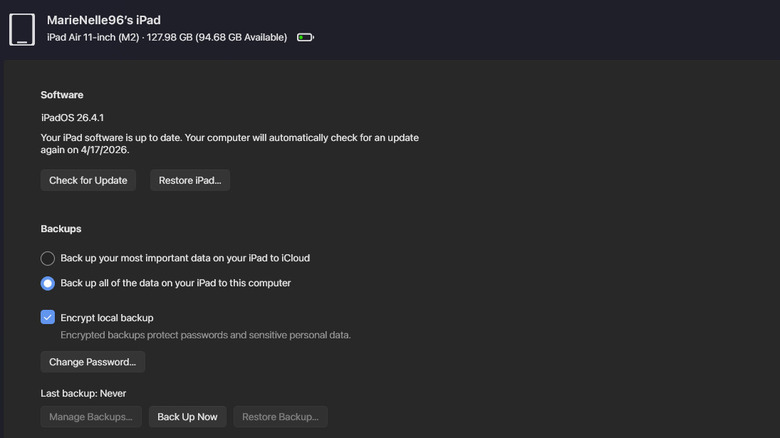
Your iPad will now show up in Apple Devices. Click the General tab on the left and go to the Backups section. Then, choose "Back up all of the data on your iPad to this computer" and "Encrypt local backup" (to include saved passwords and data from your Health and HomeKit apps in the backup). Press Apply at the bottom to save the changes. If you chose to encrypt the backup, create a password for it. Make sure to keep a copy of this password as this is the only way you can retrieve your encrypted backups.
After configuring your iPad with Apple Devices, you can now start backing it up. Just press the Back Up Now button. Once you're done backing up your iPad, you can find the backups you made right in your PC. To do so, open up Apple Devices and head over to Manage Backups under the General tab. Right-click on one of the available backups and choose Show in Explorer. You'll then be redirected to the Explorer app. From the same Manage Backups menu, you can also see the options to delete or archive backups you no longer need.