3 Settings That Will Speed Up Your Slow iPad
Nothing's more annoying than trying to launch Procreate on your iPad and waiting a whole minute for it to load, or writing some school notes with your Apple Pencil but getting delayed responses. A slow iPad can seriously get in the way of your workflow. Before you waste even more time dealing with a sluggish device, it's better to fix the problem.
The first order of business is to restart your iPad. It usually solves most temporary glitches and lags as it clears temporary files. If the slowdown is due to a more serious software bug, though, updating your iPad to the latest iOS version is the way to go, as new versions are designed to resolve performance issues and bugs.
If both quick fixes don't work, there are some settings you can change on your iPad instead. We'll walk you through the three main ones that should have an immediate effect.
Enable Offload Unused Apps
One of the culprits behind your iPad slowing down is a full storage. Apple recommends leaving a minimum of 1GB of available space to keep the device running smoothly. If your storage is already maxed out, though, don't worry — there are some easy tricks to free up space on your iPad. One of the most effective methods to do so is to enable Offload Unused Apps.
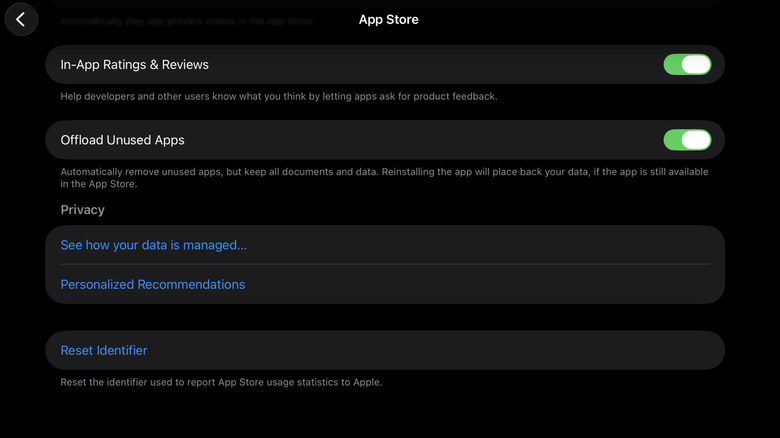
Offloading apps means removing the apps you don't frequently use when the storage runs low. It's essentially a light uninstall, as instead of deleting everything completely, their data and files are still preserved locally, letting you restore them later when you need them. To turn on this iPad setting, follow these steps:
- Launch the Settings app.
- Select Apps at the very bottom of the screen.
- Open the App Store.
- Scroll down to Offload Unused Apps.
- Toggle it on.
From here, Offload Unused Apps will automatically work in the background as soon as your free space reaches critical levels. If you'd rather not wait until then, you can manually offload apps from the Settings too. Just navigate to General and choose iPad Storage. Then, swipe left on the third-party app you'd like to offload.
Turn off Low Power Mode
The iPad battery is designed to last up to ten hours of regular use, but to further extend its life, you can opt to go into Low Power Mode. It reduces the display brightness, turns off 5G, and pauses automatic downloads and email fetch, all to minimize how much power the iPad consumes.
But while this sounds perfectly fine, there's actually a downside to turning on Low Power Mode: your iPad can start lagging. That's because it also disables some visual effects, lowers the display refresh rate from 120Hz to 60Hz, and limits the performance on some tasks. These can feel like your iPad is slowing down.
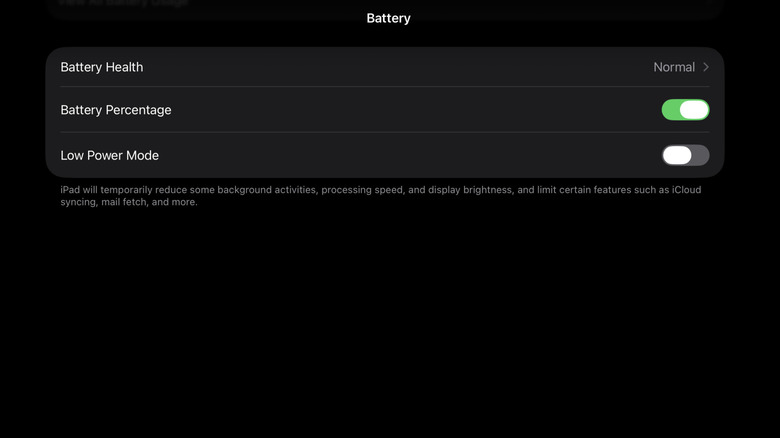
If your device isn't in the critical battery level yet (meaning 20% and below) and you want to prioritize performance over battery runtime, you're better off disabling Low Power Mode in the meantime. You can deactivate it the same way you turned it on. If you have it in the Control Center, just tap on the Low Power Mode icon. If you enabled it via the Settings app, navigate to the Battery section and toggle off Low Power Mode at the bottom of the page.
Clear browser cache and website data
Sometimes, the cache and website data your browser accumulates over time can cause performance issues just within the app. So if you notice that your browser is slowing down while the rest of your iPad works as expected, there's a good chance it's due to that stored data. To fix your iPad's sluggish browser, one of the Safari Settings you should change immediately is clearing cache and website data. Here's what you need to do:
- Open the Settings app.
- Scroll down to Apps.
- Go to Safari.
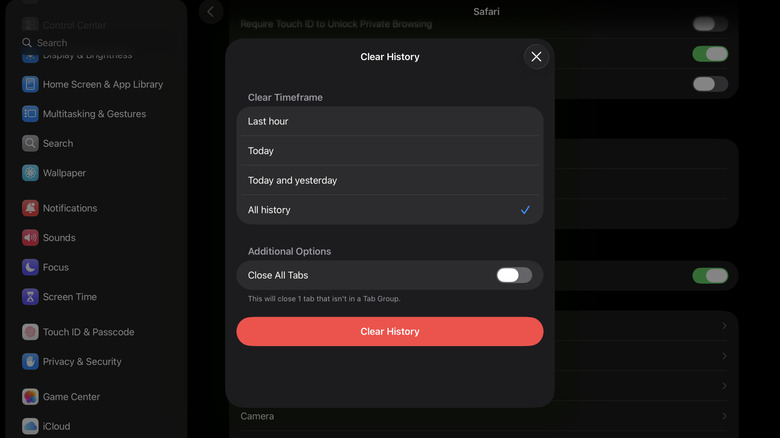
- Under History and Website Data, choose Clear History and Website Data.
- Set Clear Timeframe to All history to delete your entire browser history.
- Tap on Clear History to proceed.
This deletes your browser history, cookies, and even site permissions. If you're using Chrome instead of Safari, there's also an in-app setting there to help you achieve the same. In the Chrome app, tap the three dots in the upper right corner and select Delete Browsing Data. Then, set the Time range to All time and the Browsing data to Browsing history; Cookies, site data; and Cached images and files. Finally, hit Confirm and Delete data.