What Is The 45-Degree Rule For 3D Printing?
The 45-degree rule is boon and bane alike to 3D printers everywhere. If you've spent much time with fused deposition modeling (FDM) printers, you've probably run afoul of this cruel intersection of geometry and physics, with droopy or ruined prints as the unfortunate fruit of your carelessness. Of course, if you're a novice, you may have never encountered the 45-degree rule and its consequences, even if you've already gone over the things you should know before buying a 3D printer.
The 45-degree rule came about because your 3D printer struggles against the primordial force of gravity. What is the rule? The 45-degree rule refers to the angle at which a build can safely support its layers while it builds an overhang. With angles up to 45 degrees, about half of an additional layer sits atop the layer beneath it, giving it enough support to retain its shape while it cools.
Best case scenario, you'll be left with a deformed or misshapen print (some of which can be cleaned up with a hobby knife and some elbow grease). In a worst-case scenario, that great desk project will be completely ruined, and you'll have to start the print over from square one after making adjustments.
Angles: allies or antagonists

The issue with overhang lies with the inherent nature of FDM printers. These 3D printers work by heating and laying out thin layers of thermoplastic material, one atop the other, until a full creation emerges. Sharp angles sabotage this process because every layer needs a foundation beneath it; otherwise it will succumb to gravity before it can cool enough to hold its shape.
While it's a good rule of thumb, the 45-degree rule isn't set in stone. There are ways to build overhangs at steeper angles; you just need to give your printer a little assistance. Consider improved cooling and better airflow to help freeze layers in place before the next is laid down. In a similar vein, you can increase the time every layer has to cool before the next is printed. You can also drop your layer height to hasten cooling, or rotate a model so the sharpest angles are more gradual.
Supports: the ultimate cheat code
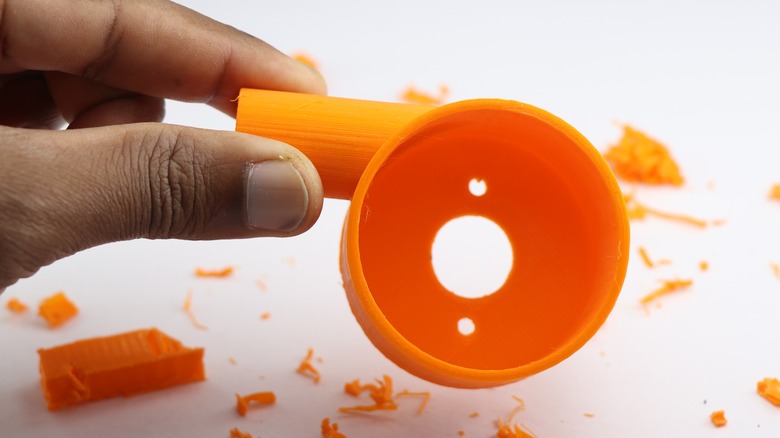
Alternatively, you can print at full speed in your current configuration and produce overhangs at nearly any angle you can imagine by means of one simple hack: supports. Supports are exactly what they sound like — thin bits of plastic that hold up a layer while it cools. After a print is complete, you can snap or cut them off and clean up the area where they were attached to your build with a hobby knife.
Supports are a great solution for printing internal cavities or arches, as in a hollow box with a recessed ceiling, for example. Without supports, the printer would attempt to bridge long areas of empty space, and end up producing drooping filament strands. Instead, a dense grid of supports directly under the cavity roof can help sidestep challenges posed by the difficult geometry.
A more advanced example is what are called tree supports, which are common in both FDM and resin workflows. If you're printing something like a dragon with wings extended, tree supports would branch upward from a few base points and split into finer arms that touch only the necessary overhangs. This reduces contact damage compared to block supports and makes cleanup much easier. To test the efficiency of supports, grab some models with dramatic overhangs from one of the free project sites sprinkled around the internet.