New Android Phone? Change These 4 Settings Right Away
When you get a new Android phone and boot it up for the first time, the operating system has to prepare your experience. This mainly consists of connecting to the network, downloading system updates, and customizing your user settings. Luckily, one of the new features added to Android phones in 2026 was a streamlined, much-improved device setup process. It can still take a little while, but even when it's done, you may want to do a little tinkering yourself before you dive in. There are a variety of options you'll want to adjust, new apps you might want to install or remove, or changes you'll want to make. For example, on an older Android phone that feels slow, there's a hidden setting you can change to make it seem snappier and faster. You may even want to do that on a new device.
It goes beyond that, of course. Maybe you'll want to remove pre-installed apps and bloatware before you start grabbing your own from the Play Store? Perhaps you'll want to change the device's look and feel with a launcher, new themes, or new wallpapers. The beauty of Android is its full customization support, and that holds whether you have a Google Pixel device, a Samsung device, a Motorola device, or another brand entirely. Whatever the case, before jumping into the new OS and phone experience, there are some settings or configurations you should consider changing as soon as possible.
1. Turn off adaptive brightness or set a lower baseline
Adaptive or auto brightness is a setting that's generally enabled on new Android devices. Thanks to a built-in sensor, the phone can detect when you're in a bright setting, like direct sunlight, and automatically crank up the brightness to make it easier to see. Then, when you go back inside or into a dark area, it should turn the brightness back to normal. It's supposed to improve battery life by optimizing these patterns. But when the settings are wrong, it can make things harder to see, and many users claim it drains the battery faster than when they adjust the brightness themselves. You'll need to enable the Android Developer Mode before you can access that setting, though.
The battery hit depends on your device or use case, as well. For example, if you have adaptive brightness on and you're frequently going outside, the screen brightness has to increase to compensate, which can certainly affect battery life. To turn it off, navigate to Settings > Display, then tap the toggle next to Adaptive Brightness. Alternatively, you can set the baseline brightness much lower by adjusting the slider above that toggle.
2. Increase (or reduce) the screen timeout
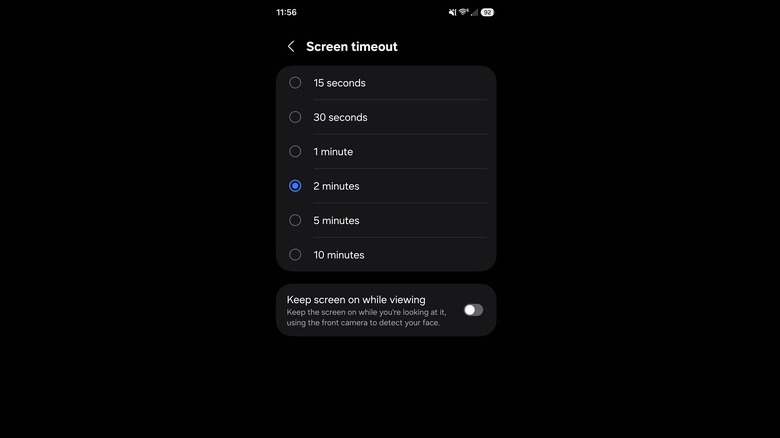
After a period of inactivity, your phone's display will automatically turn off, saving you valuable battery life. But the default setting is 30 seconds, which is almost too quick. If you're reading, for instance, and don't interact with the screen, it may shut off on you in the middle of a page or article. Changing this to one minute or two minutes gives you ample time to use your phone before the screen turns off. If you believe 30 seconds is too long, you can also reduce the timeout further.
To change this setting, navigate to Settings > Display > Screen Timeout. You should see several options ranging from 15 seconds to 10 minutes. Choose which one you think works best. Remember, you can always change it later, too. On select devices, like my Samsung Galaxy S25 Ultra, there's an option to keep the screen on while viewing — it uses the front camera to detect your face and will keep the screen active if you're looking right at it. I choose to leave this disabled, but it's still worth pointing out for anyone who would find it helpful.
3. Enable screen pinning for better security
Let's say you want to show a friend, co-worker, or acquaintance something on your phone, so you hand it over for a minute. You don't really want to give them the full freedom to snoop around on your device. There's actually an Android setting you can enable to prevent this from happening. It's called screen pinning, and it allows you to pin the currently active app or window so it cannot be minimized. This is also a great feature if you have your phone in your pocket and don't want it accidentally swapping apps — I pin my music player when I'm mowing the lawn so the phone doesn't hop around between apps in my sweaty pocket.
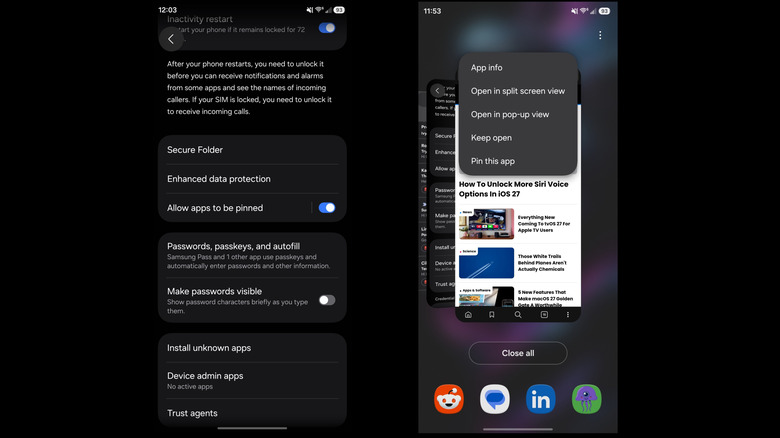
However, you have to enable the feature before you can use it. To do that, navigate to Settings > Security (or More Security Settings on Samsung) and tap the toggle next to Allow apps to be pinned.
To pin an app, open your recent apps overview by swiping up from the middle of the screen or tapping the recent button in the navigation bar. At the very top of the app you want to pin, in the center, you'll see the app's icon. Tap it, then select the pin option. To unpin, you just swipe up and hold, or touch and hold the back and overview buttons in the nav bar. For extra security, you can also lock the unpinning process behind your pin, pattern, or password.
4. Turn on the SIM card lock
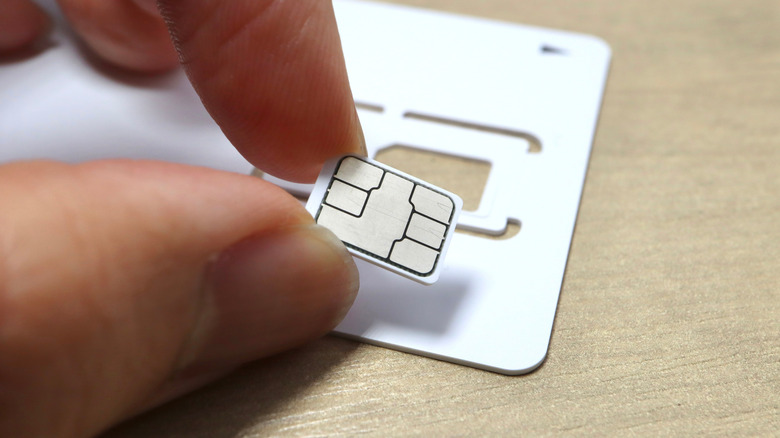
Often, you'll set a passcode or pattern for your phone, lock your sensitive data behind secure accounts and passwords, and sometimes even hide apps you don't want others to see. Case in point, you protect your phone, but most forget to lock down their SIM card, the one component that allows it to connect to various networks. If someone swipes your phone, ejects your SIM card and tries to put it into another device, as long as it's locked, they can't use it. It won't work for calls, texts, or one-time password (OTP) hijacking.
To lock it down, go to Settings > Security > SIM card lock on most Android devices, or Settings > Security and Privacy > More Security Settings > SIM Card Security on a Samsung. After you enable the setting, you'll have a limited number of tries to enter a security PIN from your wireless carrier. Most of the time, you can find this PIN in the security settings for your wireless account, whether through Verizon, AT&T, or T-Mobile. You may need to contact a service representative if you can't find it. Once it's enabled, you can leave the PIN as is or change it to a custom number, which is highly recommended.
When you have a SIM lock enabled, your phone will ask for your SIM card security PIN every time it restarts. That is one thing to keep in mind, but it significantly enhances your mobile security.
Some other things to do before using your new phone

Beyond changing settings, there are a few other things you might change to set up your new phone before using it in earnest. You'll want to make sure you can find and restore your phone using the Find My Device service. That allows you to remotely connect to and locate your phone if you misplace it. To enable it, head to Security and Privacy in the device settings. After syncing your phone to your Google account, you can go to the Google Find My Hub in any browser to connect remotely.
You'll also want to adjust or customize the quick settings tray. That's the pull-down menu, which you can access by swiping down from the top, giving you access to important settings like Wi-Fi, Bluetooth, location services, and more. You can actually add and remove settings that appear in that pane and adjust their location so something you use often shows up first. Swipe down to bring down the panel, then select the Edit (pencil) icon. On a Samsung with One UI 8.5, you'll need to tap Edit again (after the pencil icon) to configure the quick settings options.
Additionally, try installing a new keyboard like Gboard and a new messaging app like Google Messages (if it's not already installed), and possibly setting up some home screen widgets to give your Android a personal spin. Installing a privacy-friendly browser instead of the stock options is never a bad idea, such as Firefox or Brave. Moreover, you'll want to disable RAM Plus or swap space if it's active and your phone has more than 8GB of RAM available. It's a newer Android feature that might be slowing your phone down, since it uses internal storage as makeshift system memory or RAM.