I Turned My Gaming Laptop Into An Xbox - Here's How
I've spent the past week finding the best way to get Xbox Mode running on Windows 11 PCs, and the results have been genuinely surprising. By refining my approach and getting Xbox Mode running at 4K 60 FPS just like an Xbox Series X on high to ultra settings on most games, I've decided to write a full guide on how to do this from start to finish.
I've tried this on the MINISFORUM AtomMan G1 Pro, which features the AMD Ryzen 9 8945HX and Nvidia GeForce RTX 5060 (145W Full Power). The PC houses 32GB of single-channel DDR5 RAM and 2TB of NVMe SSD (it originally came with a 1TB SSD). I have also tried this setup on the Maingear Ultima 18 that comes with an Intel Core Ultra 9 275HX and Nvidia GeForce RTX 5080 Mobile graphics. As for memory, it has 32GB of DDR5 RAM supporting 4800MT/s and a 2TB Gen4 NVMe SSD for storage.
Naturally, both of these setups are geared towards PC gaming, with the Maingear Ultima 18 showing some fantastic specifications. I went with the G1 Pro because of its console-like form factor and full-power RTX 5060 to squeeze all of the performance I can out of such a small chassis. Pairing it with a white official Xbox controller gives users cool functionality while also completing the package.
Maingear is well-known for its boutique builds that have zero additional bloatware and genuinely helpful customer service support. Considering this model competes directly with a Razer Blade 18, has similar features, and has double the RAM and SSD storage, this gaming laptop was an easy decision. With Xbox Mode featuring heavily on the Asus Xbox ROG Ally X, I thought it would only be right to have a portable battle station in this guide.
Start with a fresh Windows 11 installation
For those who want an Xbox experience on a brand new PC, there's no point in reinstalling Windows 11, which we'll debloat shortly. But for users who have been running Windows 11 for a while with no optimizations, it would be a good idea to back up personal files and use a debloated Windows 11 installation to breathe new life into a gaming PC.
Head over to Chris Titus Tech's Windows Utility, copy the stable branch command line "irm https://christitus.com/win | iex", and open PowerShell as an administrator. Paste it into the command line and hit enter, which will then bring up the user interface of the Windows Utility.
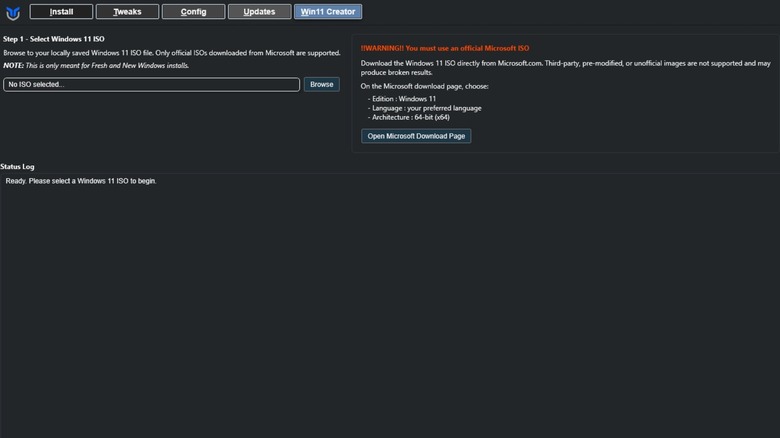
To make a new Windows ISO image, you must first download an official disk image from Microsoft. Once that's been downloaded, head to the Win11 Creator tab to create a safe, modified, and bloat-free disk image of Windows 11. This means users won't need to worry about AI features, telemetry, and useless pre-installed apps. Once the new disk image has been created, it can be written directly to a USB drive with over 16 GB of space, which will be bootable.
Use CTT Windows Utility for tweaks
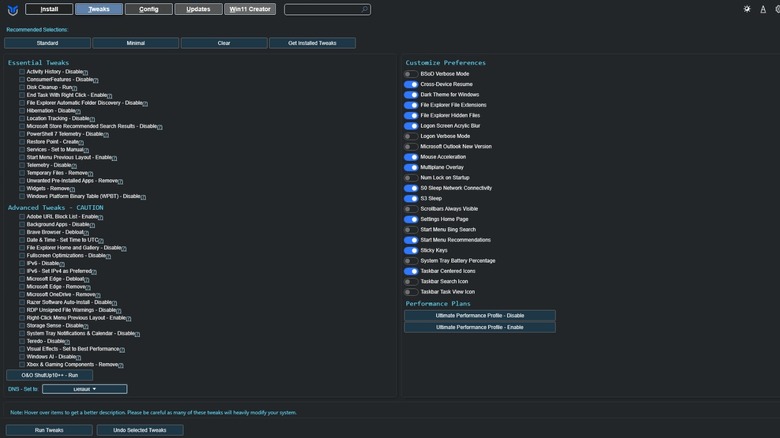
For those looking to just debloat their original Windows 11 install, head to the "Tweaks" tab. Here, users should select the standard button under "recommended selections" and tick the following additional boxes:
Essential Tweaks:
- Widgets – Remove
- Microsoft Store Recommended Search Results
Advanced Tweaks:
- Windows AI – Disable
- Visual Effects – Set to Best Performance
- System Tray Notifications & Calendar – Disable
- Right-Click Menu Previous Layout – Enable
- Microsoft OneDrive – Disable
- Microsoft Edge – Debloat or Remove
- Background Apps – Disable
Performance Plans:
- Ultimate Performance Profile – Enable
Once all this has been selected, click "Run Tweaks", which will take some time to complete. The aim here is to get all of the extra features Windows 11 comes with removed. This frees up resources from processes such as notifications and having OneDrive refreshing in the background to focus on gaming.
Enabling Ultimate Performance Profile is a hidden power setting in Windows 11 that prioritizes performance, which will naturally use up more electricity, but we're here for extra frames, right? For those running a fresh Windows 11 install, heading to the Install tab will provide quick access to every essential program users could think of, including Steam, Epic, GOG, and more.
Optimize Windows 11 settings
Next up, download Optimizer from their GitHub page, which we will be using to make sure finer privacy and other options are taken care of in Windows 11. This model has been deprecated and replaced by OptimizerNXT, but this version worked fine for me. Privacy protocols and telemetry can add up to become quite a drain on overall performance, so getting rid of anything not needed is a good call. Optimizer also takes care of Registry issues and unnecessary Windows 11 apps.
Here's everything that should be left unchecked in Optimizer, which I can confirm causes zero issues with Windows 11. The best way to do this is to enable everything, then disable anything in the list below:
General:
- Show all notification icons
- Remove menus delay
- Disable Print Service (Check this if you don't want to use a printer with your PC/Laptop)
- Enable UTC time
- Disable system restore
- Disable Superfetch
- Disable NTFS Timestamp
- Disable HomeGroup
- Disable SMBv1 Protocol
- Disable SMBv2 Protocol
Windows 11: *Leave all Windows Update and Gaming settings unchecked
- Restore Classic File Explorer
- Hide Taskbar weather
- Disable TPM Check
- Disable Sensor Services
- Align Taskbar to Left
- Disable Widgets
- Disable Spell Checking
- Disable Snap Assistant
UWP Apps: Only uninstall apps that won't be needed for gaming. If you're not sure, don't touch this tab.
Startup: Uncheck all unnecessary startup programs such as Discord, peripheral programs, etc.
Cleaner: Check all Windows options here then click "Clean".
Registry: Enable all registry issues alongside the "restart Explorer to apply changes", then click "Fix"
The best AMD and Nvidia GPU driver settings
For both Nvidia and AMD GPUs, make sure to take full advantage of their auto overclocking. Here are other optimizations to get the most out of your graphics card:
AMD (Via Adrenalin)
- Performance > Tuning > GPU > Overclock GPU
- Gaming > Graphics > HYPR-RX Global Gaming Experience and enable all options. Next, set Sharpen Effect to 50, set performance mode to performance for lower specification hardware, or quality for high-end gaming PCs
Nvidia (Control Panel Global Settings)
Turn the following settings off:
- Image Scaling, Ambient Occlusion
- Anisotropic filtering
- Antialiasing – FXAA
- Antialiasing – Mode
- Antialiasing – Setting
- Antialiasing – Transparency
- Background Application Max Frame Rate
- DSR – Factors
- DSR – Smoothness
- Multi-Frame Sampled AA (MFAA)
- Texture filtering – Anisotropic sample optimization
- Triple buffering
- Virtual Reality – Variable Rate Super Sampling
Turn the following settings on:
- Vertical Sync (Turn off if using a G-Sync compatible display)
- Antialiasing – Gamma correction
- Texture filtering – Trilinear optimization
Other settings:
- CUDA – GPUs: All
It's a good idea to use AMD and Nvidia's automatic overclocking features to get the most performance out of the GPU, which can also be done manually, but this is safer for beginners. If, like me, the TV being used for gaming isn't G-Sync compatible, turn on vertical sync at the driver level and leave it off in the in-game settings to fix screen tearing. Another great feature is enabling pre-shader caching in the Nvidia App, which will help with frame stuttering when loading into new areas and more in-game.
Enable Xbox Mode
No preview builds of Windows 11 are necessary, just ensure Windows Update is fully up to date. Then download the Xbox Full Screen Experience Tool by scrolling to the bottom of the GitHub releases page and downloading the full MSI file, which shows as "Updater.exe" after downloading. This takes the manual registry editing out of activating the Xbox Mode hidden feature in Windows 11, making this a much quicker process.
Install it, boot it up, click the "Enable Xbox Mode" button, and follow the application instructions (Basically, reboot after finishing). Then, open it up again and click "Open Xbox Mode (FSE) Settings".
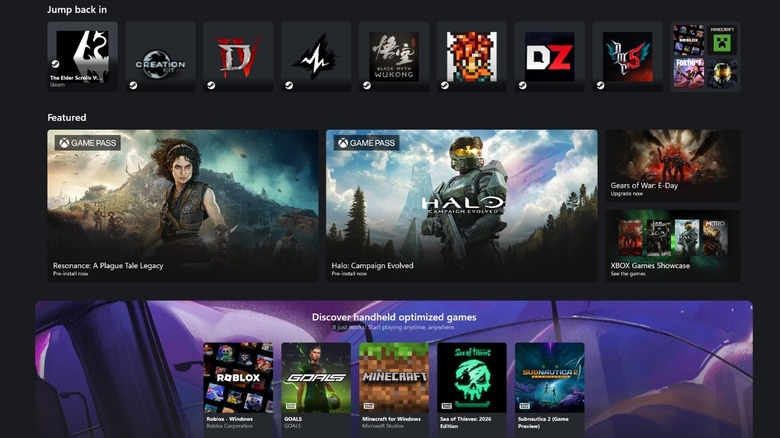
Users will then want to select the Home App to be "Xbox" and check the "Enter Xbox mode on startup" option on this particular settings page. After another reboot, Xbox Mode will come on after entering the PC's PIN or password and it's good to go.
While my Maingear Ultima 18 smashes everything it plays at 4K 60 FPS, the Minisforum Atomman G1 Pro is a big surprise. Despite only having an RTX 5060, it plays most games at 4K resolution in full 60 FPS in high to ultra settings. Yes, even "Oblivion Remastered." Granted, DLSS 4.5 is doing some heavy lifting here, but the results are nonetheless better than expected.