

5 Things You Probably Didn't Know Android 17 Can Do
Android 17 has just arrived, and with a host of Android phone brands like OnePlus, Samsung, and Google supporting Android 17, it shouldn't take long before everyone is raving about this major software update. Before it officially came out, Android already introduced the headline features during its Android Show in May, and they all sound pretty impressive.
There's Gemini Intelligence, which now lets you autofill forms faster with details from your photos, email, and messages. Additionally, it powers Rambler, a smarter speech-to-text converter that makes your message sound more cohesive. Then, you have Pause Point, a mindfulness feature that literally adds a deliberate pause in your device usage. It blocks distracting apps from launching as soon as you open them, so you get a moment to pause and reflect whether you really need to use that app. With Android 17, you also get more vibrant emojis, built-in video stabilization in Instagram, and improved iOS-to-Android transfer. But beyond these core highlights, Android 17 actually offers more handy settings and tools you might have missed. Here are five of them.
Adjust Gemini's volume separately
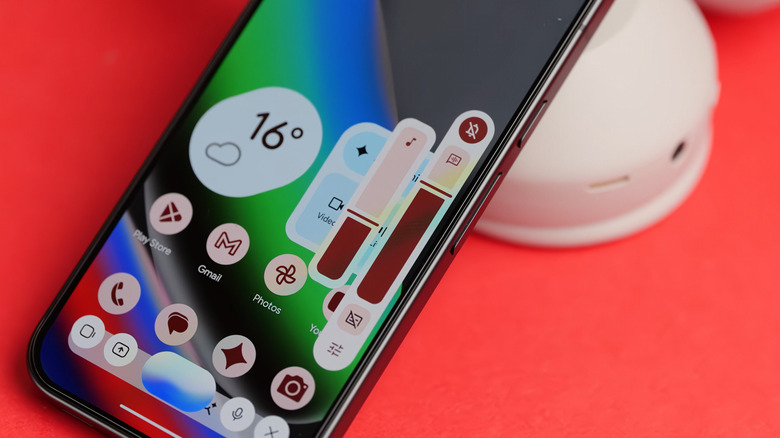
There's no denying how helpful Google Gemini is in your daily life, but the problem is its volume. It uses your device's volume by default, which means it will be as loud as the song you're playing on Spotify. If you're not comfortable with that, especially when in public, you'd always have to adjust the volume manually every time you talk to Gemini. Thankfully, you won't need to do so again in Android 17. You now have the option to set Gemini's volume independently of your usual media volume. Follow these steps:
- Launch the Settings app.
- Head over to Sound and vibration.
- Drag the slider under Assistant volume to your preferred level. You'll hear a preview of how loud that level is, so you can change it when needed.
If Gemini or another voice assistant is active, your volume buttons can also be used to adjust the assistant volume. Press the volume up or down button, and you'll see a slider show up next to your typical volume bar. You'll know which is which as the assistant volume is marked with a chat bubble icon. You can either continue pressing the volume button or slide the slider on the screen to adjust the volume. Keep in mind that this separate volume slider will only appear while talking to Gemini or your assistant of choice. Otherwise, you'll only see the typical volume control when you press the volume button.
Open apps in a floating bubble
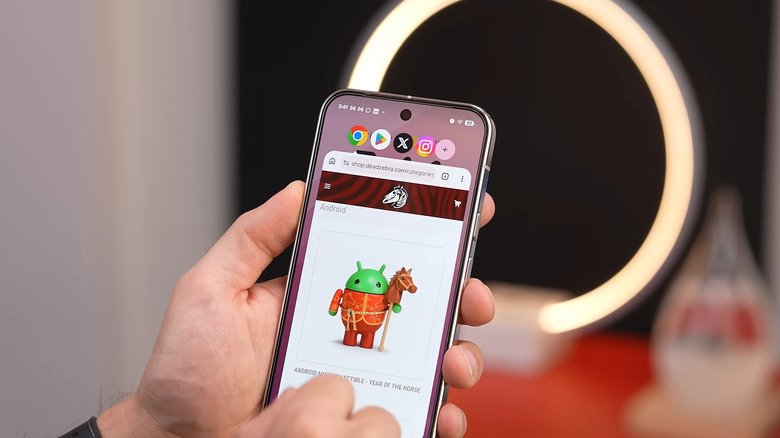
One reason why Android is more powerful than iOS is the floating chat heads feature. On supported apps like Facebook Messenger, you won't need to switch out of your current app just to read and respond to your friend's chat. You simply press the floating chat head, which stays on top of the screen no matter what app you open. This sounds mundane, but it's actually a convenient feature, especially for multitaskers. Well, Android 17 now brings that same convenience to all your installed apps as it now lets you turn any of them into a floating bubble.
To open an app in bubble form, all you have to do is hold down its app icon (whether on the home screen or in the app drawer) and choose the bubble icon, which looks like a rectangle with a small dot. If you don't immediately see the bubble option, go to Actions first. Right away, the app will become a floating window with the app icon as the bubble head. You can then use the app like you normally would, though the window is, of course, a bit smaller than normal.
To minimize the bubble windows, just tap on the bubble app icon or swipe up from the bottom of the bubble window. To completely close any of the app bubbles, drag the app icon to the X mark at the bottom of the screen. You can still reopen any recently closed app bubble when you press the plus icon. Just like chat heads, Android 17's bubble mode supports multiple apps. They'll stack on top of each other and let you switch between any app bubble you want to view. You're also free to move all the minimized bubbles around wherever is convenient to you.
Change each app's dark theme
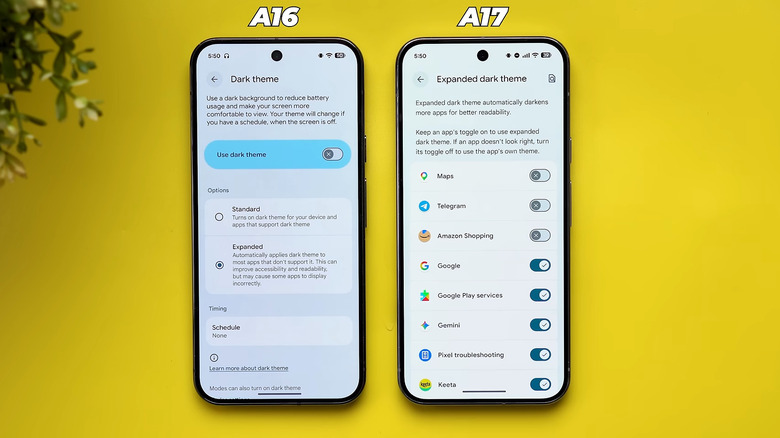
A lot of Android apps already have dark mode built-in or, at the very least, sync with what the system theme is. Surprisingly, there are still some stubborn ones out there that are locked into light mode. Android 17 fixes that with its improved Expanded Dark Theme functionality. This Expanded Dark Theme option was actually introduced in Android 16 and designed to force light mode-only apps to switch to dark mode. However, the dark theme gets applied system-wide to most of the apps with no built-in dark mode.
On Android 17, you get to decide which light mode-only apps will use the dark theme. That way, if you prefer an app to be in light mode, you're free to exclude it. To use the improved Expanded Dark Theme feature on Android 17, here's what you need to do:
- In Settings, open Display and touch.
- Under Appearance, tap on Dark theme.
- Toggle on Use Dark theme.
- Select Expanded from the options.
- To apply dark mode to only specific apps, press the gear icon next to Expanded.
You'll then see a list of all of your apps, even those that already come with dark mode. Toggle on the switch for the apps you like to view in dark mode. Then, launch the app and see whether everything looks good. If the app is still in light mode or appears wonky with inverted images, it might not be compatible with the expanded feature. If you turned on Expanded Dark Theme for an app that has built-in dark mode and it doesn't look right, disable Expanded Dark Theme for that app and use its own dark mode instead.
Show a selfie video in your screen recordings
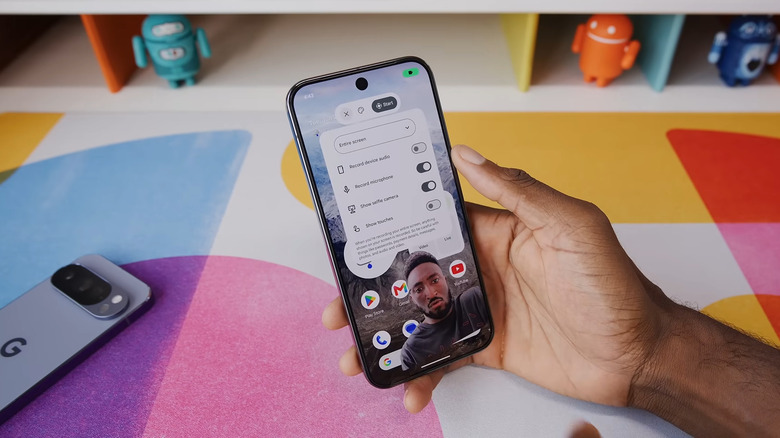
Android's screen recorder isn't exactly bad. But with Android 17, you get an additional feature you probably didn't know you needed: selfie video overlay. Officially called Screen Reactions, this feature lets you start a selfie recording while you're recording your screen at the same time. This can come in handy when you want to share your reaction to a new app you've just downloaded or walk viewers through how to create their own emoji.
This selfie recording isn't exactly new to Android phones, though. It's actually one of the features on Samsung Galaxy and Motorola devices. But unlike the existing selfie video overlays, Android 17's doesn't simply put your face inside a small circle. Instead, it goes the extra mile and removes your background as if you're using a green screen. That way, only your face (and any other person who joins in) is on the recording.
Here's a quick tutorial on how to use Screen Reactions on Android 17:
- Open the Quick Settings panel by swiping down from the top of the screen.
- Press Screen record.
- In the pop-up that opens, make sure the "Entire screen" option is selected. You can't record a selfie video on screen recordings for single apps.
- Toggle on Show selfie camera. This automatically turns on Record microphone too.
- To add a solid background color to your selfie video, press the palette icon next to Start and pick from the preset colors.
- Once ready, hit Start to begin recording.
Your face will now show up on the screen. To resize it, simply pinch your fingers in and out. You can also drag the overlay anywhere on the screen.
Edit suggested replies in the Notification panel
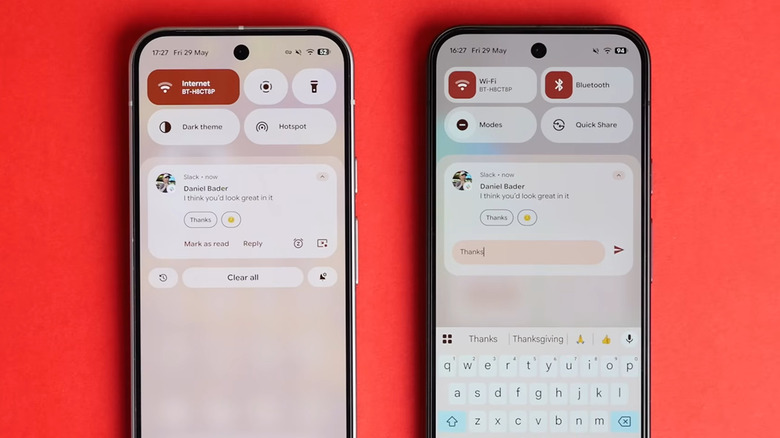
Whenever you receive a message, Android lets you reply to it directly from the Notifications panel. That way, you won't need to open the app. But aside from the Reply button, you'll also see some auto-generated reply suggestions under the message you received. They make responding even more effortless as you'll simply tap on one, and it's sent to your contact automatically. These auto-generated texts are typically referred to as Quick Replies or Smart Replies, and they seem pretty convenient to use on paper.
In practice, though, they aren't as seamless as you'd hope. One common issue is how easy it is to tap on them accidentally when opening or reading the notification. They also don't capture everything you want to say, so you'd still have to go to the Reply button to type your entire message.
If you're not a fan of Quick Replies because of that downside, you'd be glad to know that Android 17 offers a fix for it. Now, suggested replies aren't sent automatically to your contact. Instead, the selected reply opens in a small text field when you tap on it. Here, you're free to edit the auto-generated text, add your own thoughts to it, or erase it to type something completely new. Once you're ready, hit the Send button. This works on any messaging app that supports suggested replies on Android, including Google Messages, WhatsApp, and Slack.