

This Hidden iPhone Feature Lets You Use Your Eyes Like A Mouse Pointer
Some of the most overlooked iOS features are tucked away in the Accessibility menu, and one of them is a nifty tool that lets you use your eyes as a mouse pointer for your phone. Fittingly called Eye Tracking, it turns the iPhone's front-facing camera into an eye tracker that follows the movement of your eyes. It then drags the on-screen pointer to where you're looking. This allows you to navigate your device, all without having to touch the display.
Eye Tracking was first introduced in iOS 18 and works on the iPhone 12 and later. It was specifically developed as an aid for users with physical disabilities, giving them a hands-free way to use their device — no external accessories required. If you're looking for an alternative way to control your iPhone, Eye Tracking is one of the iOS accessibility features you should try. Here's how to turn it on.
How to enable and set up Eye Tracking on your iPhone
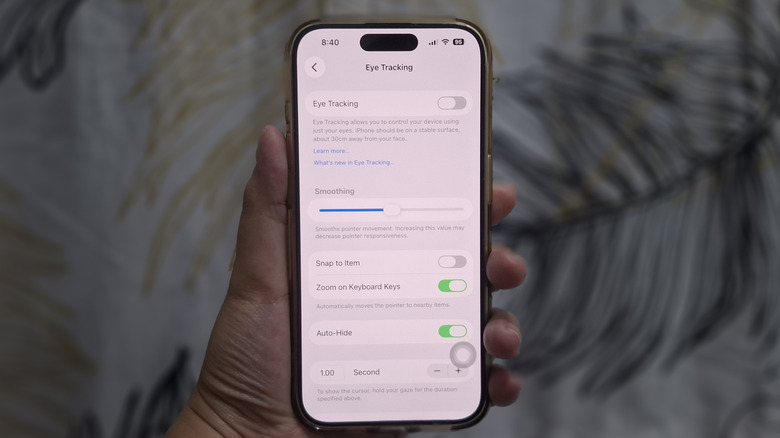
Eye Tracking is disabled by default on iOS. To set it up, you first need to position your iPhone in a stable, well-lit spot, where the screen is facing you and your face is within 1.5 feet of the front camera. It's important to keep the device very steady for the best tracking accuracy. That said, Eye Tracking won't work as well if you're holding and moving your iPhone, so you'll need to either prop it up against a solid object or use a phone stand. From there, follow these next steps to turn on Eye Tracking on your iPhone:
- Go to Settings.
- Open Accessibility.
- Under "Physical and Motor," select Eye Tracking.
- Toggle on Eye Tracking at the top.
- Hold still to start the calibration. You might be asked to move closer to the camera.
- Follow the colored dot as it moves across the screen.
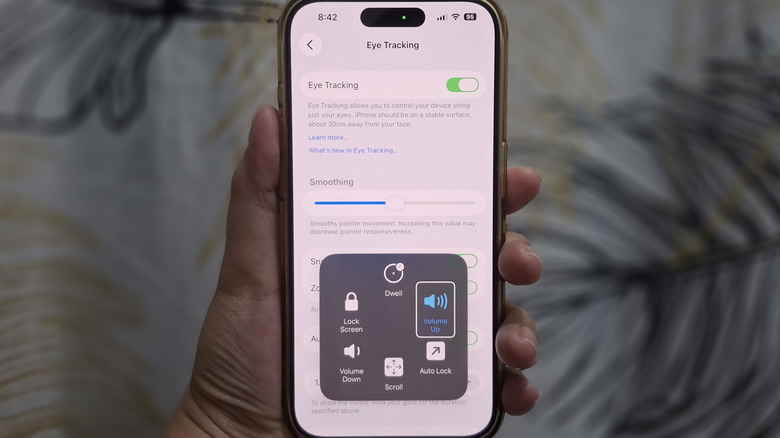
Once the calibration is done, you'll be prompted to add "dwell" and "scroll" controls to your AssistiveTouch Menu. AssistiveTouch will then appear on the screen, where you can find the buttons to scroll, go to the home screen, and open the Control Center or Notification Panel.
After setup, Eye Tracking should be ready for use. But if you want to make it work better for your needs, you can customize its settings. For instance, turn on "Snap to Item" to make the pointer jump to the closest element on the screen. You can also adjust the "Smoothing" slider. A lower setting improves the pointer's responsiveness, while a higher value provides smoother movement.
In case you move your phone or your head sometime after setup, you can easily recalibrate Eye Tracking. Just stare at the upper-left corner of the screen until the calibration starts.
How well does the iPhone's Eye Tracking work in real-world use?
On paper, Eye Tracking sounds like a useful iPhone feature, but how does it perform in practice? I've tested the feature on an iPhone 15 Pro updated to iOS 26, and I'm happy to report that it's quite reliable, at least for navigation.
For basic navigation — moving your gaze to an item and selecting it, the Eye Tracking pointer gets the job done. It easily snaps to app icons, menu options, and even small elements like toggles and back buttons. Just make sure you steady your gaze at an item when you want to select it.
But while Eye Tracking passes the basic navigation test, using it to type is an entirely different story. The experience is frustrating, to say the least. No matter how long I fix my gaze on a key, the pointer still has trouble selecting the letters on the outer edges of the keyboard. It wouldn't automatically snap to keys like Q, W, A, S, O, and P. For some reason, it also doesn't zoom into the right letter group. For instance, I wanted to select the letter D and the pointer does highlight the correct letter group. But once it zooms in, it shows me the group with G, H, and J instead of S, D, and F.
Scrolling long pages with Eye Tracking can be a pain, too. It often scrolls up and down too far, meaning you're likely to move past the part you're interested in. This was particularly noticeable when I tried reading a webpage, as it would skip entire paragraphs. The same thing happened when I was using the Settings app. While browsing TikTok, though, vertical scrolling worked perfectly fine. Scrolling left and right was consistent as well.