10 Tips For Setting Up A New iPad
Unboxing a new gadget is always exciting. No matter if you picked up a new iPad Air, or the top-of-the-range iPad Pro, going through Apple's setup guide is just the beginning of the journey. Apple's swift setup makes it easy to restore data from an old iPad, or to set up a new iPad using your iPhone. But once that's done, you're met with the same default home screen that Apple starts you off with.
But you don't have to stick to the default setup. While the iPad is a wonderful media consumption machine, you can customize it to make it so much more. With the latest release, you can have Mac-like free-flowing windows on the iPad's screen. There are gestures to speed up every interaction, and if you want a more laptop-style experience, add the Magic Keyboard with the built-in trackpad.
If you picked up an Apple Pencil to draw or sketch, there's a whole new interaction paradigm to explore. In this comprehensive guide, we will help you get to grips with all the important aspects of using your iPad for productivity, browsing, and entertainment.
Learn to use Windowed Apps mode like a pro
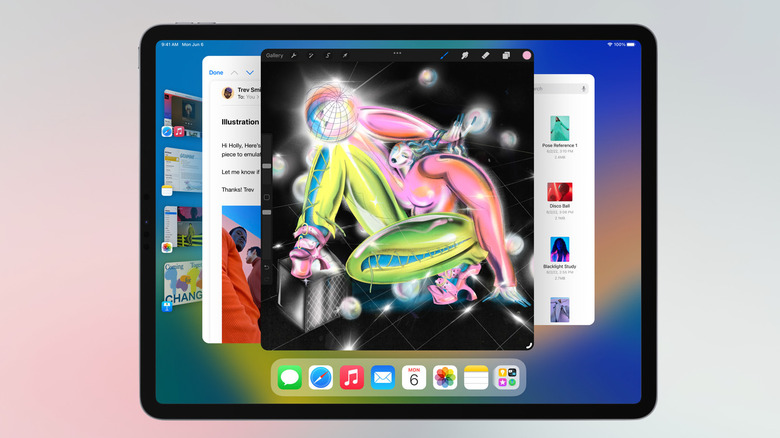
The Windowed Apps mode is one of the new iPadOS 26 features that turns your iPad into a MacBook. It brings decades-old multitasking and window management features from Mac and Windows to the touchscreen interface of the iPad. The iPad is unleashed from the shackles of a two-app Split View, and you can now use multiple floating, resizable windows on the iPad.
You'll first need to enable this mode either from Settings > Multitasking & Gestures > Windowed apps, or from the new Windowed Apps toggle in Control Center. After opening one full-screen app on the iPad, go to the Dock, and drag and drop another app icon to the left or the right side of the screen. The two apps will now work in a split-screen mode. You can use the Handle icon in the middle to resize the individual apps. To change one of the windows, simply drag and drop another icon on top of it.
If you want to engage the free-flowing mode, use the handle icon in the bottom-right corner of the window to make the window smaller (you will see the background behind). Then, drag an app from the Dock to screen. If you drop it on the right, it will take up the right-hand side of the screen. You can resize any window using the Handle icon. After resizing a window, you can use the top toolbar to drag it anywhere on the iPad's screen. To manage or arrange apps quickly, use the Window Controls menu in the top-left of every window. From here, you can minimize, close, or maximize the app. Press and hold on the Window Controls buttons to get more options for arranging the window on the screen.
Pin floating iPhone-sized apps to the top of the screen
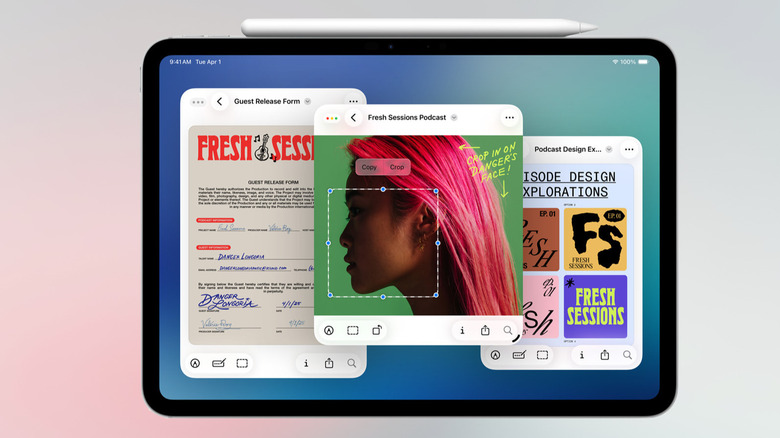
Slide Over is one of those nifty iPad features that's useful if you're a single-window person, or if you like to see multiple windows on your iPad at all times. The Slide Over feature lets you pin a single window to the top of anything that's going on in your screen. You can pin any app window, and make it as tiny as you want (perhaps a small Apple Music player window), or expand it to take up more than half a screen (with a PDF or an AI chatbot like ChatGPT).
Tap and hold the Window Controls button (ones that look like traffic lights), and tap Enter Slide Over. If you already have an app open, you can drag an app icon from the Dock to either the left or right-hand edge of the screen, where an arrow appears. The Slide Over window can be docked to its side of the screen, and you can swipe it off the edge of the screen to hide it (and then swipe in to bring it back on screen). To resize the window, grab the little handle from the bottom-left corner of the window.
Once the Slide Over window is open, you can drag any app icon from the Dock to switch to the app in the floating window. To get out of the Slide Over view, tap and hold the window controls button, and choose the Exit Slide Over option.
Master advanced iPad gestures

Being a touch-first interface, the iPad is filled with hidden gestures. You might be familiar with the basic gestures that help you open and close apps, manage open app windows, and access the Dock. But there's a whole world of advanced and hidden features that will come in handy. Here are some that you should learn to adapt in your daily iPad use:
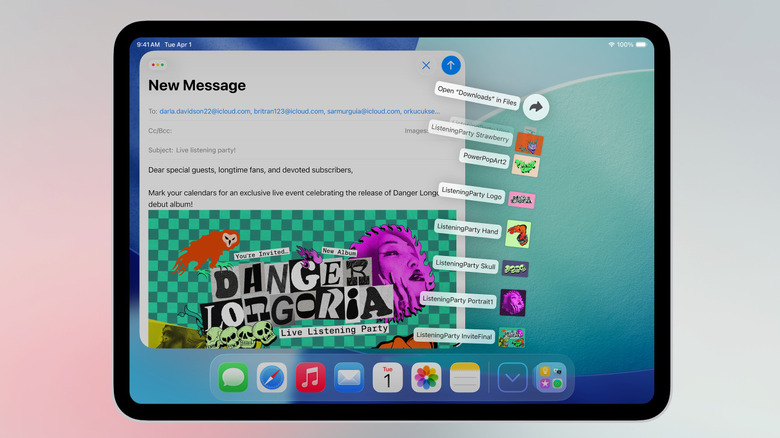
- Drag and drop anything: Almost anything on your iPad that you can open, can be dragged. Tap and hold on a link, file, image, or object, and pick it up with your finger. Now, keep that finger docked on the screen, and use another hand to select any other item. They will all get collected under your docked finger. Now drag them onto any app, lift your finger, and drop them to move them into place.
- Quickly select multiple items in a list: Simply swipe down on a list with two fingers to select multiple items. This works in Mail, Notes, and even third-party apps.
- Three finger gestures for text manipulation: The iPad has simple three-finger gestures to quickly copy and paste text. Pinch in with three fingers to copy, spread out with three fingers to paste the text. To undo writing, swipe left with three fingers. To redo, swipe right instead.
- Use the corner gesture shortcuts: The iPad has built-in corner gestures you can trigger with Apple Pencil, or your finger. Swipe in from the left corner to take a screenshot, and swipe in from the right corner to take a quick note (this only works if your iPad is set to the Full Screen Apps mode).
Use the iPad as second screen for your Mac
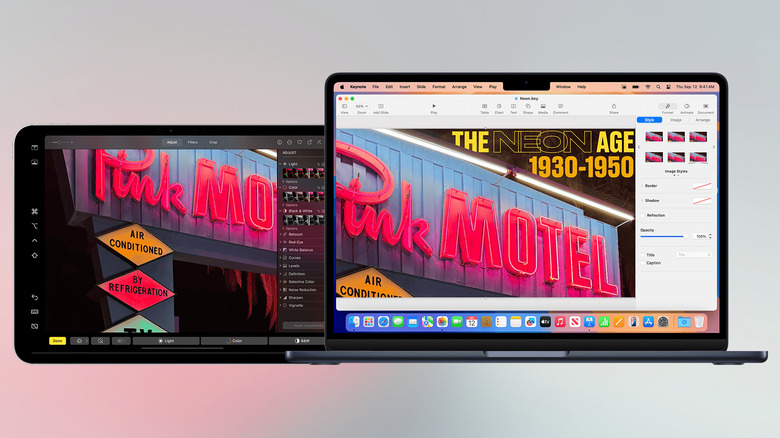
The iPad and the Mac already play nicely together. Using Universal Clipboard, you can copy and paste items between them easily. But the Sidecar feature takes it one step forward, letting you use the iPad's display as an external monitor for your Mac, one with touchscreen and Apple Pencil support. If you use a monitor with your MacBook, but miss it when you're out and about, this can be a great way to have a two-monitor setup without splurging on a portable monitor.
First, make sure that both your iPad and your Mac are signed into the same Apple Account and are connected to the same Wi-Fi network. Now, keep your iPad active near your Mac, and then go to Control Center > Screen Mirroring. In the Mirror or Extend to section, choose your iPad. Select the Use as External Display option, and the iPad will transform into an external monitor for the Mac. You can freely move your mouse from your Mac's screen, to your iPad, and you can drag and drop windows between the two screens in the same way.
Sidecar also supports Apple Pencil, so you can use it to scroll through pages, write in documents, select text, and click on buttons.
Try Stage Manager for simpler multitasking
While the new Windowed Apps mode is powerful, it can also be confusing to use for new users. If you want to group multiple windows together, you can also try the Stage Manager feature. Just like the Windowed Apps mode, you can have multiple floating windows on the screen at the same time. But here, the windows are grouped together, and Stage Manager shows a preview of all groups on the left. Visually, this makes multiple windows and app pairs easier to manage.
Stage Manager can be turned on from Settings > Multitasking & Gestures > Stage Manager, or from the Control Center toggle. You'll now see recently used apps show up on the left corner of the screen. You can tap on an app to switch to it. To add apps to the group, simply drag and drop the app icon to the middle of the screen. The two apps will be grouped. You can resize open windows, move them around, and move them between groups as well. Tap on a group from the left sidebar, and you'll instantly switch between a different group of windows.
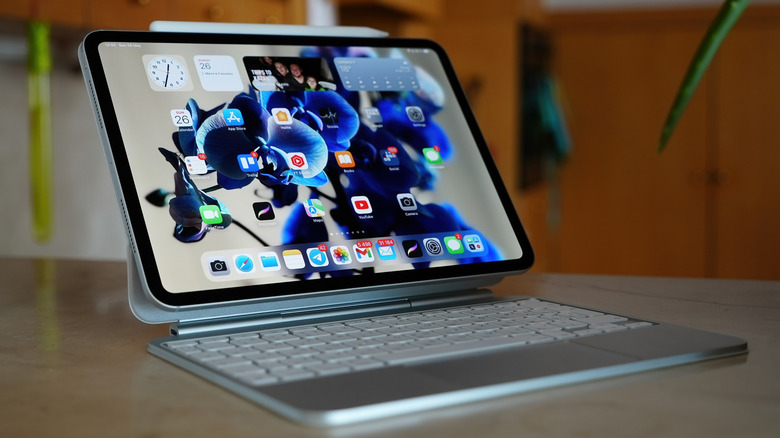
Customize the Dock
The Dock on the iPad is essentially your command center. If you haven't done so already, start by adding all your frequently used apps to the Dock by dragging and dropping them. You can bring up the Dock at any time by swiping up from the bottom of the screen (just for a bit).
To add more options, go to Settings > Home Screen & App Library. From here, you can enable the Show App Library in Dock feature to add a shortcut to the App Library (that shows all installed apps). There's also an option to "Show Suggested and Recent Apps in Dock." This will show recently used or suggested apps based on your usage.
If you deal with files and folders often, you can directly pin folders to the Dock (if you're using iPadOS 26 and higher). Open the Files app, find a folder you want to add to the Dock, drag and drop it in the Dock on the right-hand side. You can repeat this process to add more folders. The folder will open in a Mac-like menu, showing you a preview of files and folders within. You can customize this view if you like. Tap and hold a folder from the Dock, and switch between "Grid" and "Fan" options in the View content as section.
Learn to get the most out of Apple Pencil
If you've picked up an Apple Pencil with your iPad, you'll be happy to know that it can be used for a lot more than just drawing and taking notes. The Apple Pencil is a powerhouse. Here are some of the Apple Pencil features you should enable.
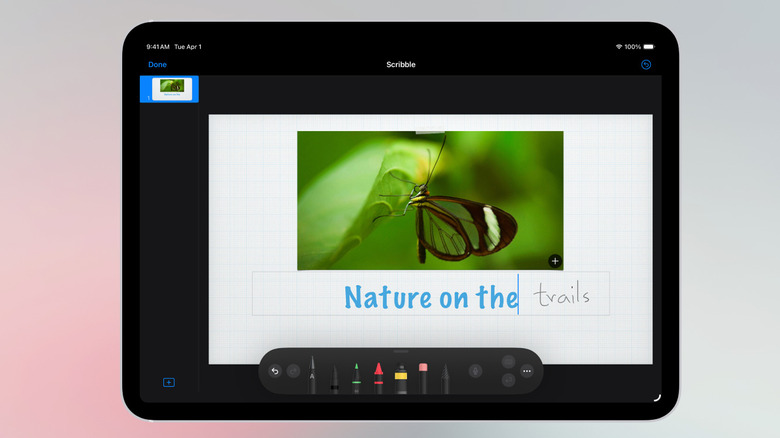
- Write in any text field: Apple Pencil's writing abilities aren't limited to just the Notes app. If you enable the Scribble feature from Settings > Apple Pencil, you can write in any text field and convert it into typed text. This works in text boxes in Keynote, the URL bar in Safari, and the message box in apps like Slack and Gmail.
- Use the Pencil to edit written text: Once you start taking notes with the Apple Pencil, you'll want to edit them as well. You can drag a circle around a word, or across a sentence to select it. To delete a word, just scratch it out like you would with an eraser.
- Customize the double-tap gesture: The Apple Pencil 2nd-Gen and the Pro have a hidden button near the tip (on the flat side), that you can use to perform several functions using a double-tap gesture. Go to Settings > Apple Pencil > Double Tap to customize it. You can choose to either switch between the current tool and the eraser, or the last used tool. You can also assign it to always open the color palette.
Create Text Replacement shortcuts to speed up typing
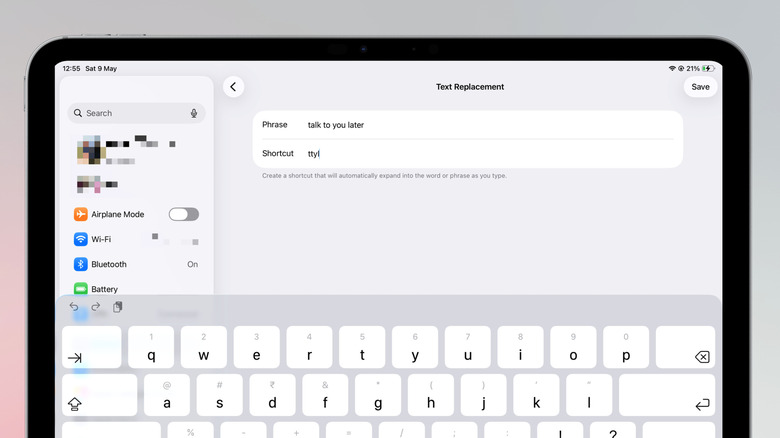
Setting up Text Replacement shortcuts is one of the first settings you should change on your iPad. The typing experience on the iPad's software keyboard isn't the best. And you can make things a bit easier on yourself by setting up text shortcuts for frequently used URLs, phrases, or email templates. For example, you can type "addrs" and it can expand to your entire home address, making the online shopping experience faster. The same can apply to repeated email messages for work.
Go to Settings > General > Keyboard > Text Replacement. Tap the Plus button to create a new shortcut. In the Phrase field, type out the long text that you want to expand to (in our example, this would be your address). In the Shortcut field, enter the shortcut phrase (something like "addrs" or "mail-reply". Then tap the Save button to add the entry. Repeat the process for adding more entries. Now, when you type the shortcut anywhere, it will expand into the phrase.
Customize the Files app to make it more like the Finder on the Mac
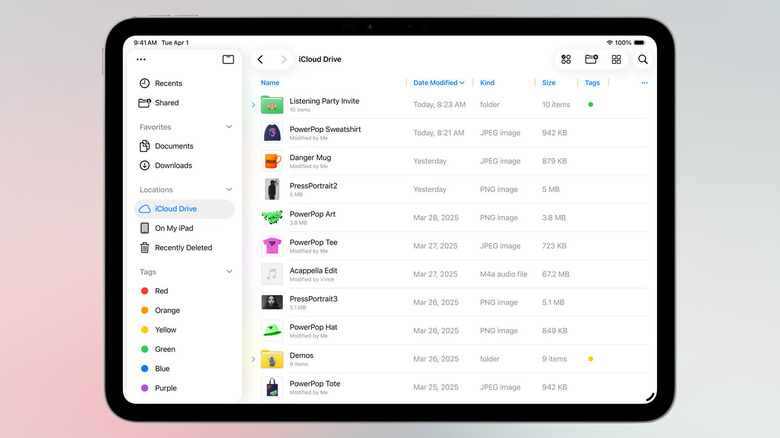
With the iPadOS 26 design update, the Files app has matured quite a lot, inching closer to how the Finder app works on the Mac. You can use the Files app to see all the files and folders that are stored locally on your Mac, as well as iCloud Drive.
To make file browsing easier, you can now create a customizable column view. Open a folder, and from the top toolbar, tap the Views icon, and switch to the List View. You'll see some basic columns here by default for Name, Date, and Size. But you can add new columns here like Kind, Tags, and Date Modified. Tap the three-dotted menu button to add more columns. You can resize columns easily by grabbing the handlebar between the columns.
Once you've customized the viewing part, take some time to add your frequently used folders to the Favorites section in the sidebar. Press and hold a folder or a location, and then tap the Favorite button. It will now show up in the Favorites section in the sidebar.
If you use your iPad when you're out and about, you might find that your important work files from iCloud Drive aren't always available offline. But with a simple feature, you can mark files to be available offline. Press and hold any file, and tap the Keep Downloaded button.
Customize your display settings and Home screen
The iPad is set up to work for everyone. But you can make it work better for you. iPad's screen content can be customized to make things easier on the eyes, or to fit in more information. If you use the iPad for work, or for browsing the internet, increasing the information density can help if you regularly use two apps side-by-side.
Go to Settings > Display & Brightness > Display Zoom and shift to the "More Space" option. All UI elements and texts will scale down slightly. On the home screen, it's the opposite story. The default layout leaves out a lot of empty space, with small icons. On the Home screen, tap and hold on an empty part to customize the home screen. From the toolbar, tap the Icons button (it looks like two squares, one big, one small) to switch to the large icons. You'll now only see large app icons, without the app names.
Now, take some time to organize the home screen itself. Press and hold on an app icon, choose "Remove App," and tap "Remove from Home Screen." If you don't want newly downloaded apps to show up on your home screen, you can send them directly to the App Library. Go to Settings > Home Screen & App Library and switch to "App Library only."
Make your iPad battery last for a long time
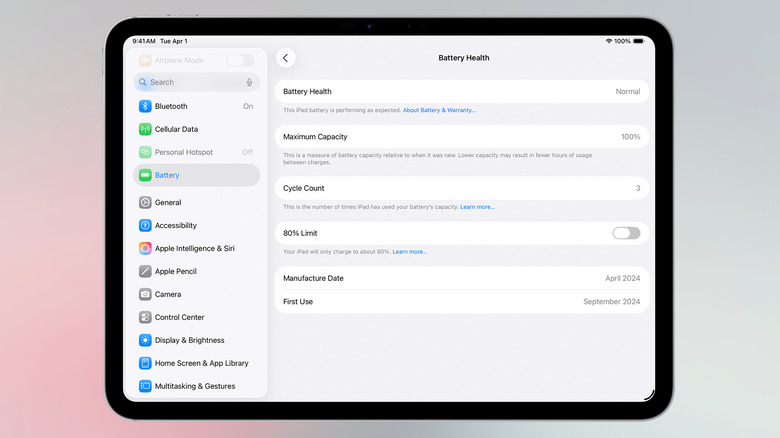
iPads can last for a long time. Unlike an iPhone, you don't need to think about upgrading after two years. But the battery is a different issue. Because of the nature of lithium-ion batteries, they degrade over time. If you want to extend the battery life of your iPad in terms of the sheer years of use, or hours per battery cycle, you can start to limit battery charging. Limiting the charge to 80% can reduce the wear and tear on the battery, and can help improve the overall lifespan.
The latest iPads (iPad (A16), iPad Mini (A17 Pro), iPad Air M2 and later, and iPad Pro M4 and later) all feature a built-in battery management feature. Go to Settings > Battery > Battery Health and enable the 80% Limit feature. Here, you can also see the total battery cycle count, the battery health, and the maximum charging capacity for your iPad.