

11 Things You Didn't Know Your Apple Pencil Could Do
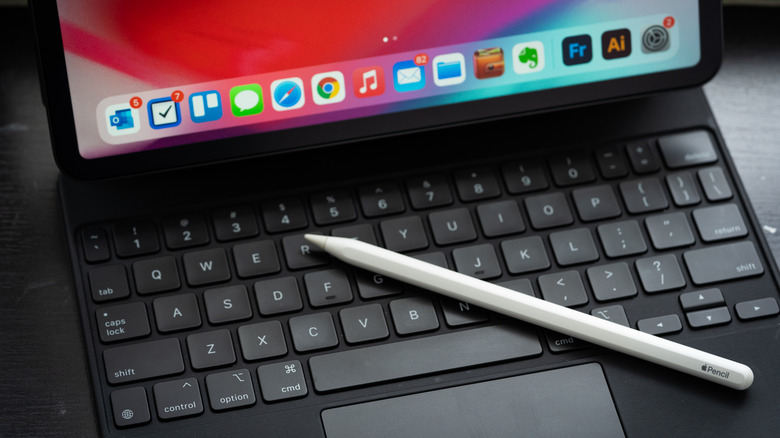
The Apple Pencil makes a perfect companion for the iPad. It's lightweight, and it snaps to the side of the iPad magnetically, so you don't need to worry about losing it. Most people use it to draw, sketch, or take lecture notes on the Notes app. But that's barely scratching the surface of what the Apple Pencil can do, especially the Apple Pencil Pro.
Apple currently sells two Apple Pencil models: The Apple Pencil with USB-C charging and the Apple Pencil Pro (which is an updated version of the 2nd Generation Apple Pencil model). While the Apple Pencil Pro is a bit expensive, it has all the bells and whistles that you might want, including pressure sensitivity, wireless charging, haptic feedback, and more.
With all these features, combined with Apple's hidden software, you can accomplish a lot with this unassuming little device. The new Squeeze gesture brings up a set of tools and shortcuts right beneath your nib. And here's the best-kept Apple Pencil secret: You can use it to write anywhere in the OS. Read our guide to learn all about the hidden features and productivity hacks for the Apple Pencil.
1. Double-tap to switch between tools
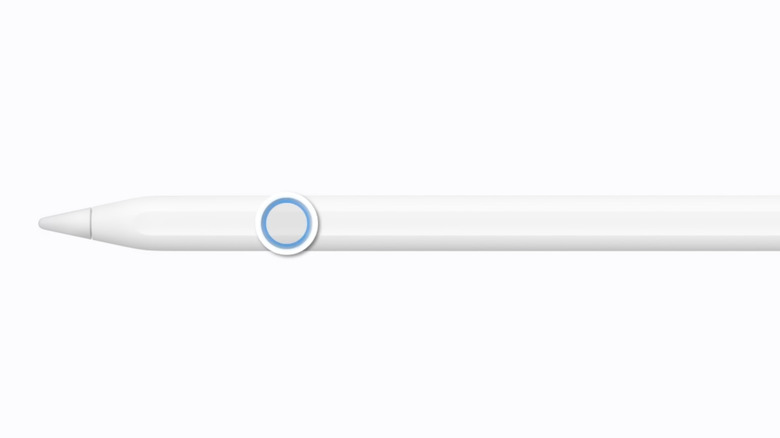
You might not realize it, but the Apple Pencil is hiding a pressure-sensitive button on its flat edge. If you tap twice just above the nib, you can quickly switch between available tools in supported apps like Apple Notes. By default, this lets you quickly switch between your current drawing tool (like Pen or Highlighter) and the Eraser tool. Double-tap the barrel to switch to the Eraser mode (you'll see a preview in the top-right corner as a confirmation), erase what you need, and then double-tap again to go back to your previously used drawing tool.
The eraser might be the best use case for the double-tap, but it's not the only option. Go to Settings > Apple Pencil > Double Tap, and you'll find a couple of customization options. Tap the "Switch Between Current Tool and Last Used" if you intend to use two different drawing tools frequently (a pencil tool for writing and a highlighter tool for highlighting notes). There's also an option to "Show Color Palette" when you use the double-tap gesture, and you can also disable the feature entirely using the "Off" option. If you feel like you're enabling the double-tap feature accidentally, you can slow down the duration for the gesture. Go to Settings > Accessibility > Apple Pencil and slow down the duration for the double-tap gesture. The double-tap gesture is supported by Apple Pencil 2nd Generation and the Apple Pencil Pro.
2. Squeeze your Apple Pencil for a tool palette
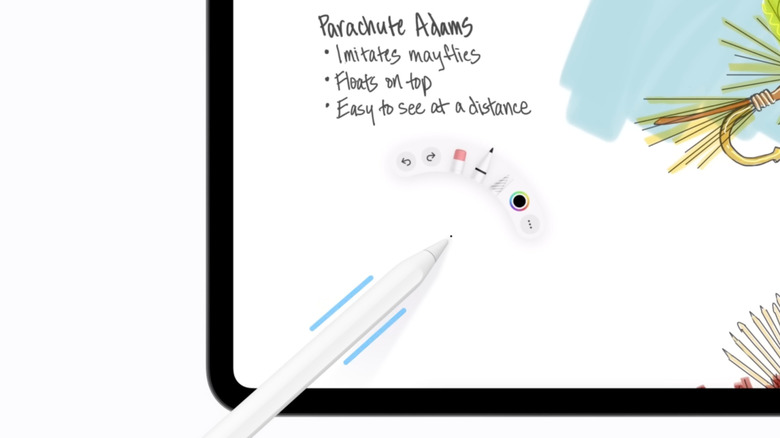
If you have an Apple Pencil Pro, you have the option to trigger a floating tool palette right below the top of your Apple Pencil. No need to go looking for the toolbar at the edge of the screen. Squeeze the barrel of your Apple Pencil gently (it's slightly above the nib, naturally situated where you hold the Apple Pencil to draw).
A tool palette will spring up, showing your recently used tools and drawing nibs in supported apps like Apple Notes, Freeform, and more. You'll find shortcuts for undo, redo, eraser, recently used nibs, and a color picker. You can swipe on the palette to expand it and to show even more tools. Tap a tool from the palette to instantly switch to it. You can tap the three-dotted button to reveal extra options like stickers, text boxes, options to sign text, shapes, and more.
If you don't like the default behavior, you can customize the squeeze gesture itself. Instead of the palette, you can use it to switch to the eraser or the previously used tool. You can also use it to show Ink Attributes. There's also an option to trigger a Shortcut using the barrel gesture. If you use your iPad and Apple Pencil for productivity, you can use this gesture to trigger a personalized shortcut via the Shortcuts app instead. When you squeeze your Apple Pencil, you'll get haptic feedback. If you find that jarring, you can disable it from Settings > Apple Pencil > Haptics.
3. Write in any text field
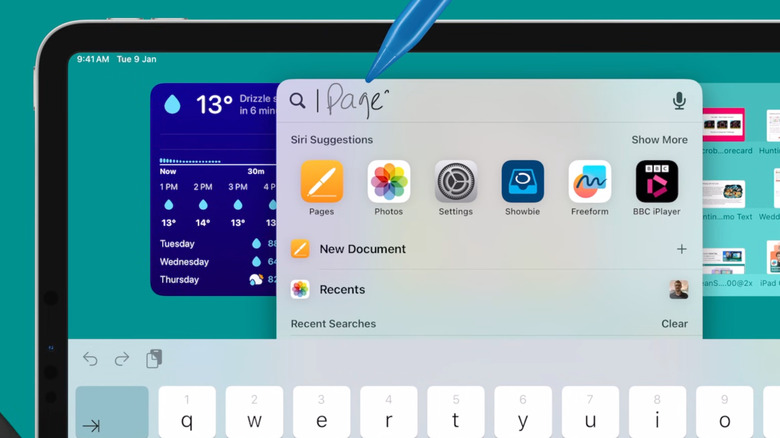
The iPad's software keyboard takes up half of the screen when it's enabled. Sure, you can attach a Magic Keyboard case to it, but that's going to cost hundreds of dollars and add extra weight. If you already use your Apple Pencil to draw and take notes, you'll be happy to discover that it can be used to write basically anywhere the iPad accepts text input.
All of this works using the Scribble feature. So first, make sure it's enabled from Settings > Scribble. Now, just start writing with your Apple Pencil in any text field. This works in Spotlight Search, the URL bar in the Safari app, and in the Messages app as well. As you write with your Apple Pencil, the iPad will convert your written text into typed text locally in the background. You'll see it appear live as you finish writing a couple of letters. This even works if your handwriting goes beyond the confines of the small text box (likely to happen when using it in Safari).
The Scribble feature can also convert writing to typed text in traditional writing apps like Apple Notes and Freeform. Here, open the tool palette, choose the handwriting tool (on the left side of the pen icon), and start writing. Now, the written text will be converted to typed text inside the Note, simulating a keyboard input.
As you are scribbling the text, you can also edit it using the Apple Pencil. To delete a word, scratch it out. Touch and hold the Pencil in any text area to watch it open up. You can then insert text in the new space. To join or separate letters, just draw a vertical line between them. To select some text to edit, simply draw around it.
4. Take Quick Notes anywhere, with added context
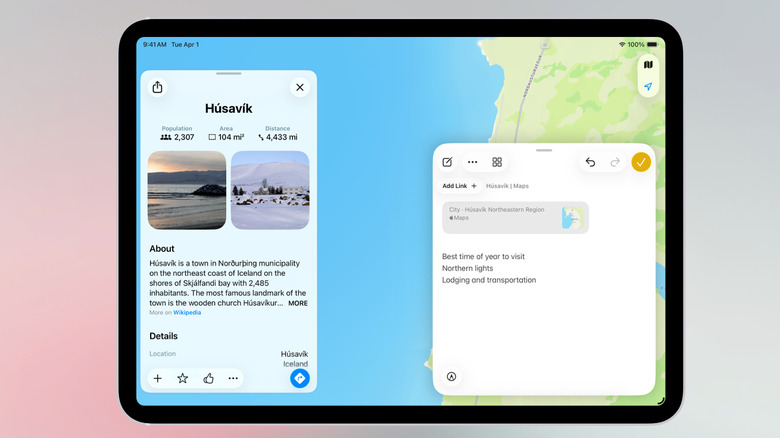
There's a hidden Apple Notes feature, exclusive to the Apple Pencil, that brings up a small floating notepad wherever you are. And it's context aware. With your Apple Pencil, simply swipe in from the bottom-right corner of the screen when you're in any app (or on the home screen). If you're using the iPad with an attached keyboard, use the shortcut Globe + Q to bring up the Quick Notes window.
You will see a small Quick Notes interface. You can now use your keyboard or the Apple Pencil to start writing or drawing. Tap the Markup button to bring up the familiar drawing and sketching tools. You can also use the squeeze gesture on your Apple Pencil Pro to view recently used tools. If you're using the Safari app, you'll also find a handy Add Link button to add an embedded link to the note (with a rich preview of the website's title and header image). You are free to drop any text or image into the note. Tap the Checkmark (Done) button from the top toolbar to save your note.
All your Quick Notes live in a separate folder. Open the Notes app, go to the notes list, and find the Quick Notes section at the top. By nature, Quick Notes are supposed to jot down quick thoughts. You can use them to add a note for a web page that you're on. You can use the Apple Pencil to write down a number, or an address, or some important detail that you're sure you'll forget down the line.
5. Quickly annotate and share screenshots
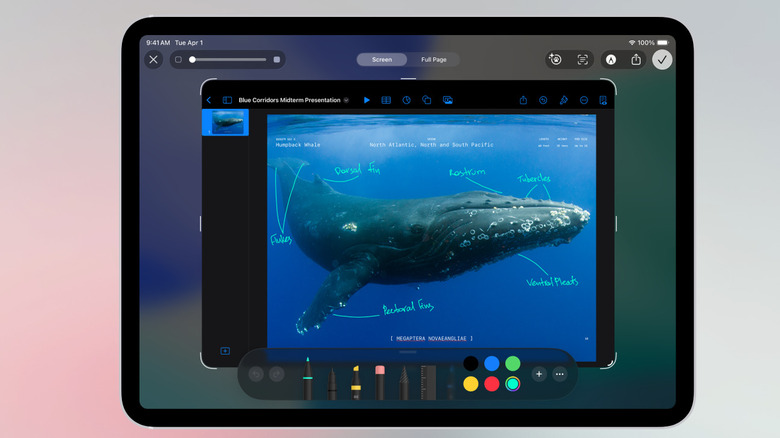
The Apple Pencil is already a great productivity companion. You can use it to scroll, tap, and select text. But it's also a great markup tool for quickly annotating whatever is on your screen.
Swipe in from the bottom-left corner of the iPad screen to instantly enter the screenshot markup interface. The iPad will take a screenshot of whatever is on your screen, and will show the markup tool palette at the bottom. Here, you can switch between a pen, a highlighter, or any other tool. If you're in Safari, you also get a Full Page option to annotate an entire webpage. Use your Apple Pencil to draw over the screenshot and annotate anything you want. You can also draw shapes and arrows. To crop the screenshot to only show the annotated portion of the screen, swipe in from one of the corners of the screenshot.
Tap the Share button to send the annotated screenshot to anyone via Mail or Messages. Tap the Done button to save it to the Photos app.
6. Use Apple Pencil to draw and control your Mac
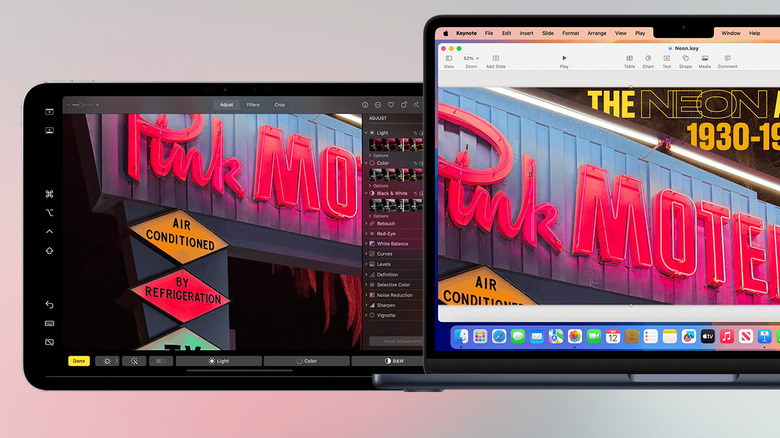
The iPad has a hidden feature that can turn it into a second screen for your Mac. In fact, it doesn't just act as a portable monitor; it turns it into a touchscreen tablet that runs macOS. Once connected, you can use your Apple Pencil to draw, annotate, and much more.
Place your iPad next to your Mac and make sure that both devices are on the same Wi-Fi network and using the same Apple ID. On your Mac, go to Control Center > Screen Mirroring. In the Mirror or Extend to section, select your iPad. Then, choose the Use as External Display option. You can now move any Mac window to the iPad using a drag-and-drop gesture. Alternatively, you can hover over the Full-screen button on a window and choose the Move to iPad option to move the window to your iPad.
You can now use the Apple Pencil as a replacement for the cursor. You can click on objects, draw in apps, and make minute adjustments in photo and video editing apps using the Apple Pencil. If you frequently need to mark up documents on your Mac, you'll find the Apple Pencil to be helpful. Apple Pencil's double-tap feature is supported on the Mac as well. You can enable and customize the double-tap gesture to perform custom actions by going to System Settings > Displays > iPad.
7. Take notes from the lock screen
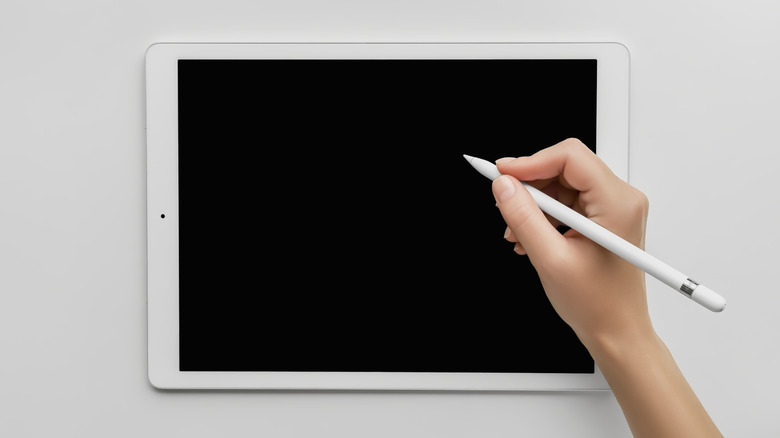
One of the best use cases for the Apple Pencil is the fact that you can start taking notes without fiddling with the keyboard. And there's a hidden feature that lets you take notes without even unlocking the iPad.
Go to Settings > Apps > Notes, then choose the "Access Notes from Lock Screen" feature. By default, this will be set to "Off". You have two options here. You can either pick "Always Create a New Note" or "Resume Last Note". If you plan to use this feature to add to a note that you're already using (for example, if you're using the Notes app for lecture notes in classes, or to record meeting notes), it's better to resume the last used note. But if you plan to use it to record new information so that you don't forget it (like someone's address or a phone number), it's better to create a new note each time.
Now, when your iPad is locked and the screen is turned off, simply tap the iPad's screen with your Apple Pencil. This will open up a note, and you can start writing, drawing, or scribbling instantly. Tap the Done button to save when you're finished. You will find the newly created note in the Notes app.
8. Make your handwritten text more legible
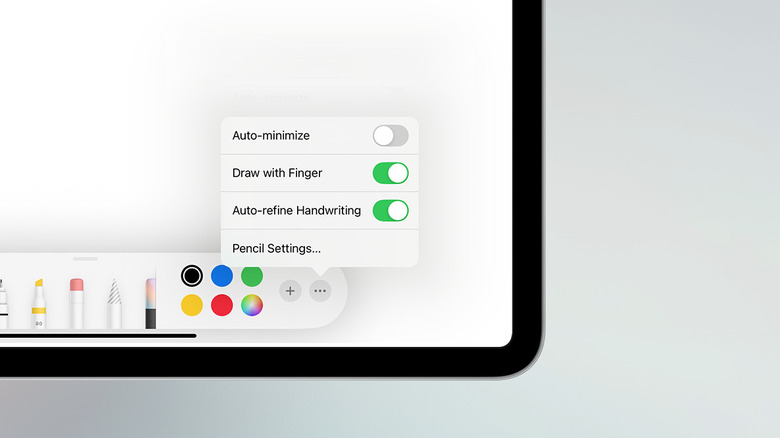
Taking notes with the Apple Pencil is fast and convenient. Until you start writing too quickly, and you realize you've shifted from legible handwriting to more of a word soup. Apple understands that not everyone has immaculate writing all the time. So they've added an extra feature called Auto-refine Handwriting. You can access it by tapping the three-dotted More button from the tool palette.
When this feature is enabled, your iPad uses an on-device processing model to essentially rewrite your sloppy writing in a style that is still your own. It uses data from your previous writing and refines writing that is less than legible. It happens automatically in the background, so you don't have to think about it.
If you don't want to enable this feature by default, you can still choose when you refine text that is particularly difficult to read. Highlight the text that you want to refine, and tap the Refine button from the pop-up toolbar. You can also use this feature to paste text from other sources, but in your own handwriting. This only works in a note where you've already used handwritten text before. Copy text from a source, navigate to the note with handwritten text, tap in the blank space, and tap the Paste button.
9. Turn your rough drawings into sharp shapes
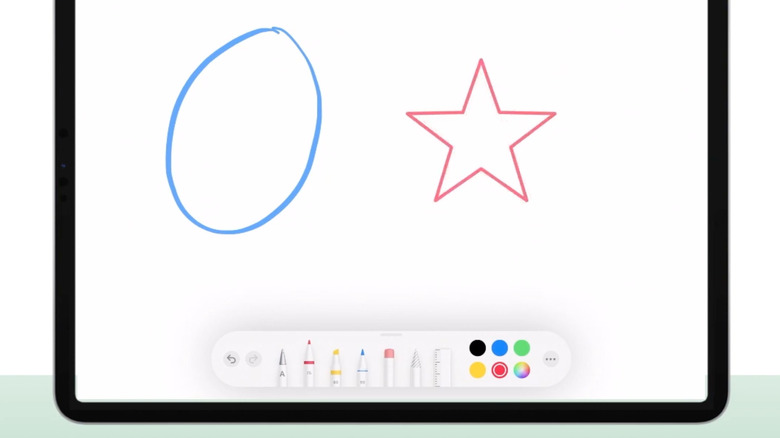
When you're taking notes or annotating documents, you'll find yourself frequently drawing the same shapes over and over again. A square, a rectangle, and arrows. Lots and lots of arrows. Getting these shapes to look right every time might require deliberation and practice. If you frequently end up turning a square into a rhombus, you'll be glad to know that Apple Pencil has a feature that automatically makes your shapes look more like the real thing.
If you draw a square, or an arrow, or a rough approximation of it in a single stroke and hold down with your Apple Pencil for just a second instead of lifting, you'll see that the iPad will automatically clean it up. The edge will be sharper, and it will just look more aesthetic. The transformation is best visible when drawing pointers and arrows. This works for straight lines, arcs, triangles, circles, pentagons, hearts, clouds, and stars, as well. This works by default in the Notes app, but it's also supported in any app where you can use the Markup feature to annotate. To use this feature, tap the Markup button in the toolbar and either choose a pencil, pen, or marker tool.
10. Use barrel rolls and pressure to bring out your creativity
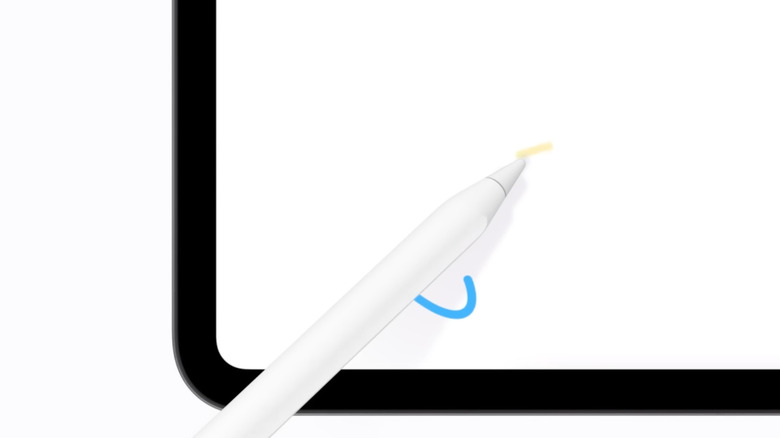
If you use an Apple Pencil Pro, you can preview the precise angle before making a stroke, and you can roll your Apple Pencil between your fingers to precisely change the thickness of line strokes. This feature is available when you're using the Highlighter tool or the Fountain Pen tool.
As you draw with your Apple Pencil, you can turn the Apple Pencil to change the stroke thickness, going from a thin stroke to a thick one, mimicking calligraphy techniques with fountain pens and brushes. Thanks to its innovative gyroscpe feature, rolling the Pencil in different ways unleashes new use cases. This works in Apple's supported apps like Notes and Freeform, and in any app that supports the Markup feature.
You can preview the line thickness even before making the stroke. Just rotate your Apple Pencil to see what the stroke thickness will look like before you start drawing.
11. Use the hidden hover feature
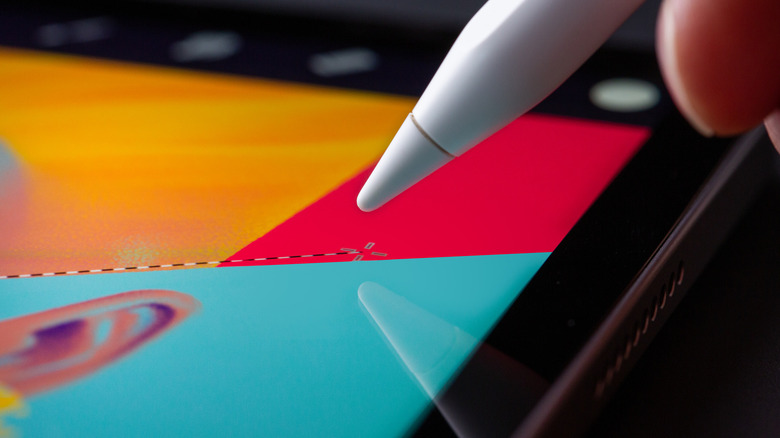
Both the Apple Pencil Pro and the USB-C Apple Pencil come with a hover feature. You can hover just above the iPad's screen to preview either the drawing tools that you're using or Apple Pencil controls. You can also use the hover feature to preview the tilt of the highlighter or the stroke of a fountain pen before drawing. You can also use it to make precise strokes when sketching or taking notes.
If you hold the Apple Pencil up to 12 mm above the screen, you'll see contextual options. For example, if the tool palette is open, you can use the hover feature to move between available tools.
This comes in especially handy when you're using the eraser tool. Choose an eraser (the pixel eraser or the object eraser tool), and hold your Apple Pencil over the display to see exactly what the size of the eraser is and what object will be erased the moment you touch your Apple Pencil on the display. If you're not a fan of the hover feature, you can turn it off from Settings > Apple Pencil > Hover.